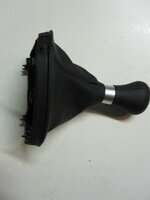
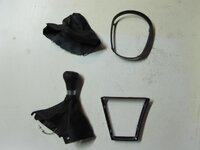
As my first little mod and having been rather underwhelmed with the OEM Z shifter I decided to bite the bullet and purchase an F10 illuminated gear knob. Being fastidious about maintaining the illuminated aspect and as the modified standard ZHP is no longer available from our eBay friends, I purchased the M5 package from Harry Fairbairn for the princely sum of £109.66 (these have incurred a price increase since previous discussions.)
I hope that the following guide and photos can be of some help to those considering this modification…
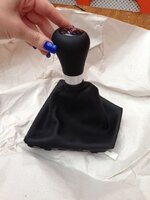
Initial thoughts are the apparent quality difference in the leather gaiter. The F10’s boot is of a thicker, more supple hide in comparison to the Z’s very thin, coarse nature. I later found out that the boot is in fact detachable from the F10’s top however if you are happy to tailor the boot to fit the Z’s frame I would advise sticking with it for the upgrade in quality
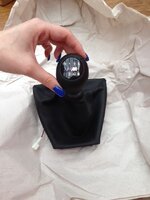
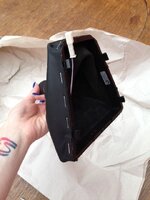
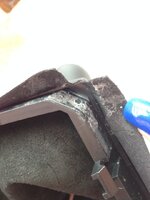
The F10 comes stapled and glued to it’s frame however the glue is not attached all the way around, only on the corners which makes removal easier
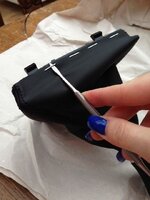
When prizing the staples from the frame, be careful not to ‘stab’ the leather with your chosen tool as these staples are a little tricky to lever clean
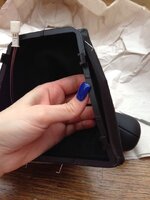
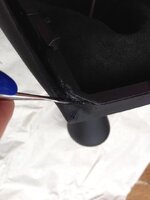
The glue lifts with relative ease, a little patience will soon see the leather removed from the corners
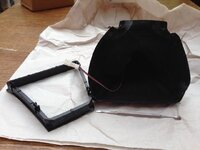
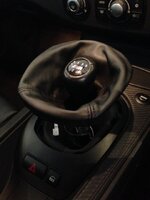
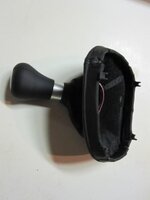
The OEM boot is fairly easy to lift off, there are two clips located on either side of the frame. Press in-ward and the frame pops off. Important note: Before attempting to remove the shift, DISCONNECT the illumination plug.
To remove the knob, place both hands around the shaft (sorry, there really isn’t away around this description ) and pull upwards swiftly with force. Do make sure you are not leaning over the top whilst trying this otherwise you will give yourself a nice shiner!
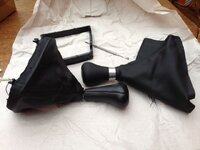
You can see the OEM unit is quite a bit longer than the ZHP, it is also quite a bit lighter in comparrison
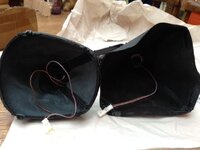
The M5 boot on the right is quite a bit larger than the Z’s on it’s frame
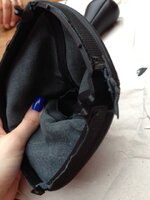
The original boot is glued the entire way around the frame, combined with the sheer thinness of the leather (tearable by hand) meant trying to remove this from the frame was nigh on impossible so I had to use a Stanley knife along the top edge
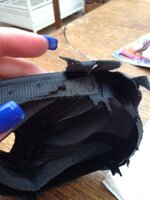
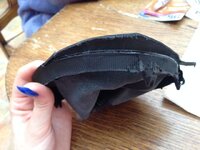
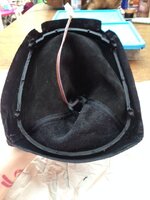
You can see the excess leather once the Z’s frame is placed inside the F10’s boot
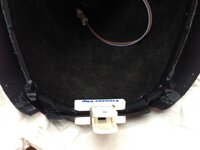
I used food clips to secure the frame in place to check placement
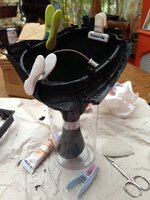
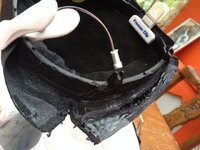
I used Bostik leather glue and applied it to small sections at a time starting with the bottom portion as the fitment was near enough the same
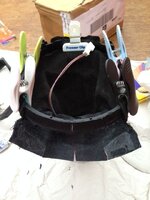
The top section required more work as there was plenty of excess to work with. Unfortunately I was unable to avoid ‘bunching’ which once installed was concerned would look poor
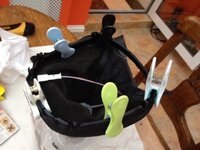
Once fully glued, I left all the clips in place for 24hrs to ensure full adhesion
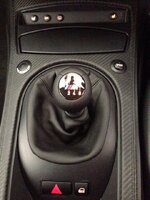
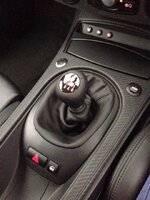
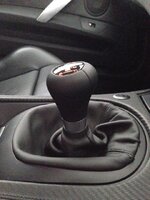
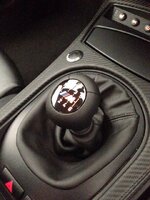
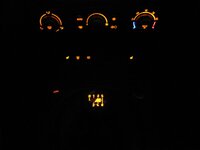
I’m yet to obtain some good ‘illumination’ photos which I will add later however I can say that compared to standard it is a vast improvement. It offers a far more even light and ties in perfectly with the cabins ambient lighting.
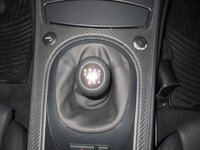
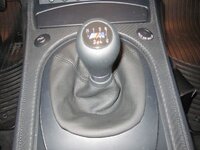
Overall I’m really pleased with the install. It feels much more planted and weighted compared to stock and offers a much higher quality product. I was concerned about the bunching leather along the top however it looks much better in person than the photos depict and it doesn’t look too out of place.
If you are willing to shell out the pounds, I would recommend this OEM product, whether you wish to modify the boot or not, it offers a high quality shifter whilst maintaining the illumination (albeit a better effect).

I hope that the following guide and photos can be of some help to those considering this modification…

Initial thoughts are the apparent quality difference in the leather gaiter. The F10’s boot is of a thicker, more supple hide in comparison to the Z’s very thin, coarse nature. I later found out that the boot is in fact detachable from the F10’s top however if you are happy to tailor the boot to fit the Z’s frame I would advise sticking with it for the upgrade in quality


The F10 comes stapled and glued to it’s frame however the glue is not attached all the way around, only on the corners which makes removal easier

When prizing the staples from the frame, be careful not to ‘stab’ the leather with your chosen tool as these staples are a little tricky to lever clean


The glue lifts with relative ease, a little patience will soon see the leather removed from the corners


The OEM boot is fairly easy to lift off, there are two clips located on either side of the frame. Press in-ward and the frame pops off. Important note: Before attempting to remove the shift, DISCONNECT the illumination plug.
To remove the knob, place both hands around the shaft (sorry, there really isn’t away around this description

You can see the OEM unit is quite a bit longer than the ZHP, it is also quite a bit lighter in comparrison

The M5 boot on the right is quite a bit larger than the Z’s on it’s frame

The original boot is glued the entire way around the frame, combined with the sheer thinness of the leather (tearable by hand) meant trying to remove this from the frame was nigh on impossible so I had to use a Stanley knife along the top edge


You can see the excess leather once the Z’s frame is placed inside the F10’s boot

I used food clips to secure the frame in place to check placement


I used Bostik leather glue and applied it to small sections at a time starting with the bottom portion as the fitment was near enough the same

The top section required more work as there was plenty of excess to work with. Unfortunately I was unable to avoid ‘bunching’ which once installed was concerned would look poor

Once fully glued, I left all the clips in place for 24hrs to ensure full adhesion


I’m yet to obtain some good ‘illumination’ photos which I will add later however I can say that compared to standard it is a vast improvement. It offers a far more even light and ties in perfectly with the cabins ambient lighting.
Overall I’m really pleased with the install. It feels much more planted and weighted compared to stock and offers a much higher quality product. I was concerned about the bunching leather along the top however it looks much better in person than the photos depict and it doesn’t look too out of place.
If you are willing to shell out the pounds, I would recommend this OEM product, whether you wish to modify the boot or not, it offers a high quality shifter whilst maintaining the illumination (albeit a better effect).
