bearded_ed
Member
Hello everyone,
This has certainly been a long time coming! Here is part one of Ed’s Zed Thread, the rest will follow over the next couple of days.
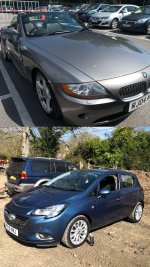
I've had my '04 3.0i Manual since the end of July 2019. I traded in my trusty '15 1.4L Corsa SE and walked away with just under £1K in my pocket. Best deal I have ever done.
The aim for trading the Corsa was that I wanted something fun and quick - I didn't need any practicality at all any more, it's just me and my Girlfriend. Plus after completely changing jobs from shooting and editing video, into a sales role - I no longer needed to haul kit with me regularly.
It took some searching to find a car I liked that was near enough to me here on the South Coast (Eastbourne ish). I ended up travelling up to Epsom to get the car from Wilson's "Bargain Buys". I got them to do some paint work for me after they tried to knock money off my Corsa for paint! So aside from stone-chips, and corroded 108's the car is was in pretty good condition. It even had full BMW service history, which I will not be continuing with as I try to do everything myself.
On my test drive a week or two before, I thought I noticed the dreaded tram-lining that I'd read so much about on this very forum. Within a couple of weeks I was 100% positive that the run-flats or the car had to go. It was just awful and honestly quite dangerous in some of the worst cases that I experienced.
I finally got the tyres sorted in September, replacing the front Pozenta’s and rear PS3’s ZP’s with a full set of Uniroyal Rainsport 3’s. The transformation was incredible, there was just so so much more feel when driving and the tram-lining was totally gone. It’s worth noting that the run-flats were actually all pretty new looking, the PS3’s had basically new tread depth, so was able to recoup some money selling these privately. The RS3’s are fantastic in all conditions so far, yes there was a tad more sidewall squish under hard cornering that was noticeable for the first week or so but I don’t notice it anymore. The grip in the wet is almost the same as it is in the dry - incredible - very hard to unstick these. They did get a tad loose when temps dropped below 5c ish though but nothing scary. I only do about 3K miles a year, even with the car as my DD, so these have worn very well so far even with some “spirited” driving.
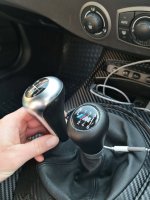
The next little mod I did was one I knew I wanted to do fairly quickly, the ZHP upgrade. However… I am a bit cheap, so when I discovered via a forum post that there was a knock-off chinese version available for about £6 on eBay, I immediately ordered one. Very happy with how that turned out - I am sure it’s not as good as the real thing but for the price it is fantastic, and way better than the crappy plastic one BMW chose to use.
Continuing with the interior modding, after seeing a couple of posts on here about all the different interior options the Zed could have come with. I decided I wanted to freshen up my interior. I think the brushed ally is probably the best of the options from the factory, though and I am very glad it wasn’t plastic-y piano black or wood! I settled on carbon after seeing the Z4M option and spending some time in a co-workers A250, the latter of which has a lovely soft touch carbon interior.
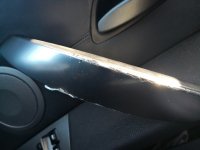
I decided to start small with the interior doorhandles as they were already very peely, which is one of the reasons I even looked at wrapping things. I was very happy with how they turned out and definitely wanted to do more bits but hadn’t got the time or the wrap materials.
A month or so later I was able to get a couple days off in a row and ordered roughly the amount of wrap that I expected to use.
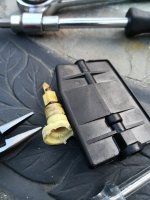
I knew that this was going to be a lot more work than the doorhandles were, mainly due to the way the whole interior is put together. To get all the brushed ally bits out I was going to have to disassemble what was effectively the entire interior. Thanks to a guide over on Pelican Parts I the whole process of taking things out went relatively simply with only a few little struggles along the way. Namely that stupid clip/pin holding the dash piece on!
With everything out of the car and taking up the spare room, I set about disassembling the whole centre console which is held together by an insane number of screws.
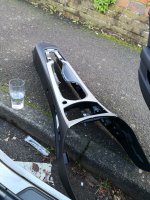
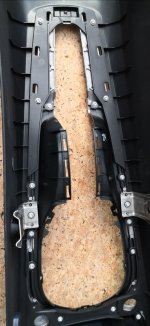
Allowing myself the best part of two days to take everything out, wrap it and put it back in seemed like plenty of time at the start. It ended up taking several days because I chose to wrap the entirety of the central console, not just the ally bits. I then had to re-do the main aly bit after trimming the wrap back a bit too much on an edge I didn’t think would be visible! This meant waiting for more material to turn up and driving around with a mostly missing interior for a few days. All the buttons were just flopping about with nothing to hold them in place.
It’s been several months since I finished wrapping the dash and centre console and it has held up very well. It really transformed the interior of the car for me and made it a much nicer place to be.
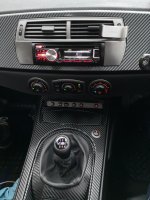
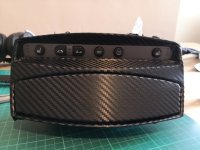
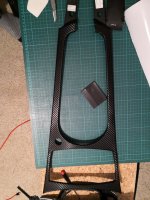
A few bits aren’t perfectly joined and ideally I’d redo the big ally dash bit as the left edge around the radio is slightly lifted. Thankfully it’s not very obvious and the rest all seems OK!
(I couldn't resist putting this pic in of the dash in it's current state)
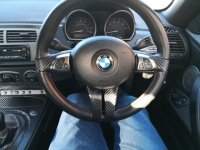
There were a couple of bits I wanted to wrap in carbon that I just never got round to when doing the rest, window switch panels and the steering wheel chrome bits. These have recently been completed during the lockdown and will be covered a little later.
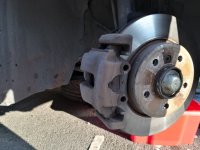
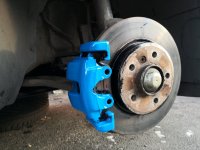
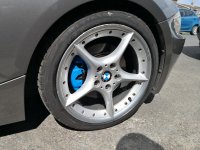
Still to come over the next few days are; Painting Brakes, Full DIY detail - including DA polish, Oil change, VANOS, DISA, HID Kit and whatever else I have forgotten! Plus many more pictures.
Thanks for reading.
This has certainly been a long time coming! Here is part one of Ed’s Zed Thread, the rest will follow over the next couple of days.
I've had my '04 3.0i Manual since the end of July 2019. I traded in my trusty '15 1.4L Corsa SE and walked away with just under £1K in my pocket. Best deal I have ever done.
The aim for trading the Corsa was that I wanted something fun and quick - I didn't need any practicality at all any more, it's just me and my Girlfriend. Plus after completely changing jobs from shooting and editing video, into a sales role - I no longer needed to haul kit with me regularly.
It took some searching to find a car I liked that was near enough to me here on the South Coast (Eastbourne ish). I ended up travelling up to Epsom to get the car from Wilson's "Bargain Buys". I got them to do some paint work for me after they tried to knock money off my Corsa for paint! So aside from stone-chips, and corroded 108's the car is was in pretty good condition. It even had full BMW service history, which I will not be continuing with as I try to do everything myself.

On my test drive a week or two before, I thought I noticed the dreaded tram-lining that I'd read so much about on this very forum. Within a couple of weeks I was 100% positive that the run-flats or the car had to go. It was just awful and honestly quite dangerous in some of the worst cases that I experienced.
I finally got the tyres sorted in September, replacing the front Pozenta’s and rear PS3’s ZP’s with a full set of Uniroyal Rainsport 3’s. The transformation was incredible, there was just so so much more feel when driving and the tram-lining was totally gone. It’s worth noting that the run-flats were actually all pretty new looking, the PS3’s had basically new tread depth, so was able to recoup some money selling these privately. The RS3’s are fantastic in all conditions so far, yes there was a tad more sidewall squish under hard cornering that was noticeable for the first week or so but I don’t notice it anymore. The grip in the wet is almost the same as it is in the dry - incredible - very hard to unstick these. They did get a tad loose when temps dropped below 5c ish though but nothing scary. I only do about 3K miles a year, even with the car as my DD, so these have worn very well so far even with some “spirited” driving.
The next little mod I did was one I knew I wanted to do fairly quickly, the ZHP upgrade. However… I am a bit cheap, so when I discovered via a forum post that there was a knock-off chinese version available for about £6 on eBay, I immediately ordered one. Very happy with how that turned out - I am sure it’s not as good as the real thing but for the price it is fantastic, and way better than the crappy plastic one BMW chose to use.

Continuing with the interior modding, after seeing a couple of posts on here about all the different interior options the Zed could have come with. I decided I wanted to freshen up my interior. I think the brushed ally is probably the best of the options from the factory, though and I am very glad it wasn’t plastic-y piano black or wood! I settled on carbon after seeing the Z4M option and spending some time in a co-workers A250, the latter of which has a lovely soft touch carbon interior.
I decided to start small with the interior doorhandles as they were already very peely, which is one of the reasons I even looked at wrapping things. I was very happy with how they turned out and definitely wanted to do more bits but hadn’t got the time or the wrap materials.

A month or so later I was able to get a couple days off in a row and ordered roughly the amount of wrap that I expected to use.
I knew that this was going to be a lot more work than the doorhandles were, mainly due to the way the whole interior is put together. To get all the brushed ally bits out I was going to have to disassemble what was effectively the entire interior. Thanks to a guide over on Pelican Parts I the whole process of taking things out went relatively simply with only a few little struggles along the way. Namely that stupid clip/pin holding the dash piece on!
With everything out of the car and taking up the spare room, I set about disassembling the whole centre console which is held together by an insane number of screws.


Allowing myself the best part of two days to take everything out, wrap it and put it back in seemed like plenty of time at the start. It ended up taking several days because I chose to wrap the entirety of the central console, not just the ally bits. I then had to re-do the main aly bit after trimming the wrap back a bit too much on an edge I didn’t think would be visible! This meant waiting for more material to turn up and driving around with a mostly missing interior for a few days. All the buttons were just flopping about with nothing to hold them in place.
It’s been several months since I finished wrapping the dash and centre console and it has held up very well. It really transformed the interior of the car for me and made it a much nicer place to be.


A few bits aren’t perfectly joined and ideally I’d redo the big ally dash bit as the left edge around the radio is slightly lifted. Thankfully it’s not very obvious and the rest all seems OK!
(I couldn't resist putting this pic in of the dash in it's current state)

There were a couple of bits I wanted to wrap in carbon that I just never got round to when doing the rest, window switch panels and the steering wheel chrome bits. These have recently been completed during the lockdown and will be covered a little later.
Still to come over the next few days are; Painting Brakes, Full DIY detail - including DA polish, Oil change, VANOS, DISA, HID Kit and whatever else I have forgotten! Plus many more pictures.
Thanks for reading.
