E86 3.0 Radiator Cover

curvature

Member
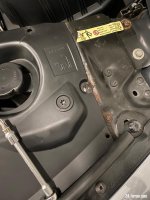
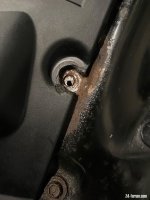
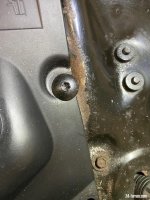
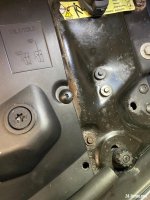
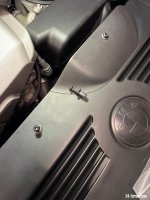
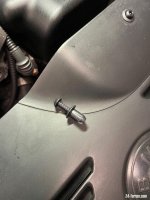
I'm gradually doing bits to the new car and want to take off the radiator cover but I have a screw stuck.

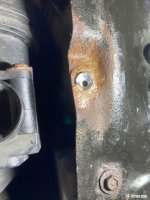
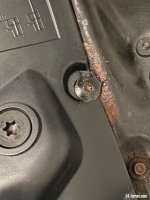
The pictures show the nearside Torx screw which I have soaked in GT85 and 3 in 1 and will attempt again tomorrow.

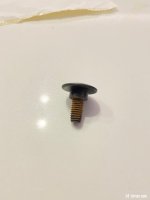
The left hand one came out with a bit of effort but this one is not going to give up easily. I've searched on RealOEM and then everywhere else but the screws that show don't seem anything like the one I need.

The parts that come up online say it is a screw with a washer but that's not the case with the one that I have managed to get out. Can anyone confirm which is correct?
 

Attachments

  • IMG_1486.jpeg
    IMG_1486.jpeg
    129.4 KB · Views: 506
  • IMG_1485.jpeg
    IMG_1485.jpeg
    114.8 KB · Views: 506
  • IMG_1487.jpeg
    IMG_1487.jpeg
    48.6 KB · Views: 506
I took mines off recently, probably had not got out in years and years. They did not have a washer. If I recall correctly I used a T27 bit which I hammered in (I think they are supposed to be T25) and I used an electric impact driver anti-clockwise and clockwise until the screw showed signs of giving up and then sent it the beans anti-clockwise until it was out :thumbsup:
 
Curvature, the rusted screw in your photo and the one stuck in the slam panel are correct. If it comes to the worst and the female Torx rounds out then you could just drill the head off it and then get hold of it with some ViseGrips and wind it out. I did this with mine only recently :thumbsup:
 
Well an overnight soaking in oil did nothing and the impact driver didn't touch it.

I'll try again tonight.

Thanks Zedebee, I'll let you know.
 
The picture on RealOEM doesn’t do it justice. It’s a M6x16 Torx bolt, part number 41352290799, same as the 7 x Torx bolts that secure the top edge of the bumper in front of the radiator cover.
 
patriot66 said:
Curvature, the rusted screw in your photo and the one stuck in the slam panel are correct. If it comes to the worst and the female Torx rounds out then you could just drill the head off it and then get hold of it with some ViseGrips and wind it out. I did this with mine only recently :thumbsup:

+1
 
Whoever fitted the cover before has managed to trap the plastic between the screw and the metal below.

I think the reason they seize up is that the screw has a shoulder that contacts the metal below and that’s where the corrosion starts. The shoulder is there to stop the plastic trim being crushed.

Over engineering that’s now giving me a headache.

Once done the screws will be going back with some grease on them.
 
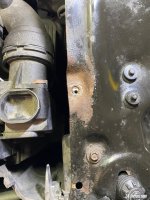
Well the bolt head is off but now I'm left with what's left of the thread firmly rusted inside the captive nut.

Once I got the main part of the head off grips simply slipped off. I manage to get a drill through the length of the bolt hoping that the side might starts to loosen up but no it simply won't budge!

As it is all well and truly fused in what do you think the chances are of opening the up the hole and then tapping a thread to take a new bolt?

Whilst I was at it I started testing every bolt that I could see and any that have signs of rust will either be renewed or treated.
 

Attachments

  • IMG_1489.jpeg
    IMG_1489.jpeg
    154.7 KB · Views: 403
  • IMG_1492.jpeg
    IMG_1492.jpeg
    180.1 KB · Views: 403
  • IMG_1494.jpeg
    IMG_1494.jpeg
    101.7 KB · Views: 403
It is one of the few covered parts of the car that is prone to rust. You will have the same problem if you ever try to take off the braces that sit in front of the radiator. :(
 
I think there's enough meat there to drill it out and re-tap as M8. Simpler (and cheaper) than helicoil. It's a low torque fastener holding part of a plastic cover.
 
Liam22 said:
I think there's enough meat there to drill it out and re-tap as M8. Simpler (and cheaper) than helicoil. It's a low torque fastener holding part of a plastic cover.
+1 :thumbsup:
 
Tapping drill for m8x1.5p is 6.75mm Dia so you have just enough meat on the captive nut.

Maybe replace the fixings with stainless steel pan hd.?
 
Job done.

I tried to drill another hole to try and get the screws out but that was not happening so I opened up the hole that you could see in the previous pictures and tapped a new M6 thread into it.

It is slightly off centre but will do the job.

The other thing that I didn't think was right were the plastic rivets. The ones I got off Ebay were too small and when I went to my local BMW dealer the ones that they provided were the same. On going back the parts guy came up with two other options and gave me the bits for free.

What I now have is a plastic rivet with a pozi head on it that you unscrew to get out. They are a really nice fit and a rubber mallet helps getting them in and there is no movement from them once in.
 

Attachments

  • IMG_1504.jpeg
    IMG_1504.jpeg
    140.6 KB · Views: 146
  • IMG_1505.jpeg
    IMG_1505.jpeg
    150.4 KB · Views: 146
  • IMG_1506.jpeg
    IMG_1506.jpeg
    135.2 KB · Views: 146
  • IMG_1507.jpeg
    IMG_1507.jpeg
    137.5 KB · Views: 146
Back
Top Bottom