E85 Rear Break-Lines Swap Out.

polmacd

Member
Hi,

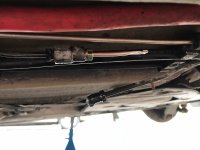
I am planning to change the rear break-lines on the E85 3si. Near side looks ok to do . I was going to cut the line under the car somewhere in the middle and replace it with Cooper Nickle. What I am not sure how to tackle the offside. Has anyone done the rear drivers side break -lines and be in potion to let me know if you need to drop the rear tank, diff ..... Some advise on this would be appreciated it.

Thanks M
 
I have done this on two Z4’s

If you remove the black under tray that runs front to back BMW have provided a pre main joint for one side the uther you need to cut and flare the pipe and put a joint in
 
I had mine done by forum member "ducklakeview" back in 2016.

He joined them under the cover more or less beneath the passenger footwell. He threaded the new copper pipe for the offside one through the brackets between the bulkhead and the petrol tank then shaped it afterwards. That way the tank didn't need to be dropped.
 
Mr Tidy said:
I had mine done by forum member "ducklakeview" back in 2016.

He joined them under the cover more or less beneath the passenger footwell. He threaded the new copper pipe for the offside one through the brackets between the bulkhead and the petrol tank then shaped it afterwards. That way the tank didn't need to be dropped.

Hi. This is what I was after . So all you have to do is pre form left side . Slid in straight long bit through the clips above the diff , come out on the other side and from it . No need to drop the diff . I guess you have to cut the old pipe on right side to pull out the remaining old one thought clips ....
 
polmacd said:
Hi. This is what I was after . So all you have to do is pre form left side . Slid in straight long bit through the clips above the diff , come out on the other side and from it . No need to drop the diff . I guess you have to cut the old pipe on right side to pull out the remaining old one thought clips ....

Well as I said someone else did it, but I was there while it was done.

My car had advisories for the rear brake pipes for 3 MOTs so he didn't have to cut the offside one to get it out, just bent it a couple of times and it snapped! :o

He didn't drop anything for the driver's side one, just slid it straight through the clips with enough length to flare it to shape then pulled it back to meet the connection to the flexi-hose. After that he flared the other end to meet the pipe from front to rear under the floor.
 
Here is a more detailed how to

Get the car up on axle stands with both rear wheels off.
Remove the large black plastic tray that runs under the car passenger side

This allows you to get at the line that has a joint in it already (why only one?) this can be undone I blanked it off with a home made plug so as not to loose all the fluid,
CC7BE727-79AC-4210-86D7-22AFDB73CD81.jpeg
Now you need to cut the one without a joint place a brake pipe nut on the pipe (loads of people forget to do this in the right order) then using a flare tool put a flare on the end of the pipe, screw a double ended female connector on the nut and fit another home made blank to stop the fluid leaking out.
Now clean up any brake fluid and wash your hands as it is a good paint stripper.

Now the passenger side is straight forward enough so take your time and shape the new pipe and flare the ends as needed etc

Now the drivers side is a little tricky you could remove the subframe but you would need your head looking at I did this for a different reason and it is not for the faint hearted. You could remove the diff same applies.

So this is how to do it the easy way you need a fair bit of space either side of the car, cut the pipe both sides of the car as it goes into the inner wheel arch, subframe area, straighten out a couple of meters of pipe this is easier with 2 of you but I did this on my own find a bit of steel or strong plastic to push into the inside of the old and new brake pipes so you have joined them together now push the new pipe in through the 3 or 4 clips letting the out just be pushed out a bit of washing up liquid helps lubricate it

Now you have plenty of pipe at both sides make each end up as the first side

026818B2-38F0-4968-98B1-36080AF56CE2.jpeg04C9555D-773C-4FA4-86B3-A82636A40631.jpeg94CD6F5F-76A3-44F1-9C29-9DF4B67EDA4E.jpeg9772E419-5B90-4A28-A61D-81805AB65E6C.jpeg8899174C-46AD-42EE-BA11-4D9DADA3EE3F.jpeg52B970D5-85F6-465B-B7B9-A741A44C05F6.jpegDA04C2B3-B1ED-4AFF-BB6F-6919EA97483C.jpeg13D54FA3-4CFB-4246-8304-8EAB4744BC90.jpeg
 

Attachments

  • 7AFC2568-2A34-4658-B53B-D9D0E8FC0624.jpeg
    7AFC2568-2A34-4658-B53B-D9D0E8FC0624.jpeg
    270.6 KB · Views: 702
Hope that makes sense and helps

I am in Manchester and Grimsby if that help
 
PDJ said:
Hope that makes sense and helps

I am in Manchester and Grimsby if that help

Hi. The walk through is really good . This will help me no end . One question . To do with threading the new pipe thought the clips. When you say I need to join the new and old pipe before threading . Will the thicker outer sleeve pass through the clips. Would brasing these together or inserting inner rod joint work. I guess pulling out the old one and threading new one wont work since you will have to aim for the clips and the pipe will never be that stright to thread thrust all the clips..... let us know on the joint methond if you can....M
 
Just join the pipes with a bit of coat hanger wire end to end and push it through gently it is just to guide it through the clips if you have thin arms you can just reach the clips I mean just.
 
Back
Top Bottom