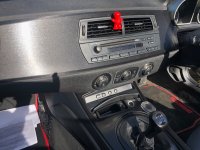
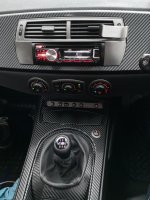
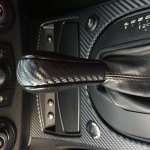
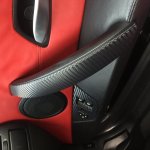
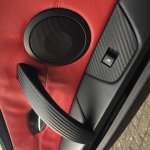
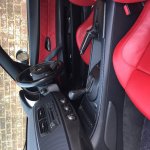
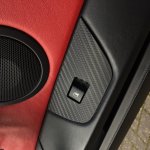
After searching for a Carbon Leather Dash & Console for a short while I decided to have a go at wrapping instead. Rather than go for the 'real' look Gloss 4D/5D I opted for the Satin 3M Di-noc which has a texture to it and is closer looking to the OEM faux Carbon Dash. Also wrapped the Auto gear trim, door pull handles and the Window control plates. Would like to do the Instrument Bezel Trim too but have no idea how to separate that from the cluster??!
You are using an out of date browser. It may not display this or other websites correctly.
You should upgrade or use an alternative browser.
You should upgrade or use an alternative browser.
Dash & Console Wrap
- Thread starter Penelope
- Start date
 North Yorkshire
Think the whole thing pulls straight out. Search the forum these was something by Bing a few years back, he changed the needles for red ones. Its quite simple, then cut and shape the wrap while the unit is on the bench.
That's a pro job, well done.
Yes, use the search function, red needles should pull it up for you. Jan 13, posted by Bing.
That's a pro job, well done.
Yes, use the search function, red needles should pull it up for you. Jan 13, posted by Bing.
 USA
USA
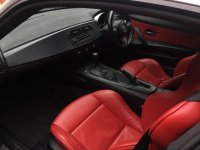
Looks great with red leather 
Did mine in carbon but bought cheap chinese wrap and got worn really quick so eventually got 3M brushed black aluminum. If I find photos I'll upload it here.
Did mine in carbon but bought cheap chinese wrap and got worn really quick so eventually got 3M brushed black aluminum. If I find photos I'll upload it here.
BTZ461 said:Think the whole thing pulls straight out. Search the forum these was something by Bing a few years back, he changed the needles for red ones. Its quite simple, then cut and shape the wrap while the unit is on the bench.
That's a pro job, well done.
Yes, use the search function, red needles should pull it up for you. Jan 13, posted by Bing.
Thanks, I'll look into it. I'm beginning to think that I might leave them as there are other silver accents on the air vents and the door open handles that would be silly to wrap. I don't want it to look too ott. Killing off the Brushed Alu was the main aim. It feels more cohesive in the cockpit now & warmer feeling.
bearded_ed
Member
Ahhh sorry I didn't see this before.
This is exactly what I did to mine!
Not perfect if you look closely but very happy with the results. Took a good while though.
Thread with more pics/info here
https://z4-forum.com/forum/viewtopic.php?f=2&t=119305
This is exactly what I did to mine!
Not perfect if you look closely but very happy with the results. Took a good while though.
Thread with more pics/info here
https://z4-forum.com/forum/viewtopic.php?f=2&t=119305
Attachments
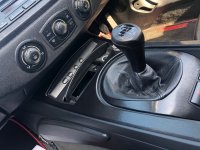
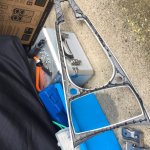
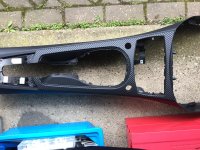
Console is not too bad. Lots of fastenings hidden away. Need a set of pry tools and Torx and Phillips Screw driver. You have to remove the casing for the rear part of the storage section before you can remove the casing over the transmission tunnel. The console trim is held on with far too many screws. Wrapping is easy enough with a heat gun used gently for the edges and the curves. It probably helps that I bought the 3M Di-noc as seems like really good quality. Super happy with the results and a very satisfying job to do whilst in isolation. Brake Calipers & Drums next...probably just in Hammerite (Silver)
 North West Surrey
saj77 said:That looks a fantastic job
Wish I was brave enough to attempt all the panel removal!
It's really not that hard, just takes a little time as there are so many screws to remove. If you know where the clips are and use pry tools everything comes off and goes back fine. Took me two days but could be done in one...or over a few given the current state of things.

bearded_ed
Member
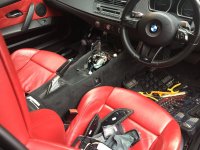
I can also confirm that there are soooo many damn screws holding this all together. Effectively the whole inside of the car feels like it has to come off.
It is so worth it when done though.
It is so worth it when done though.
This is what I did. And as a tip I recomend: DO NOT buy cheap chinese wrap. Spend more pennies for a high qualiy 3M. Also after wraping all elements you have to heat the winyl wrap to 92-100 Celsius degrees so it will hold its shape.