Long weekend so thought I would complete the mods I had always intended. Some as a matter of urgency(springs!)
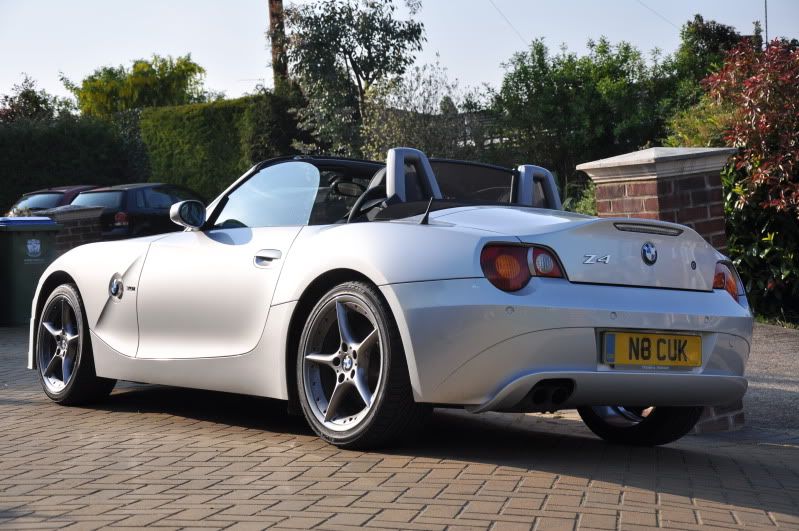
1. Rear springs - changing the wheels and noticed I had a pile of pot metal hanging around the rear spring carrier. More came out when I released them. Thought the stance looked good though but added scrubbing to already crap tyres(RFT). Plan on fitting Eibachs all round but needed to get rolling so Jonny5 came to the rescue with a set of originals left over from when he changed to Eibachs (Cheers Jonny !). Has anyone heard of Eibachs snapping?
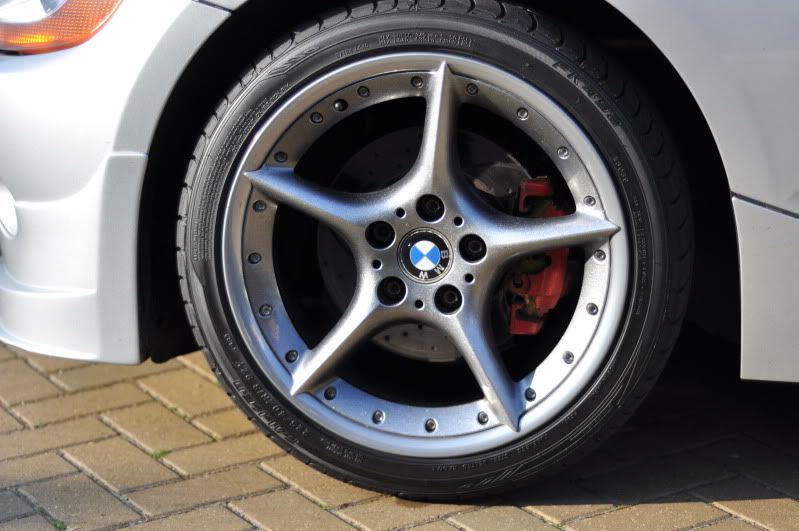
2. I had a set of 108s powdercoated; the main part in a chrome9including rears) that almost looks as though its polished and clear coated. The stars are done in a black/silver metal flake that really pops in the sun. As normal difficult to get the shot. Guys who powdercoated them have just looked into doing wheels, they normally do control cabinets for the military. If anyone wants thier details PM me- they are V reasonable. Note when splitting the stars you will bound to get a few sheared bolts (I had 3, two of which had the heads cut off and glued back to look complete ). Good tip-get an old star(I have two :wink: ) bolt it in place and use this as a guide. Why I hear you ask; because you will run off and start hitting the ally. Use a carbide drill (not coated) at slow speed with lots of pressure. Using the star will guide you accurately. If you bush the star hole (OD of the bush the ID of the star hole and ID of the bush the OD of the drill
  )it will guide even better. I have as well as two spare stars lots of spare bolts :wink: .
3. Fitted a set of Falken 452 (found them individually on Ebay and at various tyre factors, cost me £278 (+£40 for valve and balance)for the set brand new standard assymetric size - result!!) and what a difference, but probably due to the fact I had no tread left on the rear RFTs and apparently little spring assistance!.
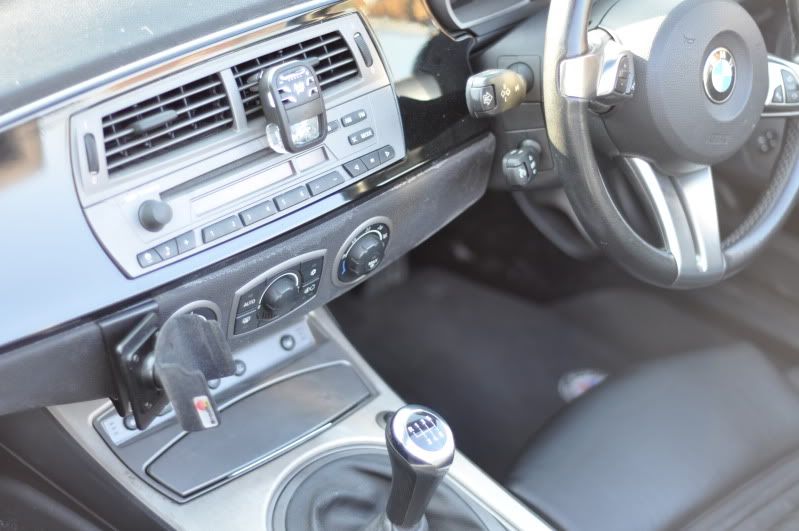
4. Had a cruise switch and cut a spare lower console and fitted that. Good for the long boring trips (v upset there was no indication when cruise is selected :thumbsdown: )
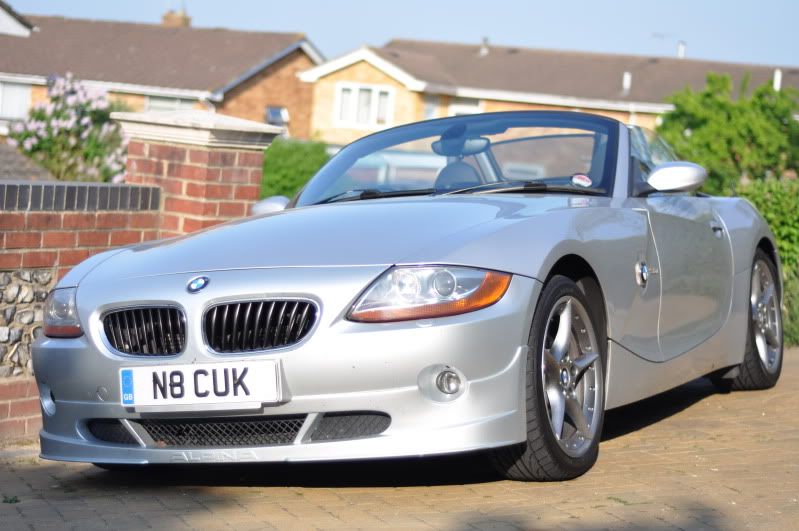
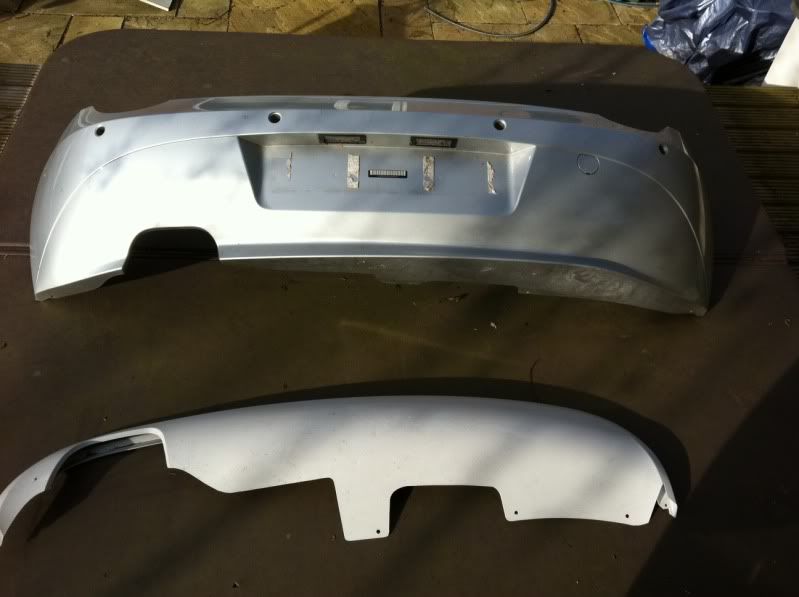
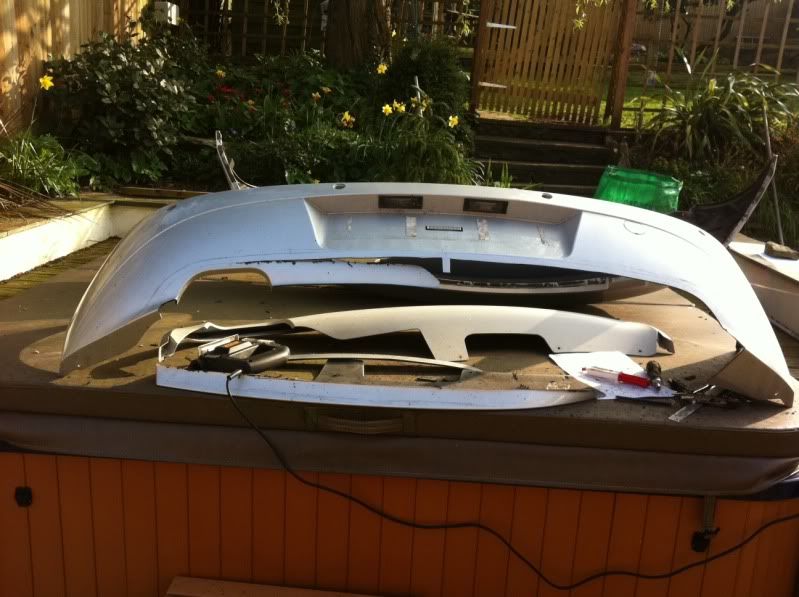
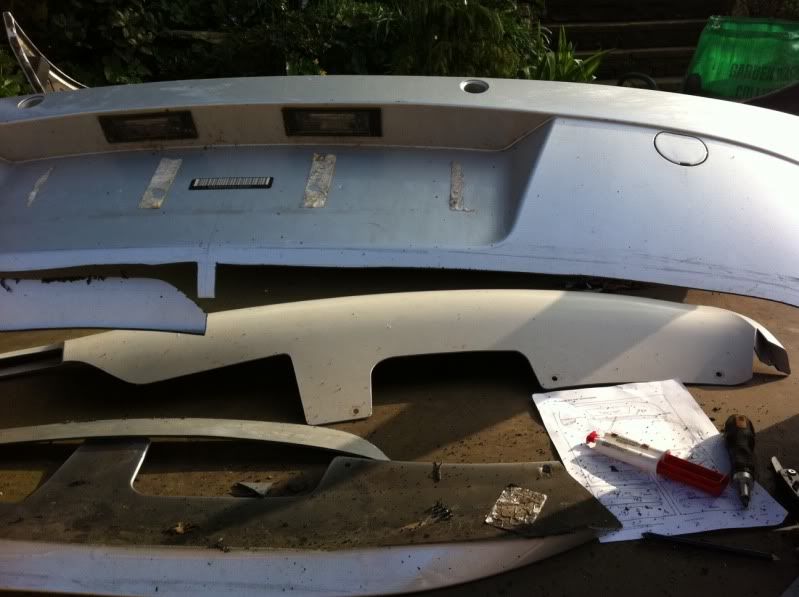
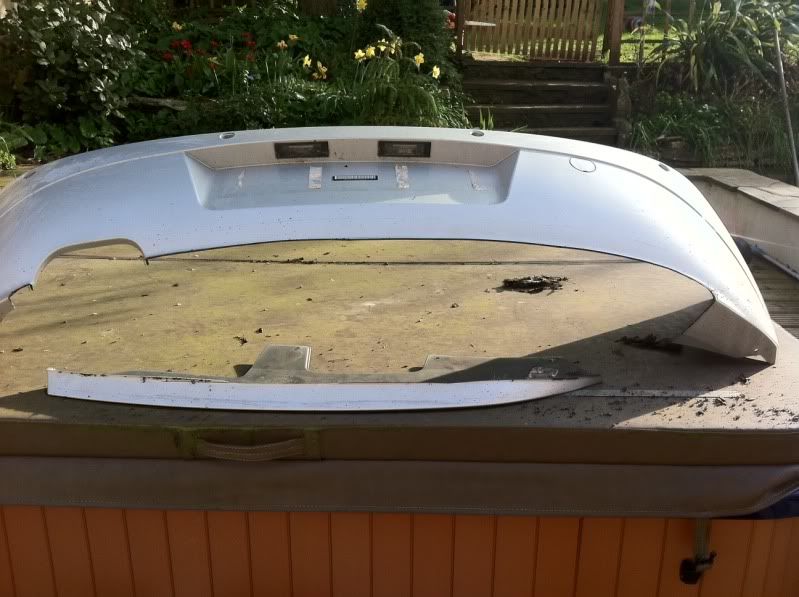
5. Cut up a perfectly good rear bumper and fitted a diffuser I had sprayed up some time ago. I know this is very subjective but I like it and I dont recall seeing one on another Zed (not in real life). Someone sent me the TIS instructions but cant find the email to thank them .
6. Fitted the black/chrome grills (thanks Jonny5-again ), had to change the chrome for mine but I prerfer the contrast on the silver cars.
7. Nothing to do with Zed's but sprayed cavity wax in all the chassis members of my classic-not pleasant!
Now I have to do some serious bridge building with the missus for mucking about on the cars all weekend and getting cavity wax on the driveway and not doing the kitchen!!
Pics below:
http://s42.photobucket.com/albums/e319/chippy59/No%2010/?action=view¤t=DSC_0081.jpg
http://s42.photobucket.com/albums/e319/chippy59/No%2010/?action=view¤t=DSC_0084.jpg
http://s42.photobucket.com/albums/e319/chippy59/No%2010/?action=view¤t=DSC_0082.jpg
http://s42.photobucket.com/albums/e319/chippy59/No%2010/?action=view¤t=DSC_0083.jpg
http://s42.photobucket.com/albums/e319/chippy59/No%2010/?action=view¤t=photo5.jpg
http://s42.photobucket.com/albums/e319/chippy59/No%2010/?action=view¤t=photo2.jpg
http://s42.photobucket.com/albums/e319/chippy59/No%2010/?action=view¤t=photo4.jpg
http://s42.photobucket.com/albums/e319/chippy59/No%2010/?action=view¤t=photo3.jpg
http://s42.photobucket.com/albums/e319/chippy59/No%2010/?action=view¤t=photo.jpg
Russ
1. Rear springs - changing the wheels and noticed I had a pile of pot metal hanging around the rear spring carrier. More came out when I released them. Thought the stance looked good though but added scrubbing to already crap tyres(RFT). Plan on fitting Eibachs all round but needed to get rolling so Jonny5 came to the rescue with a set of originals left over from when he changed to Eibachs (Cheers Jonny
!). Has anyone heard of Eibachs snapping?2. I had a set of 108s powdercoated; the main part in a chrome9including rears) that almost looks as though its polished and clear coated. The stars are done in a black/silver metal flake that really pops in the sun. As normal difficult to get the shot. Guys who powdercoated them have just looked into doing wheels, they normally do control cabinets for the military. If anyone wants thier details PM me- they are V reasonable. Note when splitting the stars you will bound to get a few sheared bolts (I had 3, two of which had the heads cut off and glued back to look complete
). Good tip-get an old star(I have two :wink: ) bolt it in place and use this as a guide. Why I hear you ask; because you will run off and start hitting the ally. Use a carbide drill (not coated) at slow speed with lots of pressure. Using the star will guide you accurately. If you bush the star hole (OD of the bush the ID of the star hole and ID of the bush the OD of the drill )it will guide even better. I have as well as two spare stars lots of spare bolts :wink: .3. Fitted a set of Falken 452 (found them individually on Ebay and at various tyre factors, cost me £278 (+£40 for valve and balance)for the set brand new standard assymetric size - result!!) and what a difference, but probably due to the fact I had no tread left on the rear RFTs and apparently little spring assistance!.
4. Had a cruise switch and cut a spare lower console and fitted that. Good for the long boring trips (v upset there was no indication when cruise is selected :thumbsdown: )
5. Cut up a perfectly good rear bumper and fitted a diffuser I had sprayed up some time ago. I know this is very subjective but I like it and I dont recall seeing one on another Zed (not in real life). Someone sent me the TIS instructions but cant find the email to thank them
.6. Fitted the black/chrome grills (thanks Jonny5-again
), had to change the chrome for mine but I prerfer the contrast on the silver cars.7. Nothing to do with Zed's but sprayed cavity wax in all the chassis members of my classic-not pleasant!
Now I have to do some serious bridge building with the missus for mucking about on the cars all weekend and getting cavity wax on the driveway and not doing the kitchen!!
Pics below:
http://s42.photobucket.com/albums/e319/chippy59/No%2010/?action=view¤t=DSC_0081.jpg
http://s42.photobucket.com/albums/e319/chippy59/No%2010/?action=view¤t=DSC_0084.jpg
http://s42.photobucket.com/albums/e319/chippy59/No%2010/?action=view¤t=DSC_0082.jpg
http://s42.photobucket.com/albums/e319/chippy59/No%2010/?action=view¤t=DSC_0083.jpg
http://s42.photobucket.com/albums/e319/chippy59/No%2010/?action=view¤t=photo5.jpg
http://s42.photobucket.com/albums/e319/chippy59/No%2010/?action=view¤t=photo2.jpg
http://s42.photobucket.com/albums/e319/chippy59/No%2010/?action=view¤t=photo4.jpg
http://s42.photobucket.com/albums/e319/chippy59/No%2010/?action=view¤t=photo3.jpg
http://s42.photobucket.com/albums/e319/chippy59/No%2010/?action=view¤t=photo.jpg
Russ