1967 Ford Mustang

Richard! said:
All done, big thank you to my family for all the help with getting this project done. Wouldn’t have been possible without all of the help
I see the cat has done all the dirty work :P

I own a very similar 1967 289 V8 coupe, same interior but Candy apple red exterior.
Funny to see we both have the same cars (Z4/Mustang) - and good taste! :wink:
I'll share some pictures later.
 
Your exhaust mod is really nice, just the straight pipes sound so good though! The V8 is definitely something you can't compare with other engine built. I just can't get enough of cruising and then straight accelerations...

I also found the car itself, especially coupes from this era (67-68'), to have lines and dimensions that makes them appealing today as retro/classic cars. IMHO, in a complete different league as other classic muscle cars. It doesn't bother me that it is not very "rare", I just find it to be a special car in automotive industry, and very proud of owning one (next to the Z4 coupe ofc :) ).
 

Attachments

  • 1.jpg
    1.jpg
    265.7 KB · Views: 3,033
  • 2.png
    2.png
    2 MB · Views: 3,033
Very nice, looks in fanatisc shape! Love the wheels.
Completely agree in regard to the coupe, for me there is just something about the shape that I really love.
 
I haven't touched at the exhaust yet, the current one is not too bad but doesn't provide the "thrill" I am looking for. Magnaflow is probably what I would go for next year. Right now I have a couple of things to fix up, that includes wiring/harness replacement cause I am not feeling really safe with 50 years old wires... and I definitely should replace the water pump and radiator. That V8 really requires some proper cooling when outside temps are getting hot as they have been lately here... :roll:

Ultimately I want to make it as reliable as possible and safe on the road, as a "daily" driver although I don't need it to go to work everyday - the gas budget per year would anyway prevent me to do so, lol :D
 
The wiring in mine is well, err not great. Plenty of stripped, twisted wires with insulating tape over. Some of the poor wiring was done recently when the car was converted for UK use. A full re-wire is in my future plans, at the moment it works so there is no rush.


Overflow tank

The kit came with rivets to install the brackets, however the side of the radiator has convenient holes for mounting with bolts.A new radiator cap was needed to allow any coolant that ends up in the overflow tank to be drawn back into the system as the engine cools.

Quick simple upgrade, no more coolant overflow :)

http://www.mustang67.co.uk/overflow-tank/

[img=http://www.mustang67.co.uk/wp-content/uploads/2017/09/009B2DA1-87D8-4EDC-9943-05C52C6E6B0A-1024x768.jpg][/img]
 
Zeddicus said:
Your exhaust mod is really nice, just the straight pipes sound so good though! The V8 is definitely something you can't compare with other engine built. I just can't get enough of cruising and then straight accelerations...

I also found the car itself, especially coupes from this era (67-68'), to have lines and dimensions that makes them appealing today as retro/classic cars. IMHO, in a complete different league as other classic muscle cars. It doesn't bother me that it is not very "rare", I just find it to be a special car in automotive industry, and very proud of owning one (next to the Z4 coupe ofc :) ).


Another fine example😍😍
 
It's a nice looking restoration, I wouldn't be modding it as it just devalues the car. The closer to original the better it is.
 
I understand that its desirable to keep things original. I do want to keep the car as original looking as possible, however will make changes that make the car safer / more reliable. I'm going to install a classic style radio to replace the modern one that was installed at some point.
I am keeping all of the original parts so in the unlikely event that I sell the car the next person will get stock rocker covers, air cleaner, drum brakes etc etc. So if desired the car could be restored to the state in which I bought it.

A little catch up on a few things that have happened of late.

Filler cap
New filler cap, the old one was looking a bit tired.
FullSizeRender-40-1024x768.jpg
FullSizeRender-46-1024x768.jpg

Steering wheel emblem
Thought it would be an easy one, ‘just’ replace the steering wheel emblem.The old one was almost impossible to remove.Ended up drilling a hole through it and using some wood as a puller.
FullSizeRender-45-1024x768.jpg

Tail lights
More photos here: http://www.mustang67.co.uk/tail-lights/
The original lights were quite dim and it was hard to tell when the brakes were applied. This was a particularly problem on bright days. I’d like to keep the car as original looking as possible, so a third brake light is not an option. The new lights are far brighter and its much clearer when the brakes are applied. Hopefully it will give other motorist enough warning when i’m slowing down.

The lens housings were cleaned up and repainted. They were looking quite sorry for themselves.

Thank you to Patrick for installing these and doing all that work to restore the lenses :)

IMG_7145-1024x768.jpg

[youtube]lIAaCdo1XRo[/youtube]

Natural safety switch
More photos here: http://www.mustang67.co.uk/natural-safety-switch/
Since I got the car it kept blowing a fuse. It was intermittent with no particular pattern. I kept putting in fuses with larger and larger ratings. In hindsight not the wisest course of action. Got to 30 amps and it stopped blowing. So I assumed all was well.

While looking at something else my Dad noticed that a wire was touching the exhaust. Turns out this was the wire that goes to the transmission neutral safety & reverse light switch. So fixed the wire, tied it back properly, and thought all was well. Unfortunately that was not the case. The reverse lights were not working anymore (presumably for some time).
IMG_5240-1024x768.jpg

The neutral safety switch was broken, at least the reverse switch part of it. The switch was being shorted out each time the car was put in reverse. With the larger and larger fuses more power was going through which ended up melting the plastic inside the switch. Buying a replacement from the UK costs more than ordering from the US even when the tax and shipping is more than cost of the part :/So for now will repair the existing switch. The unit was removed from the car, opened and repaired. Had to drill out the tabs that held it together as its not really supposed to be serviced. The contacts needed some solder on top to raise them back up to the correct level. After cleaning up the slider arm to remove the melted plastic. The part that holds the reverse switch roller needed new plastic adding to replace what had been melted away. With all fixed it was greased and glued back together. It clipped together quite firmly with a little glue it should hold fine. Woo! reverse light working again, no more blown fuses.
FullSizeRender-51-768x1024.jpg
 
Its been a little while since the last update, have been busy with efi, alternator and wheels.

EFI
More photos here:http://www.mustang67.co.uk/efi/

Carburettor rebuild
The story begins with some carburettor issues. Since I got it was not perfect, sometimes it seemed to over-fuel when slowing. However, the main issue was that the secondaries would get stuck open after going to full throttle. This meant that the car would idle at 2k rpm after going full throttle. The only way to get the secondaries to close was to stop the engine and restart. Really not an ideal situation.

Having spent a long time online reading about other people with similar issues and tying an array of possible solutions nothing really worked. Searched for vacuum leaks, checking for obstructions etc. If I lived in the states I’d have looked to buy a replacement carburettor from breakers. This would have been a quick easy way test if it was carb or something else. However not really an easy option in the UK. So decided that the next step was to try a carburettor rebuild. Ordered a kit from the US with everything in that is needed to complete a rebuild. Many of the parts in the kit are old stock as they don’t make these all these parts anymore. But overall a very good kit.

IMG_5139-768x1024.jpg
Took lots of pictures from all angles, at different stages of disassembly to ensure it goes back together the same way it came apart. Also made notes on settings, and positions of the various adjustment screws etc. Something that seemed odd, during this process, was that one of the idle mixture screws was fully screwed in and the other was out 3 turns. The base setting for these is meant to be 1. 5 turns.

IMG_5149-1024x768.jpg
SO many parts

IMG_5222-1024x768.jpg
Many hours later everything was cleaned and reassembled. Sadly that was the end of the good news. Set everything up as per the instructions re-installed on the engine. It did start but it did not run well. Over the course of several weekends tired different sets of instructions for setting up the carb. Inhaled far too may exhaust fumes. Had help from family, only just managed to get it to a semi-usable state. Oddly the mixture screws had to be set as it was when it was taken apart, one all the way in and the other out several turns. After the rebuild, it ran worse than before. The secondaries still got stuck open at full throttle. Tried replacing the points with a hall effect Pertronix ignitor & replaced the old coil with a new one (Flame-Thrower also from Pertronix). Also changed the stock style fuel filter with an external one just in case there were any fuel supply issues. No luck :(

I’m sure that someone with carburettor experience would probably be able to understand what was going on and might be able to fix it. I get the feeling that there must have been some sort of damage on the carb, either blocked channel or some other kind of damage from my rebuild and/or an earlier rebuild.

Holley Sniper EFI system
After spending way too much time on the carburettor I decided it was time for something more drastic. I had a plan to install EFI at some future stage. With all the issues the timeline on this project was moved forward. So ordered a Holley Sniper EFI system. I ordered the master kit which comes with fuel filters, fuel pump, hose & fittings.

IMG_7482-300x225.jpg
Mechanical fuel pump removed and the hole left in the side of the engine covered with the supplied cover plate.

IMG_7381-1024x768.jpg
Intake manifold removed, damn that’s a heavy lump of iron! I’m used to plastic or aluminium manifolds. The coolant temperature sensor for the EFI system was installed in the location of the original factory temperature sensor, this seemed like the optimal location for the best reading for the EFI. Had to remove the brass adapter in order to fit the new sensor. It wouldn’t unscrew so it had to removed with a Dremel and tapped out.

IMG_5514-1024x768.jpg
The original temperature sensor was installed just behind the thermostat housing. This placed the sensor on the inside loop of the cooling system so the dash gauge has a good reading. To install the sensor a new hole had to be drilled and tapped.

IMG_5491-1024x768.jpg
O2 sensor installed, the Sniper EFI system comes with a no weld solution which is really practical. ‘Simply’ (not so simple without removing the exhaust) drill a hole and bold up.

IMG_7452-1024x768.jpg
The EFI system requires a return line for the fuel. I didn’t fancy removing the tank in order to install the fittings. That left two choices, either return to the filler neck or to the pickup. The latter was chosen as it is more convenient for connecting the return without having to go into the trunk with a fuel line. Patrick did a fantastic job of installing the return fittings into the tank.

IMG_5566-1024x768.jpg
IMG_5570-1024x768.jpg
Fuel lines, fuel pump and filters installed. Decided to go with hard lines for the majority of the distance.

IMG_7389-1024x768.jpg
In order to fit the EFI the original spacer plate was needed. It lifts the body up high enough so the throttle linkage clears the top of the engine. The spacer intake holes were polished to remove flash lines and match nicely with the throttle body.

IMG_5520-1024x768.jpg
Wiring was planned out to fit on to the engine neatly. Since I plan to install the Holley Dual Sync distributor all of the wiring & the module for this was prepared in the loom. As and when this part arrives it should be a simple case of plug an play. For now, the original vacuum advance distributor will be used.

The display for the EFI was installed in the centre console behind the roll-up storage compartment. This hides it away keeping a nice stock look. The display is easily accessible when needed.
MG_5571-1024x683.jpg
IMG_5736-1024x768.jpg

All installed, basic setup wizard steps completed!

The first start it kicked into life right away! One short blip on the starter and away it went. Super happy with it :) :)
[youtube]MB5Mo6XSHa8[/youtube]

Second start now with air filter.  (Exhaust flaps closed on these first two starts, didn’t want to annoy the neighbours late in the evening, hehe)
[youtube]uqekZlq8w3U[/youtube]

It runs really well on the EFI, very smooth, more responsive on the throttle. Starts right away, no need to worry about cold weather. Driven a few miles with it so far and the system is in the process of learning, not sure it has much to learn as it runs fine already. Really happy with this upgrade.

Alternator Replacement
The original charge system failed and would no longer charge the battery. Upgraded to a one wire alternator replacement. Removed the voltage regulator and installed a 4 gauge power wire to the battery. A nice solid charge on the battery now.

The headlights are much brighter now, will make driving at night a bit easier.
IMG_5735-1024x768.jpg


New Wheels
http://www.mustang67.co.uk/new-wheels/

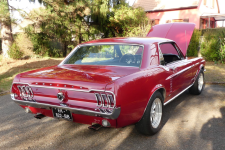
Ordered some American Racing Torq Thrust D wheels. The colour is vintage silver. They are 15″ x 7J. This will allow the fitting of disc brakes as part of a future upgrade.

MG_5588-1024x683.jpg
MG_5567-1024x683.jpg
MG_5583-1024x683.jpg
MG_5586-1024x683.jpg

That was not the first set I order :/ Originally I got them in 8.5j. Didn’t think it would be an issue. Unfortunately, they didn’t have much inward offset so the protruded a LOT. It would have required significant modification to the body to get them to fit. This is something I do not want to get into. The car looked a bit silly with these wide wheels…
Returned those wheels and to replace them with the 7J alloys. Big oopsy on that one. For those who might be interested here's a photo.
IMG_7244-1024x768.jpg
 
Your Mustang seems to just be getting better and better OP. :thumbsup:

EFI sounds like a great modification, and your wheels look really good (well the 7J ones do)! :lol:

A few forum members in my area use TWG Automotive to look after our BMWs, and Will (the principal) has a lovely Mustang coupe (I think it may be a 66 though).

There must be something about BMWs and Mustangs that appeal to the same people - I'd certainly love a new V8! :lol:
 
Yeah 8.5J really did look very silly. I’m trying to keep it looking somewhat classic.

There must be a bmw - mustang synergy... I’m sure it’s not the only one though :)
 
Those wheels look great! Good mods as well, more reliable modern kit but not affecting the look or spirit of the car. Braver man than me with that carb. Whenever I stripped any carbs they never worked very well again!
 
If you care about the value of the car, don’t change anything from original. Changing things back to original is good, If you just want drive it and not worry then carry on .... :D :D
 
As mentioned before I’m after a car I can use anytime with no fuss, doesn’t overheat in the summer, stops quickly and goes. I don’t want a museum piece or an investment. It should be fun :)

In the unlikely event I sell the car I am keeping all the old parts, who ever buys it can have an all original car if that’s what they prefer.
 
Holley Dual Sync

More pictures here: www.mustang67.co.uk/holley-dual-sync/

To finish up the EFI install a Holley Dual Sync distributor was added. Its pretty much plug and play with the Holley Sniper.

The wiring had been prepared when installing the sniper EFI. Only had to remove coil input wire from the ignition coil. Then connect coil driver in its place.

In order to align the Dual Sync distributor the crank needed to be rotated to 50 degrees before top dead centre (on compression stroke). My harmonic balancer only had 3,6,9,12 degrees marked out. The balancer is 6. 375″ diameter so to find 50 degrees used a simple equation to mark up some tape with appropriate positions. Also added 6 & 12 degrees to verify the size. ( had marked up for 7″ & 8″ balancers as I didn’t know how big the balancer was )
A2118C4A-6364-4783-8FD0-92B0EF6606EB-1024x768.jpg
2BCA3F2F-9F63-48CC-8FF5-32D1DF7207FF-1024x768.jpg

Once the crank was positioned correctly set the distributor was dropped in. All went smoothly until I tried to connect up the spark plug wire.

A bit of a discovery for me, the spark plug wires from the original setup didn’t fit on the new distributor, doh! I didn’t know there were different types. Original was stock style plug and the new one is HEI (high energy ignition). So had to order new spark plug wires.
A5D56175-BE18-45FF-86AD-AFA940A9E22C-520x693.jpg
0A6CD842-7C7C-4A63-A5E0-09F886F0C416-1024x768.jpg

New spark plug wires; the set is really nice and has spark plug number on each wire which is handy. Only had to cut the ignition coil wire to length and attach the correct connector. Really like the new colour suits the engine.
I rotated the distributor so the number one spark plug position was at the rear. This lines up better with the spark plug wires lengths.
IMG_0102-768x1024.jpg
IMG_0106-1024x768.jpg

Final setup was quite simple, set the Holley Sniper to link to the Holley Dual Sync. Then set the timing to a static number. I chose 12 degrees as there is a marker on the balancer at that point. Initially, the timing was checked on the starter with the fuel pump disabled. After that was confirmed to be ok the fuel pump was enabled and the engine started. It started right away.

Next stage was to set the static timing with the engine running and verify the timing position on the balancer. After that, the engine had to be revved up to verify that the timing stays in place at higher RPM. The engine would retard a little with higher RPM. So had to increase the inductive delay in the settings to compensate. With a few iterations got the inductive delay just right and it stayed on the 12 degrees static timing at any RPM.

It’s so much smoother now the new distributor. I’m looking forward to some better weather so I can go out for a drive.

Audio Samples

Took an audio recording before and after the distributor install, click below to hear the difference. Each recording starts with exhaust flaps closed, then open.

Samples: www.mustang67.co.uk/holley-dual-sync/#audio
 
Thanks :) Will get everything sorted in time. Next big thing will be the brakes. Going to be changing the front to disc + servo assistance. Will be nice to have predictable braking.
While its so cold outside made a small start on the audio upgrades.

Head Unit Upgrade
More photos here

The car came with single din Kenwood head unit. It didn’t really suit the car. I really wanted to change back to a classic style radio. The problem was that when the single din head unit was installed the original mounting holes were cut out. The optimal solution would have been to replace the console with a new unit. This wasn’t really feasible and was not able to find second-hand one at the time.
IMG_0273-1024x768.jpg

So the solution was to get a radio bezel for a non-console car then ‘shape’ the console to fit. To do this the console was removed and cut to fit under the new bezel. The new head unit is a Custom Autosound USA-630. It looks vintage but has connections for USB/iPod, remote wire for amps etc.
IMG_0291-1024x768.jpg
IMG_0298-520x693.jpg
IMG_0300-1024x768.jpg

The finished article :)
IMG_0307-1024x768.jpg
IMG_0312-1024x768.jpg

That’s the start of the audio upgrades.
 
Brake Upgrade

The time came to upgrade the brakes. Had enough of being on edge while driving anticipating when less cautious drivers plan to pull out in front or cut me up :/

Started by removing the old master cylinder. All of the pipe fittings were so tight it was near impossible to remove without damaging the fittings. The old master cylinder was leaky, so had to clean up the firewall to remove light surface rust and greasy mess.

In order to fit the brake servo had to drill out a few of the existing mounting threads and increase the size of the centre hole to allow the servo to pass through. IMG_1244-1024x1024.jpg
IMG_1263-1024x768.jpg

The brake pedal was challenging to install. Had to lay upside down under the dash, could have done with extra joints in my arms to get in there. The pedal needed to be modified so it would not foul on the top of the pedal box. Ground a little of the top edge of the pedal. Would have been nice if I’d have spotted that before it was installed for the first time :/

One of the bolts on the back of the booster was a bit long, had to cut it. The boosters valve rod had to be shortened so the brake light would only stay on when the pedal is pressed. I guess these parts are generic and so need to modification to particular cars.
IMG_1245-1024x1024.jpg

With a new proportioning valve the brake lines need to be adapted to fit. Both front lines were extended, and the rear line needed a larger fitting. The kit came with steel pipes to connect the master cylinder to the proportioning valve. Unfortunately, they did not fit well and would not seal. So had to remake those lines so they would fit and seal.

The fluid warning sensor connector was soldered on to the loom replacing the original connector (which was not compatible with the original distribution block – useful right)

The master cylinder was bench bled and everything fitted.
IMG_1246-1024x1024.jpg
IMG_1261-1024x1024.jpg

Next up was installing the brake discs. The drums came off really easily, 4 nuts on the back and the main wheel nut. Had trouble unbolting the brake pipes that connect to the drums, so just cut them. Was able to remove the pipes by clamping a brake line spanner with a mole wrench. Then using a socket with an impact wrench on the other side. After a fair bit of time, they come loose.

The Wilwood kit was fantastic, everything fit together really well. The rotors, hubs, nuts etc all need to be assembled.  The brake lines to the callipers were spaced with a bit rubber hose and a zip tie.  This will prevent damage when turning the wheels.
IMG_1265-1024x768.jpg
IMG_1268-1024x768.jpg
IMG_1293-1024x768.jpg
IMG_1307-1024x768.jpg

All done, what a transformation. So much more control on the brakes, a massive amount of brake force. The car feels so much better to drive.
IMG_1311-1024x768.jpg
IMG_1339-1-1024x768.jpg

More photos here: http://www.mustang67.co.uk/brake-upgrade/


Export Brace

When I bought the car it came with an export brace.  It was not fitted to the car.  The issue was that the front struts were too close together by about 10mm. I guess that's why it wasn't fitted.
By lifting the car at different points + lots of levering I was able to get it to fit!

Its a huge improvement to the feel of the car.  When going around a corner it feels far more stable.  Much less wobbly :)
IMG_1355-1024x768.jpg

More photos here: http://www.mustang67.co.uk/export-brace/
 
Back
Top Bottom