

The "BMW" mylar overlays are available off eBay or PM me for a good source. They come 6 in a set so if you goof one up you have extra.
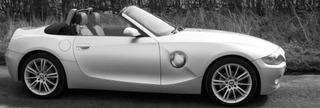
You can of course take the caliper off the rotor and hang from something. You do not want to pull on the brake line at any time. Brakes are your friend, don't mess with the lines, even SS brake lines. Some remove the caliper off the vehicle altogether and have the calipers powder coated. My method is to leave the caliper on the vehicle, prep and coat. For bandwidth sake I only took photos of the front calipers.
PUT YOUR VEHICLE ON JACK STANDS. THERE IS NO SUCH THING AS A SAFETY SHORTCUT. IF THE VEHICLE SLIPS AND YOU OR ANY PART OF YOU ARE UNDER YOU WILL BE SERIOUSLY HURT. MAKE IT SAFE OR BE STUPID.
Photo one is of the standard caliper that has had a light coat of black spray paint put on it. Doing this project takes a couple of days minimum so I had to pick a good time when you have enough time to complete the project. Cold damp weather doesn't help the curing process, so do this when it is at least 60F and a somewhat dust free environment.
TOOLS:
Part of this project was to work the face and part of the caliper to a smooth polished finish. Basically the caliper area that is in plain sight. I have a medium sized compressor that will run a die grinder. I used a course grit disc then medium grit disc to remove any paint rust and surface contaminants and remove all the castings lines, bumps and rough areas. These tools and products can be purchased from a shop that cater to body and collision shops. Don't know where one is, call a body shop and ask them were they buy their shop supplies and products. Pep Boys and Halfords etc., don't usually carry items like this. Brass brush is to help prep as is the grey scotchbrite pad. You'll want to wear a face mask because the dust from the caliper material is dirty and not good for your lungs. You already know what the various paint brushes are for.

I first worked the front of the calipers with the roughest disc first:


Although the photos don't show it very well, the surface is becoming much smoother:

Now you want to turn the steering wheel to allow as much frontal access to the caliper:

Clean the back area of the caliper with chemicals and a wire brush where possible to help coating adhesion:
I did not use the grinding discs back there. You just need to rough it up:

BEFORE coating only mix a small amount of paint (add the hardener) because this paint gets tacky very quickly.
Don't stop and start, use light coats I used 3 very light coats, allowing the coating to dry a few hours before adding the next.
Highly suggested: Use an adhesion promoter like this one before coating:

I used G2 for the calipers and duplicolor for the brake pad backing (this will peel away in a few months of regular driving so totally optional):

WERD: I prepped front & rear calipers before I painted. Trust me because if you mixed not enough paint it is easier to go back to the backside of the
rear caliper with the next mixed batch of paint. By the time the first coat is cured any paint (if you mixed too much) is hard as a rock and can't be
used anyway. Oh yeah, clean your brushes after use otherwise have several of the same size and type available for the next coat.


NB This is a tough, tedious, dirty, messy project. The success relies on your determination to be patient, follow instructions to the letter and perform the most outrageous preparation.
IMHO the results are worth it.
My caliper springs will be chromed soon.
Good luck...
Cheers,
Greg