

Hi there,
I'm both new to the forum and new to Z4's. My intro was here: http://www.z4-forum.com/forum/viewtopic.php?f=11&t=97728
Long story short, I bought a 2003 3.0i Z4, 71k miles for £1500 as a project car come doer-upper. Roof didn't work when I bought it.
Since I'm doing a few things as I progress I figured I'd write a post abit like a diary so I will over time be adding to this first post as I go.
I'll start with how the car looked when I bought it:
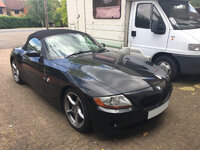
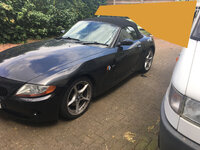
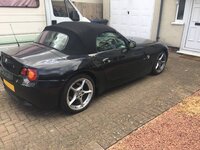
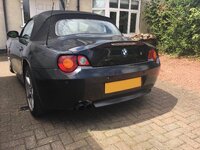
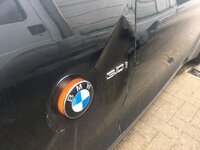
Stupidly I didn't take any pics of the interior before I started, but it has the cream interior which is filthy!! It also has the (IMO) horrible brushed metal trim.
So, when I bought the car, the roof wasn't working. After some investigating I had a two-fold issue whereby the microswitch was dodgy AND the top roof motor that controls the latches was buggered. I didn't take pics (I know, bad start!!) of that either, but that was about an hours job. Mostly because the bolts were f*****g tight!!! But swapped it out, and roof is now working
The first thing I wanted to sort out was the horrible wheels! I was going to get them refurbished but then came across a freshly refurb'd set, complete with new tires so made more sense to buy them, and just sell the ones I had on it.
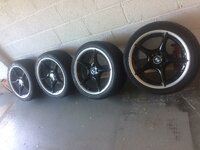
They arrived today, got them fitted and I personally think they look awesome! (Just need to wash and polish the car to match)
Here's what they look like fitted:
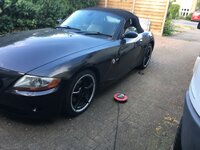
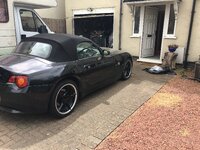
The next thing was I wanted to fit my Double Din Pioneer SPH-DA120. Let's not debate who prefers single or double, or that it doesn't match the car... it's personal preference & I wanted double din
So first thing was to start designing something so that I could 3D Print a fascia.
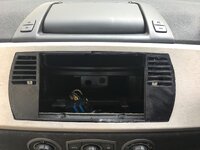
The thread for the design progress is here: http://www.z4-forum.com/forum/viewtopic.php?f=2&t=97733
Whilst I'm still working on the design and getting things lined up etc, I decided today that I would investigate any mods that would be needed in the car to fit the new double din.
So, off the bat it was obvious there wouldn't be enough depth for a double din due to the vents. That means it's cutting time!!

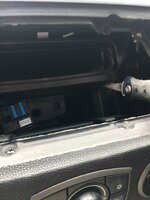
Eventually, after an annoying 10 mins I managed to chop out this block...

I'm fortunate in that I have the sat nav set up - this meant I could get to the vent to chop it back easier than if I'd had to go in from the front with a dremel.
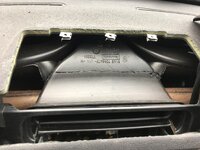
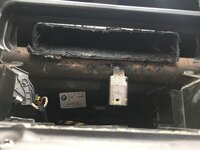
After chopping the vent back, I'm now left with enough depth to fit the head unit!
Update 1: 17th June 2017
Today I decided to try my hand at vinyl wrapping! I've never attempted this before in my life so this was to be an experience. A quick look at a couple of youtube vids & I was ready to go.
I bought myself some 6D Carbon Fibre vinyl wrap from eBay: www.ebay.co.uk/itm/381117191869 - It arrive today so I got to work
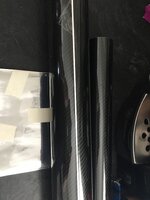
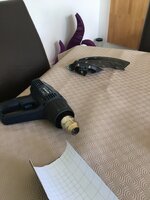
Door handles:
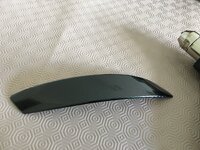
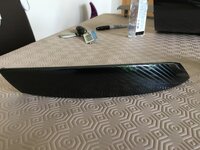
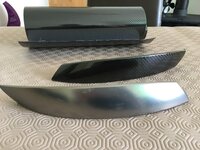
Switch(es):

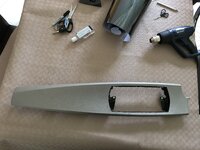
And of course the main trim:
Before:
After:
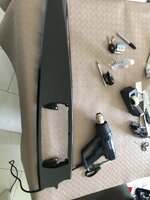
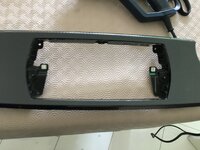

The pictures don't do the finish justice! They look awesome (IMO) in the carbon wrap! I'm very happy with results
--
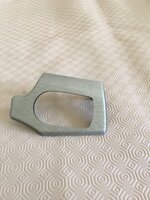
to be done tomorrow!
Update 2: 19th June 2017
Like an idiot, I leant on the heat gun when reaching across the table ha!
Anyway, finished my wrapping and got the bits installed this morning. Here's the final result:
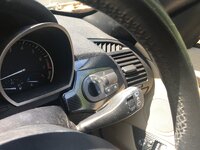
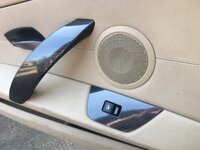
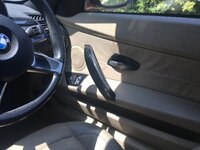
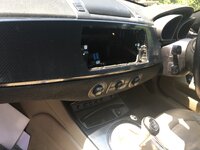
You will have to excuse my crappy photo skills. As you can see I did the door handles, the window switches, the center console, and main dash trim.
Anyone considering wrapping for the first time, I'm gonna say give it a go. My results aren't perfect as this was my first time however, I am still happy with results enough to refit the parts
This was the main youtube video I watched to get an idea on what to do: www.youtube.com/watch?v=hRUvucGdJ_c
Update 3: 25th June 2017
Another update now, so I went and collected my replacement passenger side front wing. Changing the wing was a mission and a bloody half let me tell you!! The changing of the wing itself is actually fairly straight forward - but I had 3 seized bolts All of which the torx head appeared to be already rounded!!! So out came the dremel to cut a nice slot in the middle to get a large flat headed screw driver into. With no joys there, I used a pair of vice grips clamped to the side of the screw driver handle - forming a kind of T piece, but on one side only. So an inverted L I guess. Anywhere with lots of abuse & cursing I FINALLY managed to get them all off.
First of all, you need to take the side skirt off. This is fairly easy. I had 2 x 8mm nuts and lots of plastic expanding retaining rivets. I would say it's worth spending a few £ and getting a pack of these: http://www.ebay.co.uk/itm/20x-BMW-Expanding-Rivets-Plastic-Trim-Clips-for-bumpers-sills-skirts-covers/370931120194 because those b*****ds can be a pain to get out and I found most broke or just squished too much. And for the sake of a few £ I felt better putting new ones back in place. Once they're out of the underside of the side skirt, it literally just pulls off. I went gently from back to front and came off with reasonably light effort. Wing next....
There's 3 x T30 torx screws along the top, and a 10mm nut just beyond the bonnets end, infront of the windscreen:
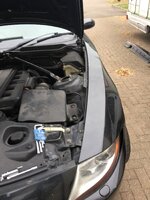
There's 2 x 8mm bolts in the wheel liner, 1 x T30 Torx on the INSIDE of the door
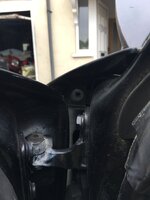
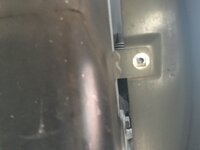
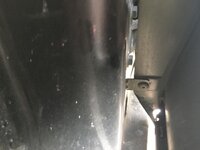
and then 2 x T30 on the INSIDE of the wing itself. They were not fun to get to - especially when one of the 2 was amongst the ones pre-rounded! Getting a dremel into that space was a right PITA.
TOP:
BOTTOM:
Got there in the end though!
Next on the list was putting my rear top plastic cover back on. The manual roof release was missing a spring and so the handle sat wonky. I didn't like this! I took it when I was wrapping my center console, but only just got around to sorting a spring. Once I'd made a make shift spring by destroying a clothes peg, I realised that one of the hooks had actually broken. It was held on by luck I think, but only took me 30 seconds of trying to glue it for it to fall off!!

Well, that's there the 3D Printing comes in handy again 8) Measure the hook, drew it up in 123D Design, printed it, then used JB Weld Plastic Bonder Epoxy to glue it in place. Works perfectly now, woohoo!!
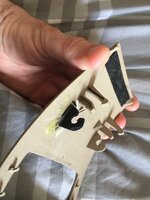
(I might have gone a little overboard with the epoxy! :roll: )
I borrowed a spring clip from the - whatever it's called - center / arm rest that's not an arm rest cover thing to test with, perfect-a-mondo
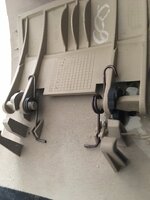
The last update for now, was replacing the side markers for clear ones, and changing the badges. I am changing the badges all around and will add photos in the next few days. For now though, here are the pics of the side marker side by side...
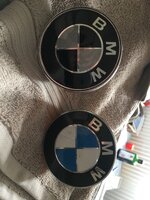
New on "top" and old on "bottom"
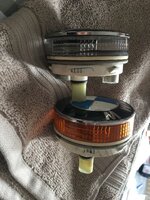
In case you're wondering, I bought my clear side marker/indicator from bmw_direct on eBay for £21.80. I only bought the one, as the side wing I bought came with one already as it was off a 2006 model.
http://www.ebay.co.uk/itm/BMW-Genuine-Additional-Turn-Signal-Indicator-Lamp-Light-White-63137165734/172364896177
Then it was back to working on the Double Din Fascia...
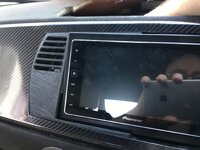
More details of which are in my "Double Din Fascia" thread http://www.z4-forum.com/forum/viewtopic.php?f=2&t=97733
I'm both new to the forum and new to Z4's. My intro was here: http://www.z4-forum.com/forum/viewtopic.php?f=11&t=97728
Long story short, I bought a 2003 3.0i Z4, 71k miles for £1500 as a project car come doer-upper. Roof didn't work when I bought it.
Since I'm doing a few things as I progress I figured I'd write a post abit like a diary so I will over time be adding to this first post as I go.
I'll start with how the car looked when I bought it:
Stupidly I didn't take any pics of the interior before I started, but it has the cream interior which is filthy!! It also has the (IMO) horrible brushed metal trim.
So, when I bought the car, the roof wasn't working. After some investigating I had a two-fold issue whereby the microswitch was dodgy AND the top roof motor that controls the latches was buggered. I didn't take pics (I know, bad start!!) of that either, but that was about an hours job. Mostly because the bolts were f*****g tight!!! But swapped it out, and roof is now working
The first thing I wanted to sort out was the horrible wheels! I was going to get them refurbished but then came across a freshly refurb'd set, complete with new tires so made more sense to buy them, and just sell the ones I had on it.
They arrived today, got them fitted and I personally think they look awesome! (Just need to wash and polish the car to match)
Here's what they look like fitted:
The next thing was I wanted to fit my Double Din Pioneer SPH-DA120. Let's not debate who prefers single or double, or that it doesn't match the car... it's personal preference & I wanted double din
So first thing was to start designing something so that I could 3D Print a fascia.
The thread for the design progress is here: http://www.z4-forum.com/forum/viewtopic.php?f=2&t=97733
Whilst I'm still working on the design and getting things lined up etc, I decided today that I would investigate any mods that would be needed in the car to fit the new double din.
So, off the bat it was obvious there wouldn't be enough depth for a double din due to the vents. That means it's cutting time!!
Eventually, after an annoying 10 mins I managed to chop out this block...
I'm fortunate in that I have the sat nav set up - this meant I could get to the vent to chop it back easier than if I'd had to go in from the front with a dremel.
After chopping the vent back, I'm now left with enough depth to fit the head unit!
Update 1: 17th June 2017
Today I decided to try my hand at vinyl wrapping! I've never attempted this before in my life so this was to be an experience. A quick look at a couple of youtube vids & I was ready to go.
I bought myself some 6D Carbon Fibre vinyl wrap from eBay: www.ebay.co.uk/itm/381117191869 - It arrive today so I got to work
Door handles:
Switch(es):
And of course the main trim:
Before:
After:
The pictures don't do the finish justice! They look awesome (IMO) in the carbon wrap! I'm very happy with results
--
to be done tomorrow!
Update 2: 19th June 2017
Like an idiot, I leant on the heat gun when reaching across the table ha!
Anyway, finished my wrapping and got the bits installed this morning. Here's the final result:
You will have to excuse my crappy photo skills. As you can see I did the door handles, the window switches, the center console, and main dash trim.
Anyone considering wrapping for the first time, I'm gonna say give it a go. My results aren't perfect as this was my first time however, I am still happy with results enough to refit the parts
This was the main youtube video I watched to get an idea on what to do: www.youtube.com/watch?v=hRUvucGdJ_c
Update 3: 25th June 2017
Another update now, so I went and collected my replacement passenger side front wing. Changing the wing was a mission and a bloody half let me tell you!! The changing of the wing itself is actually fairly straight forward - but I had 3 seized bolts
All of which the torx head appeared to be already rounded!!! So out came the dremel to cut a nice slot in the middle to get a large flat headed screw driver into. With no joys there, I used a pair of vice grips clamped to the side of the screw driver handle - forming a kind of T piece, but on one side only. So an inverted L I guess. Anywhere with lots of abuse & cursing I FINALLY managed to get them all off.First of all, you need to take the side skirt off. This is fairly easy. I had 2 x 8mm nuts and lots of plastic expanding retaining rivets. I would say it's worth spending a few £ and getting a pack of these: http://www.ebay.co.uk/itm/20x-BMW-Expanding-Rivets-Plastic-Trim-Clips-for-bumpers-sills-skirts-covers/370931120194 because those b*****ds can be a pain to get out and I found most broke or just squished too much. And for the sake of a few £ I felt better putting new ones back in place. Once they're out of the underside of the side skirt, it literally just pulls off. I went gently from back to front and came off with reasonably light effort. Wing next....
There's 3 x T30 torx screws along the top, and a 10mm nut just beyond the bonnets end, infront of the windscreen:
There's 2 x 8mm bolts in the wheel liner, 1 x T30 Torx on the INSIDE of the door
and then 2 x T30 on the INSIDE of the wing itself. They were not fun to get to - especially when one of the 2 was amongst the ones pre-rounded! Getting a dremel into that space was a right PITA.
TOP:
BOTTOM:
Got there in the end though!
Next on the list was putting my rear top plastic cover back on. The manual roof release was missing a spring and so the handle sat wonky. I didn't like this! I took it when I was wrapping my center console, but only just got around to sorting a spring. Once I'd made a make shift spring by destroying a clothes peg, I realised that one of the hooks had actually broken. It was held on by luck I think, but only took me 30 seconds of trying to glue it for it to fall off!!
Well, that's there the 3D Printing comes in handy again 8) Measure the hook, drew it up in 123D Design, printed it, then used JB Weld Plastic Bonder Epoxy to glue it in place. Works perfectly now, woohoo!!
(I might have gone a little overboard with the epoxy! :roll: )
I borrowed a spring clip from the - whatever it's called - center / arm rest that's not an arm rest cover thing to test with, perfect-a-mondo
The last update for now, was replacing the side markers for clear ones, and changing the badges. I am changing the badges all around and will add photos in the next few days. For now though, here are the pics of the side marker side by side...
New on "top" and old on "bottom"
In case you're wondering, I bought my clear side marker/indicator from bmw_direct on eBay for £21.80. I only bought the one, as the side wing I bought came with one already as it was off a 2006 model.
http://www.ebay.co.uk/itm/BMW-Genuine-Additional-Turn-Signal-Indicator-Lamp-Light-White-63137165734/172364896177
Then it was back to working on the Double Din Fascia...
More details of which are in my "Double Din Fascia" thread http://www.z4-forum.com/forum/viewtopic.php?f=2&t=97733

 I thought I'd write it as I went along so others can read my progress and maybe decide to give something a go on their own, or just enjoy the read! More to come once I have time to fit my passenger wing and also finalise my double din fascia. I'm also trying to design something I can insert into the cut fan duct to redirect air either side of the stereo fascia I'm making