Plastics around handbrake.

.adam.

Member
The plastics underneath the handbrake are looking tatty on my car. I've just cleaned the soft touch plastic coating off from around the window switches which has made them look way better, but I want sure if the handbrake trim was painted or had the soft touch plastic coating?
Has anyone renovated this?
 
.adam. said:
The plastics underneath the handbrake are looking tatty on my car. I've just cleaned the soft touch plastic coating off from around the window switches which has made them look way better, but I want sure if the handbrake trim was painted or had the soft touch plastic coating?
Has anyone renovated this?

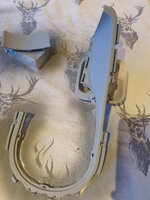
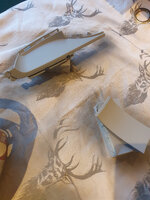
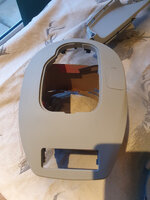
I’m in the process of spraying mine, as I’ve had to take it all apart to fit new leather-covered centre console trim. First off, taking the trim off is a bit of a nightmare. It feels like you’re taking half the car to bits. There are 27 screws holding in the trim from underneath :| so it’s not coming out without the whole plastic section being removed! To get that out, the rear storage compartment needs to come off! Satisfying when it’s finally done though.

The trim pieces are just standard interior painted plastic. I’m going matt black with mine. Few pics, just in primer at the moment…

20230805-204101.jpg

20230805-204104.jpg

20230805-204057.jpg
 
That sounds a pain! I tried taking off the rear storage compartment door last week, but after some pulling got scared of breaking something and gave up! I'll have to have another go, as there are a few jobs I want to do that need it off.
 
.adam. said:
That sounds a pain! I tried taking off the rear storage compartment door last week, but after some pulling got scared of breaking something and gave up! I'll have to have another go, as there are a few jobs I want to do that need it off.

If it's purely to take the rear storage compartment off, the door doesn't need to be removed. I was following the 'pelican parts' guide, which says it does, but after seeking advice from Rob (Usel) I managed to get to the screws underneath using a screwdriver with an extension piece, holding a torx bit :thumbsup:
 
Back
Top Bottom