
You are using an out of date browser. It may not display this or other websites correctly.
You should upgrade or use an alternative browser.
You should upgrade or use an alternative browser.
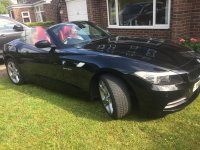
New to me
- Thread starter maxman
- Start date

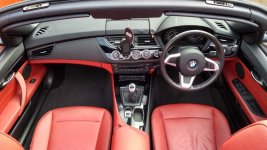
maxman said:..... centre console trim has been cleaned with something aggressive ,so needs sorting.
.....
Looks nice

Have you considered a wrap? Did mine last year and found it interesting to do, but I enjoyed the experience. So much so that I'm changing it at the moment for a different style.
Black is the full dash panel wrap I did last year and the brushed steel is the new (not yet finished) version.
Attachments
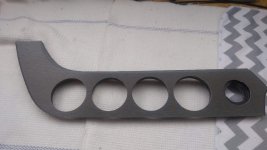
Here's a video I did for installing the Android screen but if you jump to 3:30 then it'll show you how to remove the centre console and the main dash panel..... https://www.youtube.com/watch?v=VC9VFJBDFQM&t=
To remove the light switch panel you need to pop the door jamb plastic panel at the end and then remove the screw, you'll see it once the panel is off. The the light switch surround comes off with metal pop clips.
To remove the door cards, take a look at this video...
https://www.youtube.com/watch?v=LnyP_-vs3T4&t=
Once you've got your panels off the car you'll need to separate the two dash panels. These are held together by melted plastic rivets, which can be drilled out. You would need to make sure that they are glued back in place to form a good strong bond. When I did mine the first time I used a 2 part epoxy and some tile spacers with the two opposing parts cut off (basically a straight peg) and glued in place first onto one side and then once set the two halves put together and more glue put into the holes and all secured together with clamps.
I bought enough to do mine twice, but this time around I've bought enough to do it three times over. It's not very expensive (this time cost me about £18) but it is worth buying more than you need because you'll end up doing some panels more than once.
To remove the light switch panel you need to pop the door jamb plastic panel at the end and then remove the screw, you'll see it once the panel is off. The the light switch surround comes off with metal pop clips.
To remove the door cards, take a look at this video...
https://www.youtube.com/watch?v=LnyP_-vs3T4&t=
Once you've got your panels off the car you'll need to separate the two dash panels. These are held together by melted plastic rivets, which can be drilled out. You would need to make sure that they are glued back in place to form a good strong bond. When I did mine the first time I used a 2 part epoxy and some tile spacers with the two opposing parts cut off (basically a straight peg) and glued in place first onto one side and then once set the two halves put together and more glue put into the holes and all secured together with clamps.
I bought enough to do mine twice, but this time around I've bought enough to do it three times over. It's not very expensive (this time cost me about £18) but it is worth buying more than you need because you'll end up doing some panels more than once.


Nice looking car
I drove my first E89 today funnily enough - they do feel a generation different to the E85 vintage and then some. Lovely cars.
I drove my first E89 today funnily enough - they do feel a generation different to the E85 vintage and then some. Lovely cars.
Timmyboybunter said:Nice looking car
I drove my first E89 today funnily enough - they do feel a generation different to the E85 vintage and then some. Lovely cars.
I haven't driven it far enough to make a fair comparison .The tyres are crap runflats which will be changed this week for non runflats.
Looks great Alan..enjoy mate
dont expect to get anywhere near that under normal conditions... I get low 30s, and I'm not really a boy racer!maxman said:On the run back home it ave 39 mpg,doing a steady 70 where possible

MICHAELROSCO
Member
Looks good enjoy