Headlight repair kit- guidance

bigwinn

Elite
 Lincoln UK
Site Supporter
Hi all

Just got my headlight repair kit through to fix my wobbly offside

No instructions so asking for your guidance- is it fairly simple?

I'm thinking:

- follow the guide to get the front bumper off
- make sure the light alignment is recorded on the garage door/wall
- light out and apply the repair kit

Anyone done this?

Cheers

Stuart
 
Can't help I'm afraid, but as wifey's has a bit of wobble on the nearside then I shall follow your work with interest.
 
bigwinn said:
I'll post up a How To- weather looks permitting this weekend!

:D

I'm liking the fact that you have turned up and are doing all the jobs I was thinking of, so I can nick all the info :thumbsup:
 
enuff_zed said:
bigwinn said:
I'll post up a How To- weather looks permitting this weekend!

:D

I'm liking the fact that you have turned up and are doing all the jobs I was thinking of, so I can nick all the info :thumbsup:

I'm my own worst enemy too as I keep going and looking for faults/preventative maintenance to do

Still gives the missus something to be unhappy with
 
bigwinn said:
Hi all

Just got my headlight repair kit through to fix my wobbly offside

No instructions so asking for your guidance- is it fairly simple?

I'm thinking:

- follow the guide to get the front bumper off
- make sure the light alignment is recorded on the garage door/wall
- light out and apply the repair kit

Anyone done this?

Cheers

Stuart

I have questions
If you buy the repair kit does it cover all the brackets on the 1 headlamp or do you buy a kit for each bracket
Thanks
 
markplant said:
bigwinn said:
Hi all

Just got my headlight repair kit through to fix my wobbly offside

No instructions so asking for your guidance- is it fairly simple?

I'm thinking:

- follow the guide to get the front bumper off
- make sure the light alignment is recorded on the garage door/wall
- light out and apply the repair kit

Anyone done this?

Cheers

Stuart
I have questions
If you buy the repair kit does it cover all the brackets on the 1 headlamp or do you buy a kit for each bracket
Thanks

Hi bud

It’s a kit for left or right

£21 from eBay
Branded Hella
 
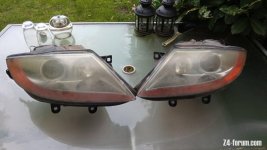
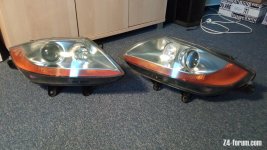
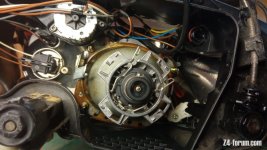
I'm in the middle of refurbing my headlights and noticed the bulb holder on the driver side was loose.
Haven't noticed any beam wobble when driving but I'll be securing it with a bit of lead wire twisted around the neck to secure it in place. Hoping it doesn't throw the beam pattern off too much.
And I figured out why those fekin igniters don't go back on as easily as they come off sometimes; there's a lockout tab that has to be in the upright position before you can insert the cable and offer them up to the bulb holder. Took me an hour to figure that out! I'll never get that time back. lol
:roll:

Lenses refurb came out a treat tho, Used the 3M kit and an intermediate 1000 and 2000 grit stage before polishing...

IMG_20201012_182608.jpg
IMG_20201016_183649.jpg
 
It’s only the 3rd and 4th tab that is unique, the one in the far left and far right corner (of each light).

The two (1st and 2nd) tab that sit under neath the light are the same. And can be used on either left or right headlight.
 
Chris_D said:
And I figured out why those fekin igniters don't go back on as easily as they come off sometimes

What do you mean mate? Are these for xenon lights?
 
kis said:
Chris_D said:
And I figured out why those fekin igniters don't go back on as easily as they come off sometimes

What do you mean mate? Are these for xenon lights?
Yeah. The igniter for the xenons wouldn't go back on the holders for somereason. Figured out that there's some kind of elaborate plastic lockout tab that has to be in position before you can mount back on the holders. It's in the upright position inside the cable connector when you can refit without issue. You have to line up an indent in a plastic internal collar for the lockout to re-appear in the connector. PITA
 
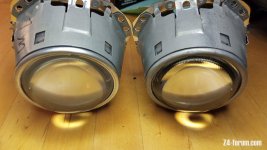
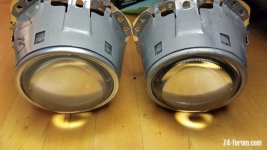
Internal lenses always worth a polish too.
Cleaned vs uncleaned. Can u tell which is which?
IMG_20201014_172510.jpg
 

Attachments

  • IMG_20201014_172510.jpg
    IMG_20201014_172510.jpg
    102.9 KB · Views: 403
Chris_D said:
Internal lenses always worth a polish too.
Cleaned vs uncleaned. Can u tell which is which?
IMG_20201014_172510.jpg

Are the lenses easy to get to once lamps are out?

Also drying the other side out it’s got condensation that’s harder to get rid of than covid
 
bigwinn said:
Chris_D said:
Internal lenses always worth a polish too.
Cleaned vs uncleaned. Can u tell which is which?
IMG_20201014_172510.jpg

Are the lenses easy to get to once lamps are out?

Also drying the other side out it’s got condensation that’s harder to get rid of than covid
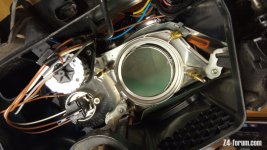
No, they're anything BUT easy to get out!
4 nylock nuts holding the lens frame in place on long threaded bolts.
You need a pair of long needle-nosed pliers to loosen enough in order to get a 9mm socket over the long bolt and loosen the rest of the way.
I set aside 2 hours to dismantle. It's taken me 2 days to get everything done inbetween other things!
Be careful with your bumper carriers. I bought some spares but managed not to break mine. Although I need to re-mount the bumper.

Before lens frame removal
IMG_20201014_155509.jpg

After
IMG_20201014_164306.jpg
 
Back
Top Bottom