Forum members z4m comes in for the WORKS..... Track pack PPFM- Video added on final page

Beedub

Lifer
 Sutton Coldfield
I did speak to the customer / forum member who's car has been in my shop for the last week...... Got to be my fave job of the year so far.

The spec sheet for this car is absolutely MASSIVE with the customer clearly embarking on a mission for a very special car. Aaron contacted me a good few months ago.... weve followed each other for many years on the socials and he came for some work 3.5years ago. Fast forward to more recent times and his car had unfortunately picked up some light damage to the bumpers, and wing.... So at this point he duly gave away a leg, an arm and some kidneys and pretty much had the whole car repainted..... Thats were we came in!

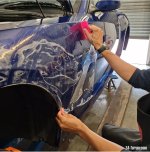
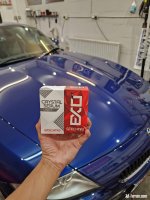
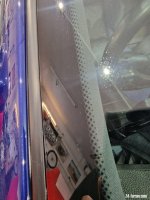
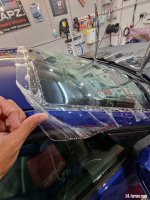
our spec sheet was to perfect it, protect it..... the paintwork finishing was less than ideal from the body-shop so we set about correcting it to perfection then , with over 15 metres of sunteks ULTRA ppf... With the age of this car the patterns from these era were absolutely terrible, many shops wont touch them or even have the knowledge / skillset to make this on the car ( as a few owners from this very forum have called and asked my advice on) , as one of very few official suntek ppf centres in the UK meaning i get sent all the difficult stuff LOL, ive been working on e85 / e86 PPF for a few years on my own car with a view of getting some solid ppf stuff available for this platform! Starting with my own z4m which i PPF'd last year and documented in this forum, i got the first lot down and it wasn't perfect but it was bloody GOOD. but i now had a base and most importantly the car was protected!

with Aarons car now finished! i thought id bring you all along for a journey of perfecting and protecting another z4m ( and using my updated patterns and techniques to properly PPF this vehicle ) , a platform that's extremely close to my heart, and being able to do this for work felt pretty special, i LOVED it! so.... lets do it!

FYI - ive also recorded the full job for YT, which i cant wait to edit!

for those interested, thanks for being here!

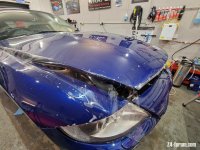
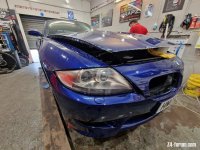
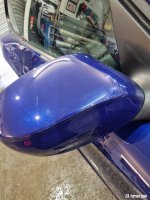
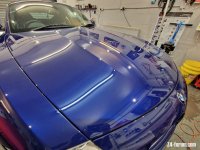
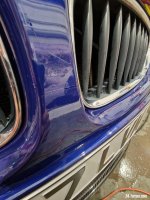
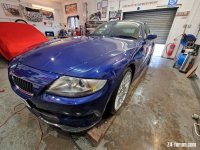
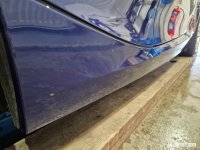
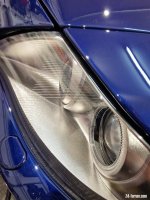
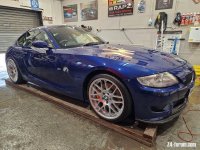
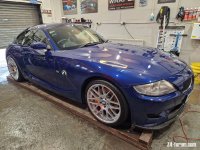
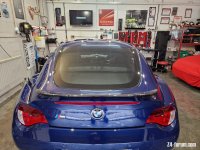
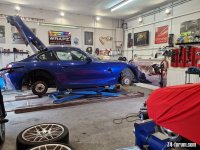
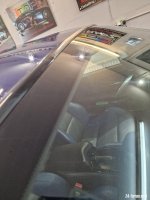
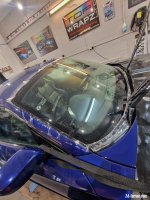
so here was the start point!!

EDIT 29/12/2023 - VIDEO UPLOAD https://youtu.be/3atgf_hlkf8?si=uCxZ-r3-vwSWNCEZ
 

Attachments

  • IMG_20230724_175805_845.jpg
    IMG_20230724_175805_845.jpg
    217.2 KB · Views: 5,739
for anyone that uses instagram, here's abit of a intro into the car....

https://www.instagram.com/reel/CvQETrKo3n2/?utm_source=ig_web_copy_link&igshid=MzRlODBiNWFlZA==
 
With the fresh paint now looking as it should , time to work on those pesky PPF pieces and get them as neat as possible .... Theirs alot of modifications to make to the bumper piece , in here is the head light units , fang pieces , wash jet covers , and the top section of the grille which is a split piece design where I'll butt join it to the main piece creating easily replaceable sections.
 

Attachments

  • 20230724_152924.jpg
    20230724_152924.jpg
    216.9 KB · Views: 5,707
cheers fellas! i thought this may be of interest!

ok so part of the spec sheet for this one, aaron asked for me to cover the screen with our windscreen specific dyno flex, this is extremely popular for our commercial limo clients, rare exoitc cars, an screen NLA, our cars fall in the rare car and last time i checked these original screen as on national back order.... hes got the original glass in this car ( pretty rare in itself) and he wants to keep it this way! its abit pot-marked but its done damn well over the years and is a pretty important piece of this cars history , this screen has the original etchings on it and all the original BMW stickers in the corners! its COOL, lol.

so.... first things first measure the film which is pretty difficult to work with as its TPU plastic. and its THICK, will easily withstand a ball bearing shot at it, lol! difficulty is the z4 screen is very curved, so ive got to pull it enough to make it sit flat but NOT to much that it distorts the film , not an easy balance i assure you! luckily, my shop has one of the highest install rates for this stuff so ive learned some expensive mistakes!

Note all these are HAND cut to each vehicle so it takes some real skilled knife work, you can see the consistent super clean gap across the glass work. Once dried this is will utterly invisible, it also hid some of the age related scratches in the screen, its 99.9% UV resistant so will stop the plastics getting battered by the sun and the car will feel a lot cooler for the one day of heat we get. Its highly hydrophobic so minimal wiper use is needed. With a car of this type of use i expect a GOOD 4 years from this film, maybe longer before it will need replacement. once cured this stuff is optically CLEAR, and the first time a rock bounces off it, you'll thank jesus from above!
 

Attachments

  • 20230724_145803.jpg
    20230724_145803.jpg
    151.5 KB · Views: 5,659
  • 20230724_145754.jpg
    20230724_145754.jpg
    157.5 KB · Views: 5,659
  • 20230724_143355.jpg
    20230724_143355.jpg
    226.6 KB · Views: 5,659
  • 20230724_143411.jpg
    20230724_143411.jpg
    196.5 KB · Views: 5,659
heres a video of the stretching process.. ( the workshop is solar heated to 25 degrees for optimum film behaviour)

https://www.instagram.com/reel/CvJfDP-Ir4C/?utm_source=ig_web_copy_link&igshid=MzRlODBiNWFlZA==

for those not on instagram , here a YT link for the same clip

https://youtube.com/shorts/8XnLy29oSuI?feature=share


Note the pattern in which i remove the slip solution, these spreads the tension so i can even it out on the edges before trimming
 
Wing / fenders PPF

so the wings on this car are huge! not an easy piece to get right.... the patterns available suck and non of them take into account the cutout for the indicators. Particular difficult on this car was fresh paint and the ///M badge on the side meaning i was NOT keen to remove the badge, i cant tell you how many times i see damaged paint removing badges stuck on fresh paint, it often just doesn't have the integrity of of oem so even my PPF work needs to be careful and thought out.

so i lock it to the back edge, stretch forward, leaving the back edge exposed so i can keep it moving with slip solution.... , tack the bottom creating a bridge where i can keep introducing slip. With my hot water tanks right next to me i use boiling hot water to tack, zero alcohol as this minimised my adhesive marks, then bring the water to the wheel line trying hard to keep my half arch and fold in where possible.... on my car i hand cut this back on this one i tried to avoid this as you adding another human area for a jagged cut line. The front edge needs to be trimmed by hand, the bottom edge and then cut the badge and indicator sections but hand.... Turned out pretty damn good!
 

Attachments

  • SmartSelect_20230730_112116_Gallery.jpg
    SmartSelect_20230730_112116_Gallery.jpg
    207.2 KB · Views: 5,535
short clip of the wing being worked down.

instagram
https://www.instagram.com/reel/CvM0Q9HI0XJ/?utm_source=ig_web_copy_link&igshid=MzRlODBiNWFlZA==

youtube
https://youtube.com/shorts/c1iLAIhPLI0?feature=share
 
Bonnet -

relatively simple piece just LARGE...... very large as we all know... trick to getting this down clean is LOTS of solution, a soft squeegee to BEND over the ///m humps in the hood and , work quickly.... Dry the edges overnight and wrap round , any left over water bubbles will dry in time, rule of thumb is 20P piece or smaller will go, anything larger, use a needle to get it out. The corrected paint with PPF over the top is a different type of glow and gloss.... Utterly flawless , with the self healing qualities, its a no brainer on what i see as a genuine modern classic.
 

Attachments

  • 20230726_150223.jpg
    20230726_150223.jpg
    212.3 KB · Views: 5,478
  • 20230726_151459.jpg
    20230726_151459.jpg
    215.2 KB · Views: 5,478
  • 20230727_153832.jpg
    20230727_153832.jpg
    181.8 KB · Views: 5,478
the final result

the final sections of the car were ceramic coated using CSL black 5 year coating, the wheels were coated with C5 wheel armour , the exhaust tips polished and the calipers painted orange ( this looked fantastic ) and the car was handed over to a pretty happy client. Nothing is perfect and my PPF isn't in this case but i can say its extremely neat and looked like proper patterns from a modern era by the time i was done! The car was left with a near flawless finish that's properly protected for the foreseeable allowing the owner to just drive and enjoy and keep perfecting !

heres some up close pics of the edge work, and the added bodykit piece from skyer.... the paintwork was optically pretty much perfect after it left. With the self healing front end shes ready to hit the road!!
 

Attachments

  • 20230727_153810.jpg
    20230727_153810.jpg
    165.3 KB · Views: 5,436
  • 20230727_153823.jpg
    20230727_153823.jpg
    197.1 KB · Views: 5,436
  • 20230727_153832.jpg
    20230727_153832.jpg
    181.8 KB · Views: 5,436
  • 20230727_153843.jpg
    20230727_153843.jpg
    176.4 KB · Views: 5,436
  • 20230727_153857.jpg
    20230727_153857.jpg
    229.4 KB · Views: 5,436
  • 20230727_153919.jpg
    20230727_153919.jpg
    140.5 KB · Views: 5,436
  • 20230727_153933.jpg
    20230727_153933.jpg
    193.2 KB · Views: 5,436
  • 20230727_154103.jpg
    20230727_154103.jpg
    228.3 KB · Views: 5,436
  • 20230727_154120.jpg
    20230727_154120.jpg
    249.1 KB · Views: 5,436
  • 20230727_154146.jpg
    20230727_154146.jpg
    241.2 KB · Views: 5,436
couple more
 

Attachments

  • 20230727_154640.jpg
    20230727_154640.jpg
    129.1 KB · Views: 5,393
  • 20230727_154158.jpg
    20230727_154158.jpg
    210.4 KB · Views: 5,393
  • 20230727_154103.jpg
    20230727_154103.jpg
    228.3 KB · Views: 5,393
Having once again spent far too long for just a semi-decent correction, ppf is starting to sound better and better. If/as/when I decide to do it, you can have the (dis)pleasure of correcting the black paint and doing the ppf :lol:

Because of the bloody colour, I also started mulling over a Sepang respray as ruby black is such a pita to maintain.
 
Back
Top Bottom