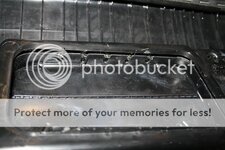
Recently I bought some red M-Sport seats with matching door cards. The seat were quite saggy and fixed with a hot air gun (among other things). I tried the hot air gun on the door cards as they weren't perfect either. Whereas the seats came up a treat, the hot air melted the arm rest on the door...

I tried filling the holes a special leather filler and colouring with scuff masters - the fill went okay, but was too smooth. In this pic the Scuffmaster was too dark - had I not decided to do this swap I'd have taken it off and re-cloured.
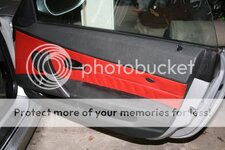
Peddy kindly sent me his damaged door card, where only the leather insert was damaged. As this was a first time for me doing this I decided to start with this one first, in case something went wrong. Although the sequence below follow chronologically I have used pics from both door cards.
First, I stripped the door card of the handles, switches and speaker.
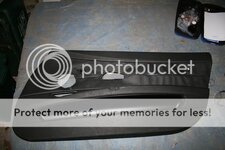
Next, used a Dremel to cut around the inside edge on the back of the door card...
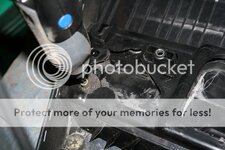
This throws up a lot of dust and the occassion shard, so mask and glasses / goggles are a must. Also, the Dremel can't be on too fast a speed or it will melt the plastic.
There are 4 sections on the back of the door card, I cut all except the section where the airbag deploy - cannot get to the bonding material.
By this stage I had freed all of the leather insert from the frame of the door card, except around the airbag hatch. This next bit took a leap of faith / little stupidity
:!: This may look like applying brute force, but I worked slowly to avoid damage.
First, I peeled back the lather insert as far as possible (it bends easily), took a flat head crew driver and jammed it into one of the top corners still attached.
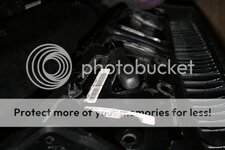
Once the screwdriver was stuck in there, I twisted until I heard a crack - the bonding material splitting, it is strong but quite brittle. Once having made an opening, I worked the screwdriver slowly across the top. Once there was an opening, holding the door card frame I slowly peeled back the leather insert, again with more cracking...
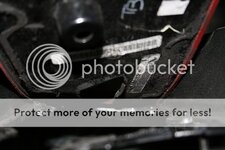
Going slowly until it reaches the other end...
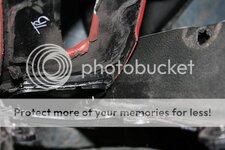
Once this was off, the first part was done.
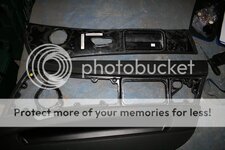
Then the other door card, giving a collection of parts...
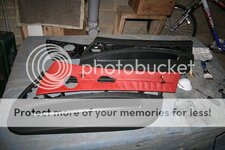
Reassembly. Because of the way that the two parts are originally bonded together they didn't come apart evenly on each door card. This I suspected woudld make using an adhesive a little hit and miss as there wasn't a consistent contact point all round. So, I went with plastic welding where possible - very strong and very short setting time. The other option would have been a strong plastic filler, something which came be built up - bumper filler should do a good job.
I then trim any loose ends from the door card frame and leather insert that I wanted to keep. Next bit, because it is hard to get to and weld, I glued the section around the airbag hatch and pressed the leather into place, putting some weight onto it while it set.
Then plastic welded the parts that can be seen - I did this using an electric soldering iron with strips of ABS plastic to use as solder and to build up any gaps.
Worked all the way round to get a solid fix...
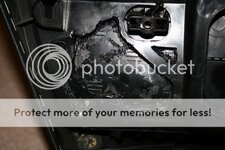
A but belt and braces, but I then also sport welded around the airbag hatch, where I could see the join...
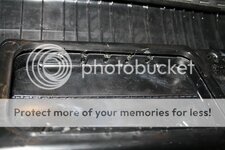
Once that's done. Job done. The back of the butchered door card...
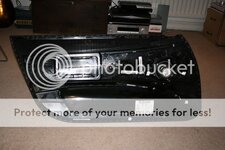
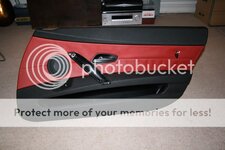
...and the front...
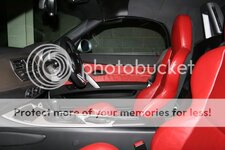
Then refit to the car...
The whole process was a lot simple than I was expecting. Cutting the donor door card too about 1hr30m. The second one, once I'd got the technique down and stopped checking my progress every 5 minutes, all was done in 45m
The plastic welding took a little while, but that was just trying to be thorough. I couldn't figure out why BMW had bonded the damn leather insert on instead of just using clips (as some I've seen in the past), I am guessing, but I think it is so the leather insert holds enough for the airbag hatch to rip through it if the airbag fires.
Fine job, delete my eBay saved searches for door cards
Just hope when I take the car for a drive there is not rattling or creaking.
I tried filling the holes a special leather filler and colouring with scuff masters - the fill went okay, but was too smooth. In this pic the Scuffmaster was too dark - had I not decided to do this swap I'd have taken it off and re-cloured.
Peddy kindly sent me his damaged door card, where only the leather insert was damaged. As this was a first time for me doing this I decided to start with this one first, in case something went wrong. Although the sequence below follow chronologically I have used pics from both door cards.
First, I stripped the door card of the handles, switches and speaker.
Next, used a Dremel to cut around the inside edge on the back of the door card...
This throws up a lot of dust and the occassion shard, so mask and glasses / goggles are a must. Also, the Dremel can't be on too fast a speed or it will melt the plastic.
There are 4 sections on the back of the door card, I cut all except the section where the airbag deploy - cannot get to the bonding material.
By this stage I had freed all of the leather insert from the frame of the door card, except around the airbag hatch. This next bit took a leap of faith / little stupidity
:!: This may look like applying brute force, but I worked slowly to avoid damage.
First, I peeled back the lather insert as far as possible (it bends easily), took a flat head crew driver and jammed it into one of the top corners still attached.
Once the screwdriver was stuck in there, I twisted until I heard a crack - the bonding material splitting, it is strong but quite brittle. Once having made an opening, I worked the screwdriver slowly across the top. Once there was an opening, holding the door card frame I slowly peeled back the leather insert, again with more cracking...
Going slowly until it reaches the other end...
Once this was off, the first part was done.
Then the other door card, giving a collection of parts...
Reassembly. Because of the way that the two parts are originally bonded together they didn't come apart evenly on each door card. This I suspected woudld make using an adhesive a little hit and miss as there wasn't a consistent contact point all round. So, I went with plastic welding where possible - very strong and very short setting time. The other option would have been a strong plastic filler, something which came be built up - bumper filler should do a good job.
I then trim any loose ends from the door card frame and leather insert that I wanted to keep. Next bit, because it is hard to get to and weld, I glued the section around the airbag hatch and pressed the leather into place, putting some weight onto it while it set.
Then plastic welded the parts that can be seen - I did this using an electric soldering iron with strips of ABS plastic to use as solder and to build up any gaps.
Worked all the way round to get a solid fix...
A but belt and braces, but I then also sport welded around the airbag hatch, where I could see the join...
Once that's done. Job done. The back of the butchered door card...
...and the front...
Then refit to the car...
The whole process was a lot simple than I was expecting. Cutting the donor door card too about 1hr30m. The second one, once I'd got the technique down and stopped checking my progress every 5 minutes, all was done in 45m
The plastic welding took a little while, but that was just trying to be thorough. I couldn't figure out why BMW had bonded the damn leather insert on instead of just using clips (as some I've seen in the past), I am guessing, but I think it is so the leather insert holds enough for the airbag hatch to rip through it if the airbag fires.
Fine job, delete my eBay saved searches for door cards
Just hope when I take the car for a drive there is not rattling or creaking.


 After having been so cautious when I started using the hot air gun on the seats to then burn the arm rest was really frustrating. To say the least. For anyone else that might do this, I think in retrospect, No More Nails, or similar, may have been a better option - if only for the gap around the airbag hatch.