Convertible drain plugs??? Hood treatment??

ZFWOAR

Member
Hi Guys,

I purchased my Z4 last week and as I honestly care for this car more than I ever thought possible I am spending as much time as I can making sure everything is checked prior to winter.

The things I want to do are the drain plugs and the roof treatment as we all know winter and rain go hand in hand :(

I have looked at the how too guides but whether my roof is up from the top it is a plastic shelf that I can not see down to where the drain plug is and I am not sure if the easiest way is to take the rear wheels off and do it that way but on the images I cant actually see which bit is the drain hole? and what bit I need to shove pipe up?

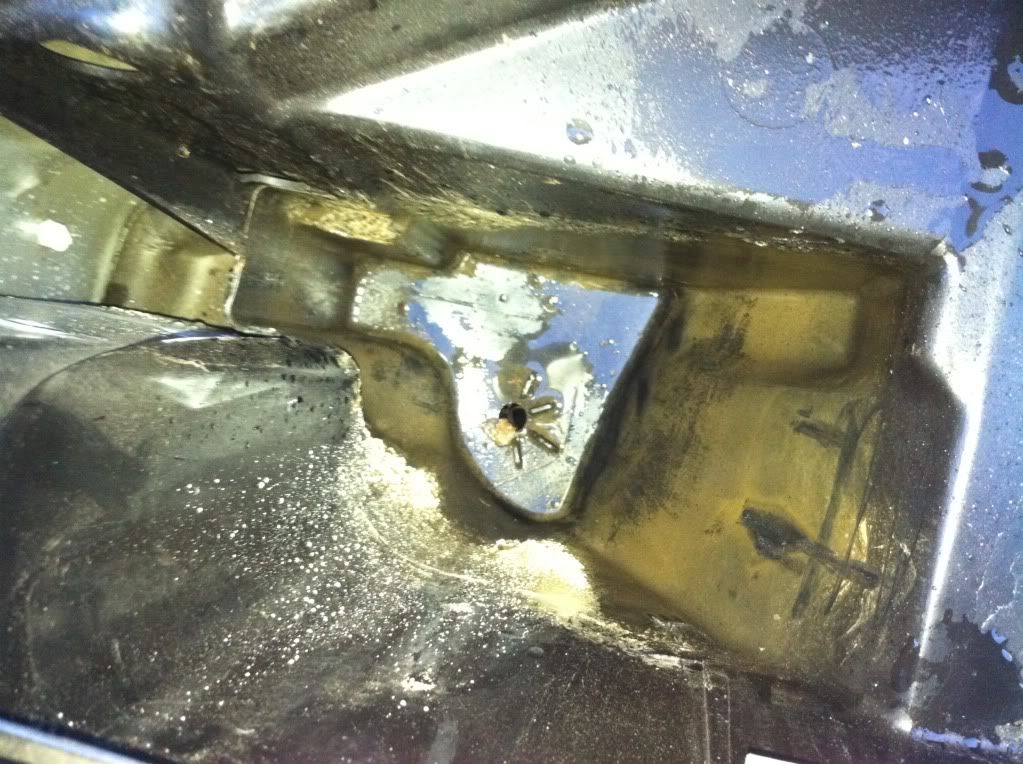
I dont understand pictures such as this:
IMG_1239.jpg


Do you have to remove the roof to see this?

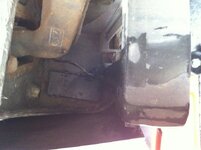
And on this image which bit is the drain plug?
B0rDeM79.jpg

Sorry for this, I have never owned a convertible before and just want to make sure it is all ok over winter :)

Also what do you recommend on the hood, I was thinking the autoglym stuff but also I noticed my black hood could do with being darker so is there any that restore the hood back to black?
 
Top picture = the hole with the lines around it.

Bottom - the plug on the left next to the brake sensor connection box.

One side you can see the hole from the top, the other side you can not and have to approach it from the bottom of the car (hence the bottom picture).
 
pvr said:
Top picture = the hole with the lines around it.

Bottom - the plug on the left next to the brake sensor connection box.

One side you can see the hole from the top, the other side you can not and have to approach it from the bottom of the car (hence the bottom picture).

Thank you for your reply :)

On the top picture how do I see that? With both the top up or down I cant see how I could see as clearer image of the drain plug as that?

And on the bottom picture is it the white bit next to the plastic bit?
 
The top picture looks as if it's been taken with the roof removed. Drivers side on a UK car, while out of the car, shine a torch down what is effectively over your right shoulder if you were in the car, you should just see the drain hole. Passenger side....don't even bother.

Bottom drains---------remove either rear wheel, remove plastic panel at front of wheel arch, 3 screws/bolts in an arc, middle one a liitle larger than the two outer, remove one screw/bolt from under sill. Remove plastic panel. Run hand under now exposed area and locate rubber grommet type plug. Remove grommet and clean. Now remove (by pulling) the bit the grommet was attached too, re-attach grommet and replace.

Repeat on other side.

If you want to check the drains are clear.....on a dry surface, pour water down the roof gap (roof up) just above the petrol flap, without spilling outside the car, if it drips from under the sill, the drain is clear. NOTE......this test requires more water then you would think, perhaps a pint. Repeat on the other side, note the water this side tends to run alond the sill and drip at the front.
 
Lance said:
The top picture looks as if it's been taken with the roof removed. Drivers side on a UK car, while out of the car, shine a torch down what is effectively over your right shoulder if you were in the car, you should just see the drain hole. Passenger side....don't even bother.

Bottom drains---------remove either rear wheel, remove plastic panel at front of wheel arch, 3 screws/bolts in an arc, middle one a liitle larger than the two outer, remove one screw/bolt from under sill. Remove plastic panel. Run hand under now exposed area and locate rubber grommet type plug. Remove grommet and clean. Now remove (by pulling) the bit the grommet was attached too, re-attach grommet and replace.

Repeat on other side.

If you want to check the drains are clear.....on a dry surface, pour water down the roof gap (roof up) just above the petrol flap, without spilling outside the car, if it drips from under the sill, the drain is clear. NOTE......this test requires more water then you would think, perhaps a pint. Repeat on the other side, note the water this side tends to run alond the sill and drip at the front.

Thanks Lance :)
 
i took those photos thats my Zed...

The top one shows where your roof motor sits when your hood is installed, in order to see that view you would have to remove your hood. That tiny hole at the botom is your drain hole.

The next photo should be rotated CW 90deg. But that plug you see will have a rubber grommit over it. and that is where the water comes out
 
ZFWOAR said:
So effectively the rubber gromit will be looking down to the road below not into the wheel arch?


Correct...............................note, the wheel does not actually need to be removed, it's just easier with it out of the way :thumbsup:
 
I note that no-one has commented on your request for details of products that will clean, re-colour and re-proof your soft-top. I recently bought a set of such products from RENOVO ( via ebay for better prices). I have yet to use them, I may now wait until Spring!

I also bought a cover for the soft-top from CoversShop (also through ebay) www.coversshop.co.uk. The cover is tailored to fit all Z4s. Having tried it for a few rainy periods I returned to CoversShop to have an extra piece of fabric sewn to the rear lower edge of the cover so that the rain now runs down the cover and onto the bodywork rather than into the small gulley between the soft-top and the bodywork. I think that CoversShop are now incorporating my design into all new covers for the Z4s.

I have also cleared out the "drains" by removing the rear wheels and the small black acess covers located in the forward panels of the wheel arches. I also managed to clear debris from the driver's side "upper" drain hole by partly removing the rubber seal by the driver's shoulder (roof down) and using a long thin metal probe ( a knitting needle!) with double sided adhesive tape on the end. It worked for me!
 
Back
Top Bottom