The Zed: 2003 2.5i ECE version (euro version)
The Parts:
Aerokit Front Bumper with Headlight Washer - 51110149439
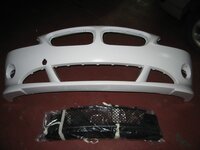
RH Headlight Washer Cover - 5117078262
LH Headlight Washer cover - 5117078261
Tools:
Hex socket set, size 8 and 10 are used
Philips screw set
Precision screw set
Lost of cardboard so you won't get all dirty plus bumper won't get scratched
Measure ruler or tape
Screws used
7 screws on top mount (used from the original) tool used is allen wrench
4 screws on undercarriage mount (4 out of 7 used from the original) tool used is hex socket size 8
Removing the original front bumper, please have a look at this DIY by mister_roger: http://www.z4-forum.com/forum/viewtopic.php?f=28&t=1071
To install the Aerokit Front Bumper, please follow the steps below:
1. Assuming you have painted and installed the lower grills and under carriage of the Aero Front Bumper properly, start by checking all attached pieces are properly glued and fitted.
2. Check AFB for 4 precut mounting holes, mine did came with one un-drilled so i had to drill it.
3. Remove the following from the original bumper
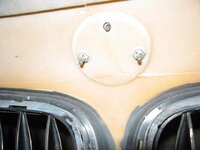
A. Emblem - use a size 10 hex socket to remove plastic badge screws (2 pcs) on the underside and pull from the front
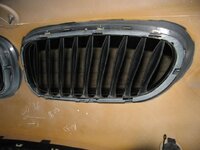
B. Kidney grills - Remove by simply pushing the old grills inwards.
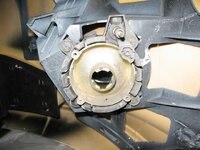
C. Fog lamps, LH and RH - Remove 4 screws by using philips screw
4. Attach Emblem, Kidney grills and Fog lights to the Aero Front Bumper the reverse way.
Should look like this:
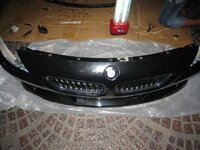
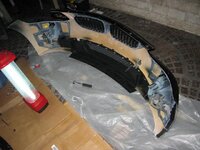
5. Test fit the AFB by mounting it on the car with clipping the end sides to the fender and screwing the top screw mounts, important to see if the headlights align properly to the fender, bumper and grill.
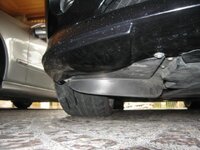
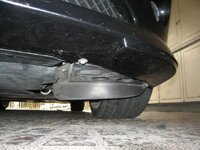
Measure the gap between the headlights and surrounding panels. Adjust accordingly by removing bumper and loosening 4 screws (2 at the bottom, see pic; 2 at the opposite ends)
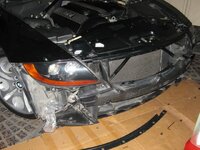
Not aligned properly (gap is big between bumper and headlights)
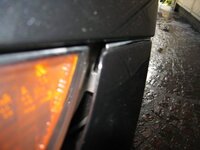
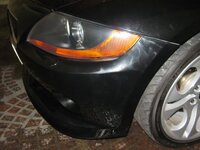
Aligned properly (gap is acceptable at least to me)
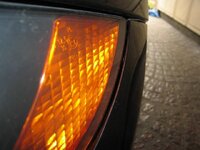
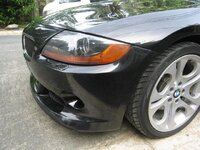
6. If everything is aligned, tighten 7 bolts on top, clip the side mounts properly and tighten 4 bottom mount screws
The Finished DIY:
Before

After

The Parts:
Aerokit Front Bumper with Headlight Washer - 51110149439

RH Headlight Washer Cover - 5117078262
LH Headlight Washer cover - 5117078261
Tools:
Hex socket set, size 8 and 10 are used
Philips screw set
Precision screw set
Lost of cardboard so you won't get all dirty plus bumper won't get scratched
Measure ruler or tape
Screws used
7 screws on top mount (used from the original) tool used is allen wrench
4 screws on undercarriage mount (4 out of 7 used from the original) tool used is hex socket size 8
Removing the original front bumper, please have a look at this DIY by mister_roger: http://www.z4-forum.com/forum/viewtopic.php?f=28&t=1071
To install the Aerokit Front Bumper, please follow the steps below:
1. Assuming you have painted and installed the lower grills and under carriage of the Aero Front Bumper properly, start by checking all attached pieces are properly glued and fitted.
2. Check AFB for 4 precut mounting holes, mine did came with one un-drilled so i had to drill it.
3. Remove the following from the original bumper
A. Emblem - use a size 10 hex socket to remove plastic badge screws (2 pcs) on the underside and pull from the front

B. Kidney grills - Remove by simply pushing the old grills inwards.

C. Fog lamps, LH and RH - Remove 4 screws by using philips screw

4. Attach Emblem, Kidney grills and Fog lights to the Aero Front Bumper the reverse way.
Should look like this:


5. Test fit the AFB by mounting it on the car with clipping the end sides to the fender and screwing the top screw mounts, important to see if the headlights align properly to the fender, bumper and grill.
Measure the gap between the headlights and surrounding panels. Adjust accordingly by removing bumper and loosening 4 screws (2 at the bottom, see pic; 2 at the opposite ends)

Not aligned properly (gap is big between bumper and headlights)


Aligned properly (gap is acceptable at least to me)


6. If everything is aligned, tighten 7 bolts on top, clip the side mounts properly and tighten 4 bottom mount screws


The Finished DIY:
Before

After
