
You are using an out of date browser. It may not display this or other websites correctly.
You should upgrade or use an alternative browser.
You should upgrade or use an alternative browser.
Vanne's 2014 28i
- Thread starter Vanne
- Start date
And we’re done.. well nearly, just gotta put the intake pipe back on. 19nm doesn’t sound much, but I’ll stick with it.
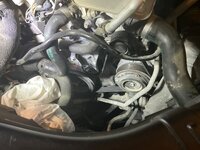
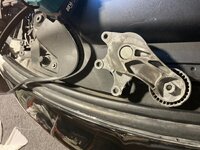
Yep well and truly past use by date.
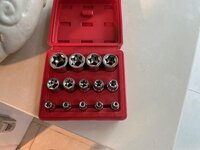
Luckily I had one of these.. lol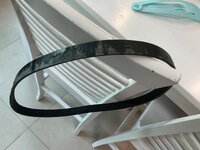
Not sure what’s going on here, but the inside has no cracks, looks like the outside is about to deleminate.
Yep well and truly past use by date.
Luckily I had one of these.. lol
Not sure what’s going on here, but the inside has no cracks, looks like the outside is about to deleminate.
Last edited:
Bought this yesterday, waiting for it to come in from Ali.
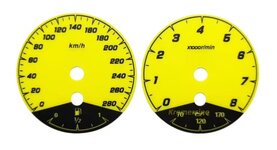
At the same time I bought some polarization films, the lcd’s on the dash are rooted, well the film is, so I’ll pull the dash and refurb it a bit somewhere along the line. Hopefully this will liven up the rather dull bimmer dash.
And this turned up today..though I won’t be installing it for a few weeks yet, I’ve got exams coming up.
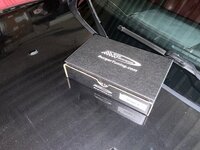
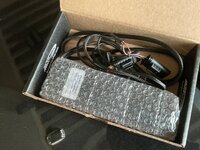
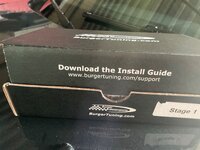
Says to download the install manual, I guess I’d better do that then..
At the same time I bought some polarization films, the lcd’s on the dash are rooted, well the film is, so I’ll pull the dash and refurb it a bit somewhere along the line. Hopefully this will liven up the rather dull bimmer dash.
And this turned up today..though I won’t be installing it for a few weeks yet, I’ve got exams coming up.
Says to download the install manual, I guess I’d better do that then..
Well I did some stuff today…
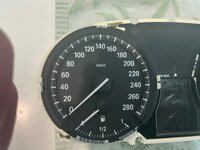
The new dials came in, but not as I ordered, it came with M crap and the Z4 emblem on the cluster cards.. which I did not order, nor want.. but alas.. iam in talks atm with the guy who made them, and they are not an easy DIY unlike the ad says.. its FUCKING difficult..
Why?
Because the new cluster cards are flat, the oem cards are 3d.. hopefully the pictures will show exactly what I mean. This means that if you’re keen to do this, you’ll need to be darn steady with a scalpel or such. Also the whole light diffuser thing is completely missing on the new cards..
First off, I used the newly arrived cards, as I wanted to get started today, (I have to work for the nextb 5 days straight, to SIN and the some other crap holes and back to SIN and the back to DXB.. the seller has already agreed to send a new correct set to my place. (I am not sure if I have to send this one back yet, but no issue as the cards are in no way damaged.) The Oem ones are, but more on that later.
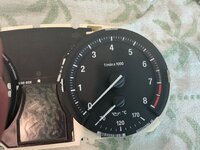
Also note the LCD.. which is un-readable.. and this was really the main goal of this project, and I am happy to say that that part is a smashing success..
So I looked on eBay for a replacement LCD display, but couldent find any, only a complete cluster (from 150us to 350 us) and then I stumbled upon some guy on the m3 forums saying that his lcd was s**t, and fixed it with a new polarization self sticking film.. hmm..
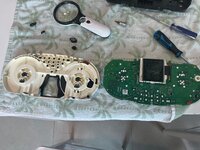
18 ead later from Ali express and I have some polarization film on its way to my house.
Well it’s a bit of a process to remove the old film as it’s glued on there, but preserving pays off. Great success, and after applying the new film, I now have a brand new looking lcd screen.
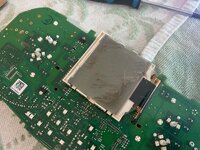
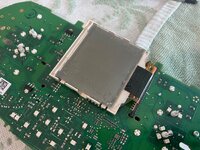
(here you can see still a heap of glue, i used metho and sticker remover goo to clean this up) its spotless by the end of it.
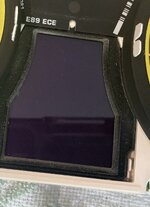
(Don’t mind the rabbit hair in the picture, they belong to my kiddos)
And now we can even read what it says..
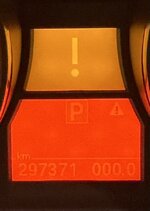
So yeah pretty stoked about how that turned out..
The dials were next..
The backlighting is a a process, it involves glueing a white sheet cutout of a4 printer paper on the backdrops of the dials. This dilutes the light to a useable amount.
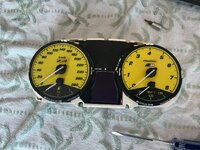
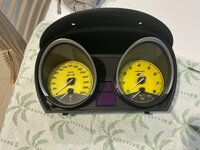
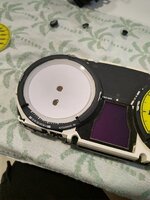
(this is the a4 dillution cutout, i might dubble up on that if need arises when the new set rocks up)
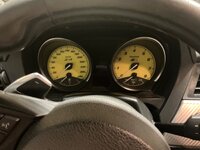
And with lights on

Anyways, there you go. It’s not for everyone, I just thought the oem dials were boring. Hopefully I’ll get the new ones without the emblems on them soonish to swap out.
The new dials came in, but not as I ordered, it came with M crap and the Z4 emblem on the cluster cards.. which I did not order, nor want.. but alas.. iam in talks atm with the guy who made them, and they are not an easy DIY unlike the ad says.. its FUCKING difficult..
Why?
Because the new cluster cards are flat, the oem cards are 3d.. hopefully the pictures will show exactly what I mean. This means that if you’re keen to do this, you’ll need to be darn steady with a scalpel or such. Also the whole light diffuser thing is completely missing on the new cards..
First off, I used the newly arrived cards, as I wanted to get started today, (I have to work for the nextb 5 days straight, to SIN and the some other crap holes and back to SIN and the back to DXB.. the seller has already agreed to send a new correct set to my place. (I am not sure if I have to send this one back yet, but no issue as the cards are in no way damaged.) The Oem ones are, but more on that later.
Also note the LCD.. which is un-readable.. and this was really the main goal of this project, and I am happy to say that that part is a smashing success..
So I looked on eBay for a replacement LCD display, but couldent find any, only a complete cluster (from 150us to 350 us) and then I stumbled upon some guy on the m3 forums saying that his lcd was s**t, and fixed it with a new polarization self sticking film.. hmm..
18 ead later from Ali express and I have some polarization film on its way to my house.
Well it’s a bit of a process to remove the old film as it’s glued on there, but preserving pays off. Great success, and after applying the new film, I now have a brand new looking lcd screen.
(here you can see still a heap of glue, i used metho and sticker remover goo to clean this up) its spotless by the end of it.
(Don’t mind the rabbit hair in the picture, they belong to my kiddos)
And now we can even read what it says..
So yeah pretty stoked about how that turned out..
The dials were next..
The backlighting is a a process, it involves glueing a white sheet cutout of a4 printer paper on the backdrops of the dials. This dilutes the light to a useable amount.
(this is the a4 dillution cutout, i might dubble up on that if need arises when the new set rocks up)
And with lights on
Anyways, there you go. It’s not for everyone, I just thought the oem dials were boring. Hopefully I’ll get the new ones without the emblems on them soonish to swap out.
Attachments
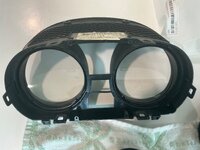
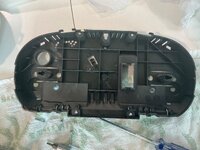
Last edited: