Don't ask why ?
This time I'm posting some text and will add pics as an edit so I don't lose all my effort .
Plus my sense of humour(?) is being threatened by my extreme level of frustration.
Some may recall my various threads concerning :
Cost of BMW Parts
Lack of reasonable body repair shops in Whitby
How to DIY plastic bumper Fangs and Spoilers
Wondering if there needs to be reflector ports, washer nozzle ports and tow hook ports.
How to DIY port hole filling.
How to paint plastic and repaired bumpers.
Hopefully what follows is a pictorial history of what happened .....
Cheers and bare with me
Bumpy
I got most of my repair inspiration from this Z Post:
An amazing DIY Reference.
http://www.zpost.com/forums/showthread.php?t=825125
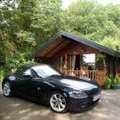
Here is what I started with.


Actually it looks better in the pic than in real life ...
The bumper had twisted and worn right through the left spoiler. The lower grill had cracks down the middle mesh.
A heat gun managed to restore general shape of the damaged parts
Chemical Required for Repair.
I used bumper specific products including two kinds of epoxy, adhesion promoter under spray and flexy bumper primer.
Acetone was used to wipe everything down before any epoxy filler was applied.
There is a can of paint prep wipe that I have yet to use. Be warned the acetone removed the flexy primer.
The Repair kit also included peel and stick wire mesh and crazy glue which I used on the lower grill mesh, with epoxy on the back.

I got a doner bumper from the dumpster at the back of the local Ford Dealer ..
I used it to provide plugs for all the port fills. There were some aesthetics from the Doner that I considered using on the Zed .
Don't you think that small aileron would look great under the rear bumper ?
Another project for another day.

How do you fill a reflector port ?
Well I have seen a repair that used a large metal mesh to provide a base.
When I looked carefully at the stock port I noticed that there were bevels in two different directions. I assume when you put in a stock reflector, it almost snaps into position. I cut a round blank and reproduced the bevels. The filler snapped right into place . The front side requires chamfering for the epoxy to fill, but on the backside I just epoxied it in.
This is the back side. The pink epoxy bondo was one of two kinds of epoxy repair. The other being black. Both are easily shaped.

Here are the repaired portions...
Lower Bumper Grill..
I would have replaced it but in the end, cost plus the fact that I decided to lower the front license plate mount will block off and protect the damaged portion.
You can see that the primed bumper is pretty much totally repaired.


I have 3 sets of kidney grills. I decided to paint one set Alpine White to match the body colour. The trim will be left chrome. The jury is out on whether I will like the finished product. I have silver and black grills to offer a proper comparison

Same thing with colour matching the brake cooling ducts. I'm hoping that will increase the depth that the ducts enter into the front, rather than clipping that visual characteristic at 2 1/2 inches. Again the jury will be out until I get everything reassembled.

Underside of reflector port roughly filled in with pink epoxy. To get the front side filled I needed to glue in another layer of doner plastic. Same thing with the washer ports. Two thicknesses of doner were required. I used doner plastic to minimize the amount of epoxy, thinking that this would minimize the chance of cracking. The washer ports had a hard plastic under support. Rather than cut that all away as some have done, I noticed that you can carefully spread the two layers and slip in a metal repair mesh patch. I epoxied that patch support in place under the washer port repair.

Pretty much finished and ready for paint...
The rack I plan on using as a paint stand is actually one of those two barred rolly clothes racks that you can pick up cheap in any jysk (Like IKEA but with products made in Asia)

A rough in of the front lic. plate location. Considering hanging it from under the lower grill. Not too sure about this yet cause I have a vanity plate that will have to have the lower portion bent back to fit. A slight concern about the impact on engine cooling, but the bracket moves the plate out slightly in front of the grill. I can alsi modify the brake coolokg ducts to direct air into the engine compartment.

The M Bumper voids the fog lights from the stock bumper. Im looking into mounting LED Fogs on the base of the brake ducts. That is a deep into the duct as I can. Using the stock wiring and electrical connectors so the stock fog light switch will still operate fogs. (Not that I use fog light much)
A coupla chemicals I need to finish off this project ....

Up next ..Paint....
Luckily after the local body shop would not touch my bumper because they wanted to do all the prep at a rediculous price ...
I decided I understand spray painting. It works when you are surgically clean about prep and take your time ..
If you get too excited or rush it you get drips and runs ...
I located a local NAPA Store that has a custom mix department. The tech was extremely helpful with tips and advice.
I ordered up 3 cans of custom Alpine White 300 as per my fender well and 3 cans of high quality clear.
Not cheap ..Each can of custom mix is $35 and the clear is $20. I can return unopened clear.

Painting is yet to come ..Call that Chapter 2.