Front wish bone rear bush & ARB replacement (updated).
Posted: Sun Jan 20, 2013 7:55 pm
Had the car for around 4 months and have not been happy with the steering. Checked the movement front to back after jacking the car up and there was visible movement of the wheel front to back so I guessed bushings needed a change. Decided to go standard bushes on wishbones also Anti roll bar (ARB) bushes looked tired so ordered some poly bushes for the ARB.
1. Jack car up at front and place on axle stands BE SAFE
2. Remove plastic engine cover bolts that attach the plastic tray to the chassis subframe 3 x 8mm (updated)
3. Remove the metal tray that is bolted to the chassis rails and subframe 8 x 16mm bolts.
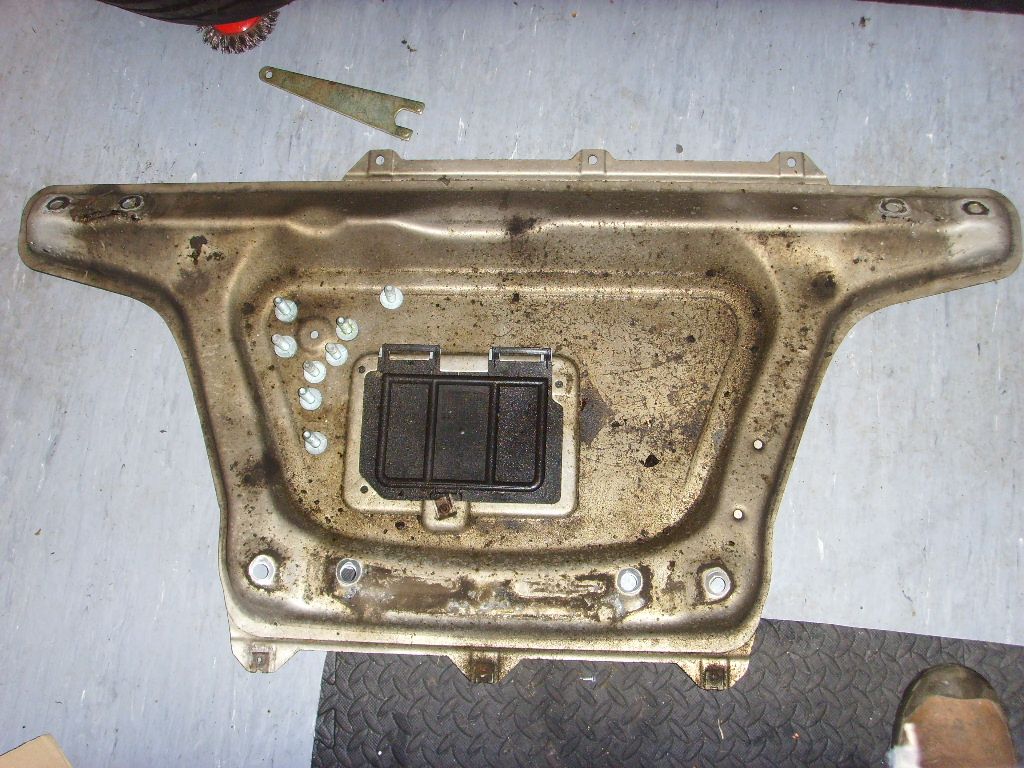
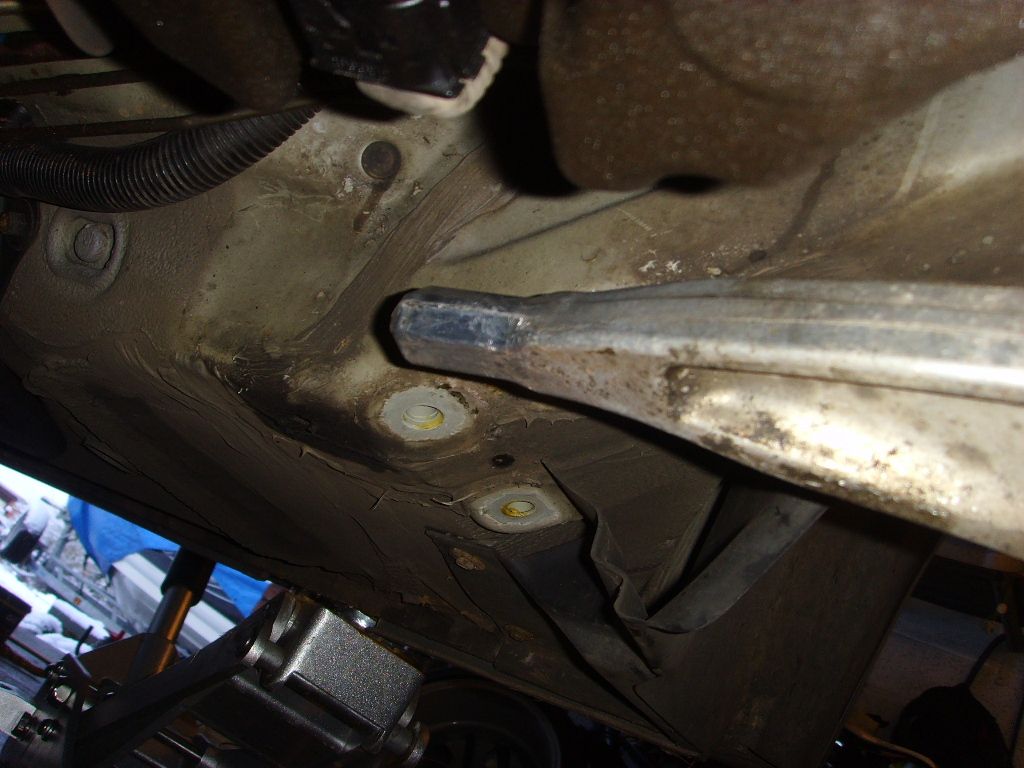
Access to bushes can now be progressed
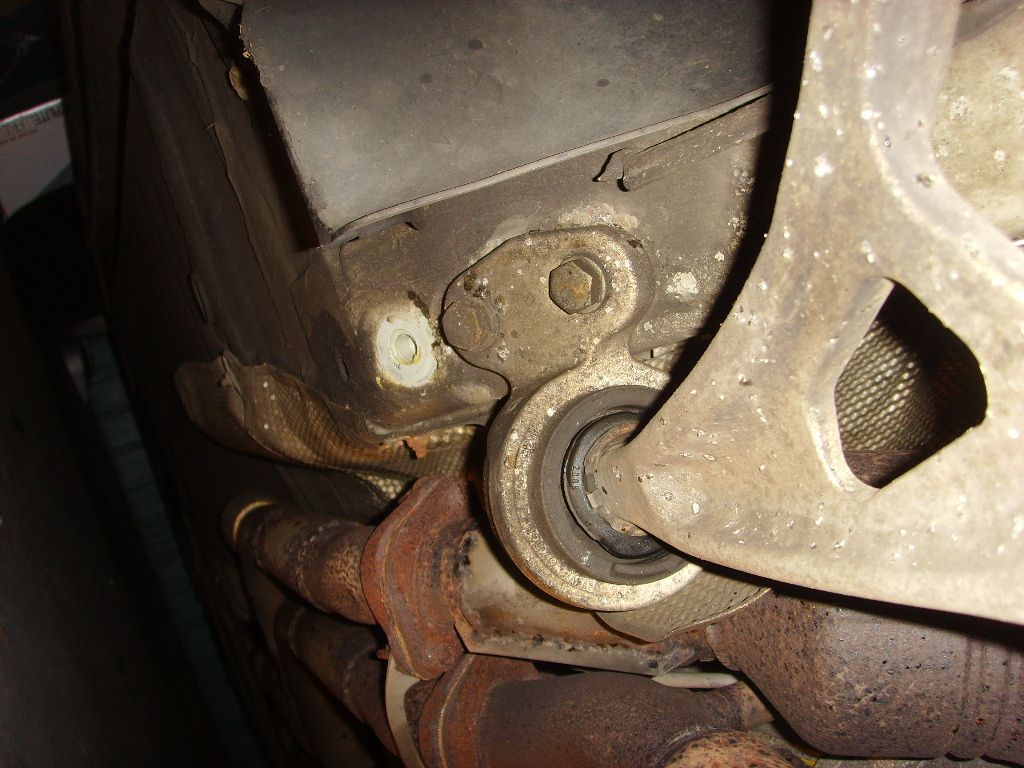
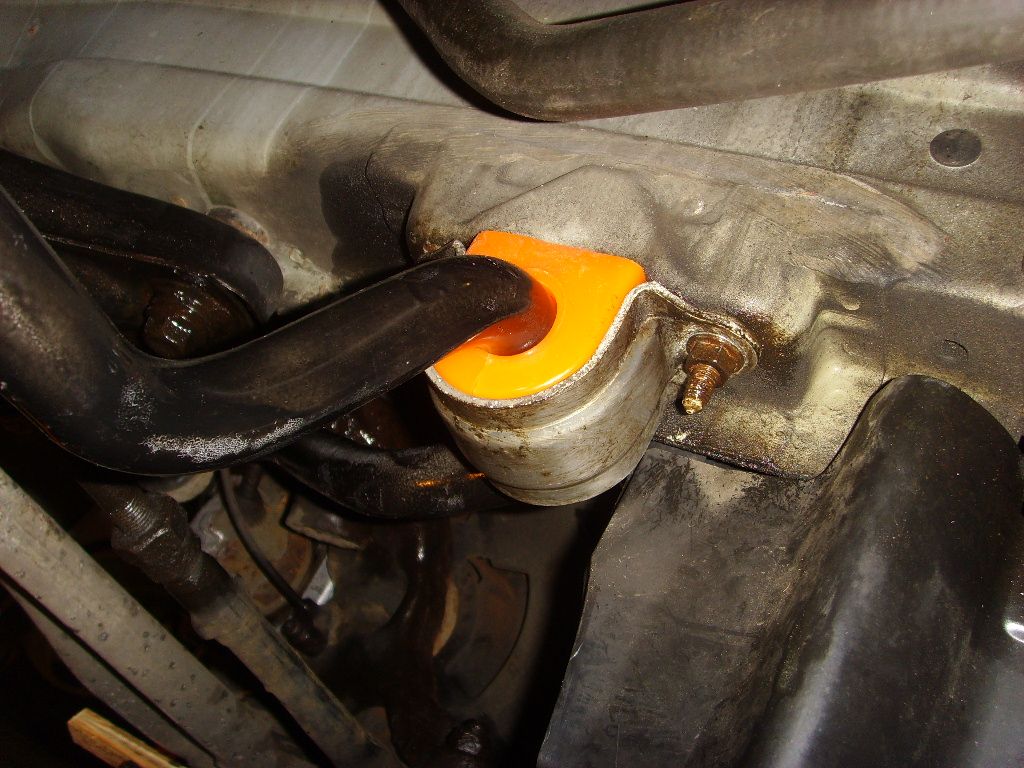
2 x 16mm bolts releases the rear bush. I found the jacking the car up furter allowed the wish bone to drop clear on the chassis.
Now for the difficult bit removing the old bushes. I did this one side at a time. The old bushes would not move. Having been on for 9 years the needed a little persuasion!
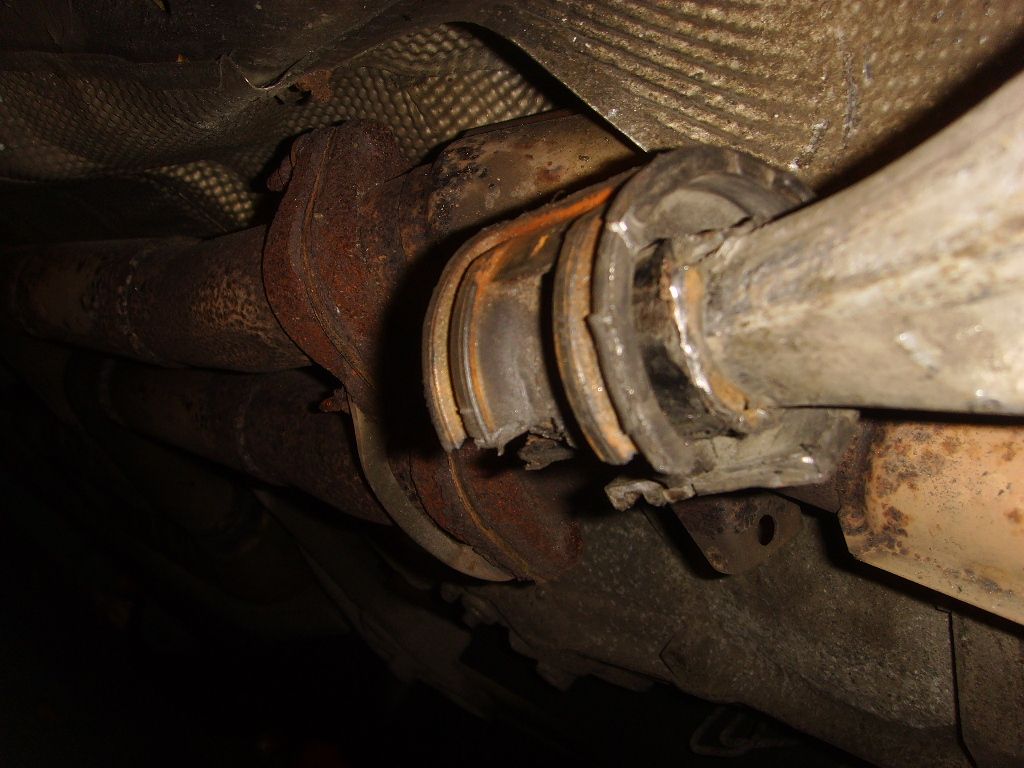
Finally I had to resort to an angle grinder but on the first wishbone I was not sure what I was cutting into!
The next bush was easier. I used a hot air gun which allowed the outer alloy bush housing to be wrestled off (rubber didn't like the heat much) then using an angle grinder I cut the inner bush along its length and peeled it off.
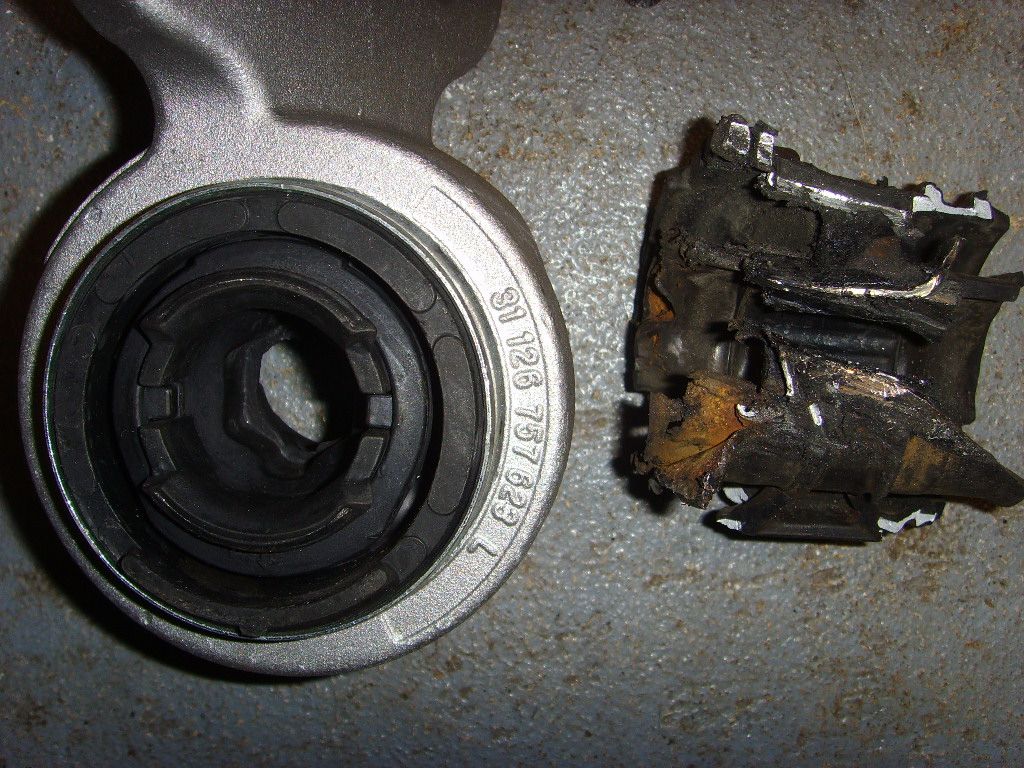
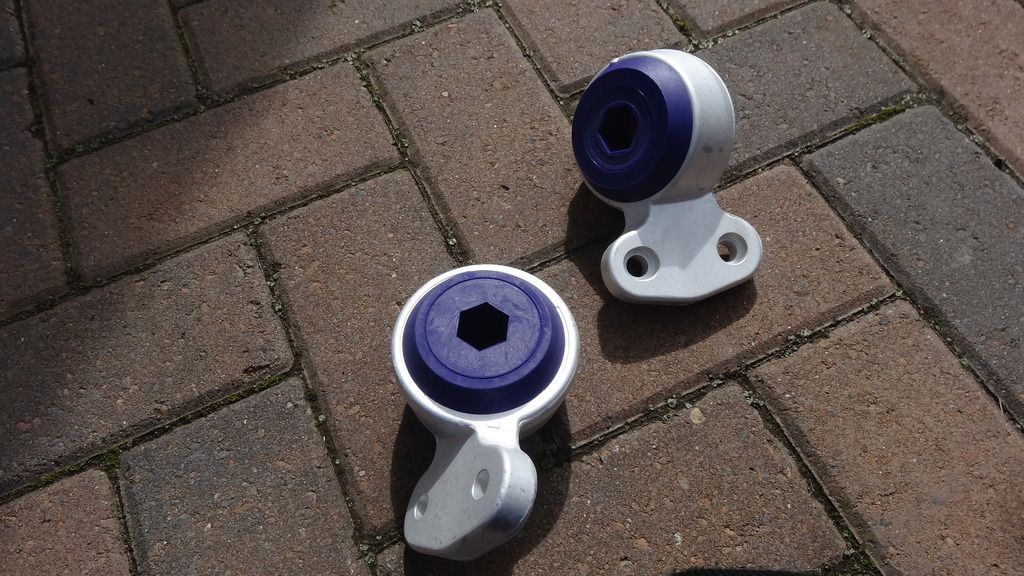
The new bush versus what was left of the old bush!
The bare wishbone, alloy hexagonal.
TOP TIP: Fitting the new bush Use washing up detergent as a lubricant for the rubber bush. This allows correct positioning. Grease or WD40 did not seem to work.
Bolt every thing back up.
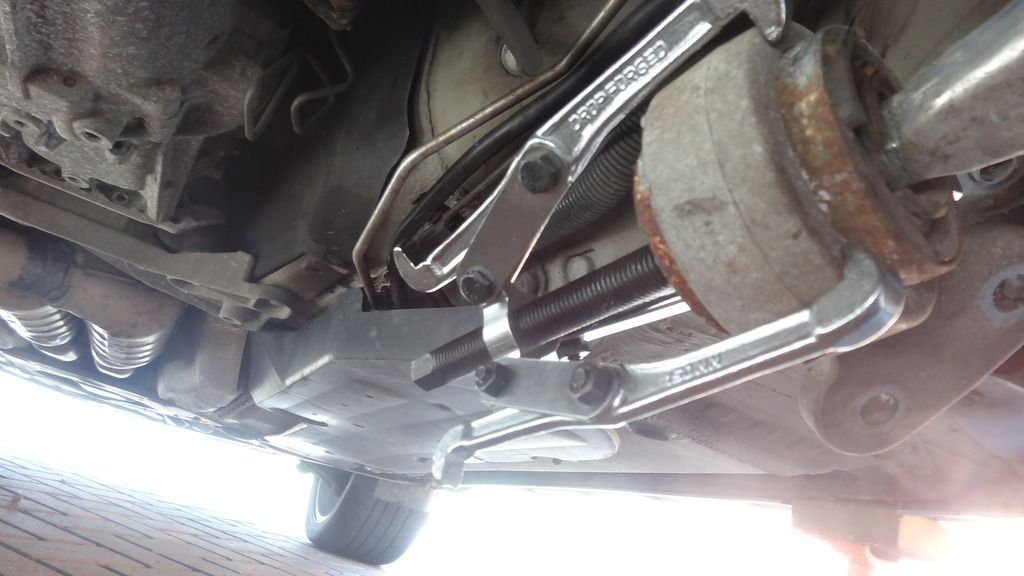
I have repeated the exercise by fitting Poly bushes today. In comparison to the first time this was a breeze and the old lollipops came off easily . I used a 3 leg puller to help.
***************
What a difference in the cars handling the old bushes were clearly knackered. They didn't last long!
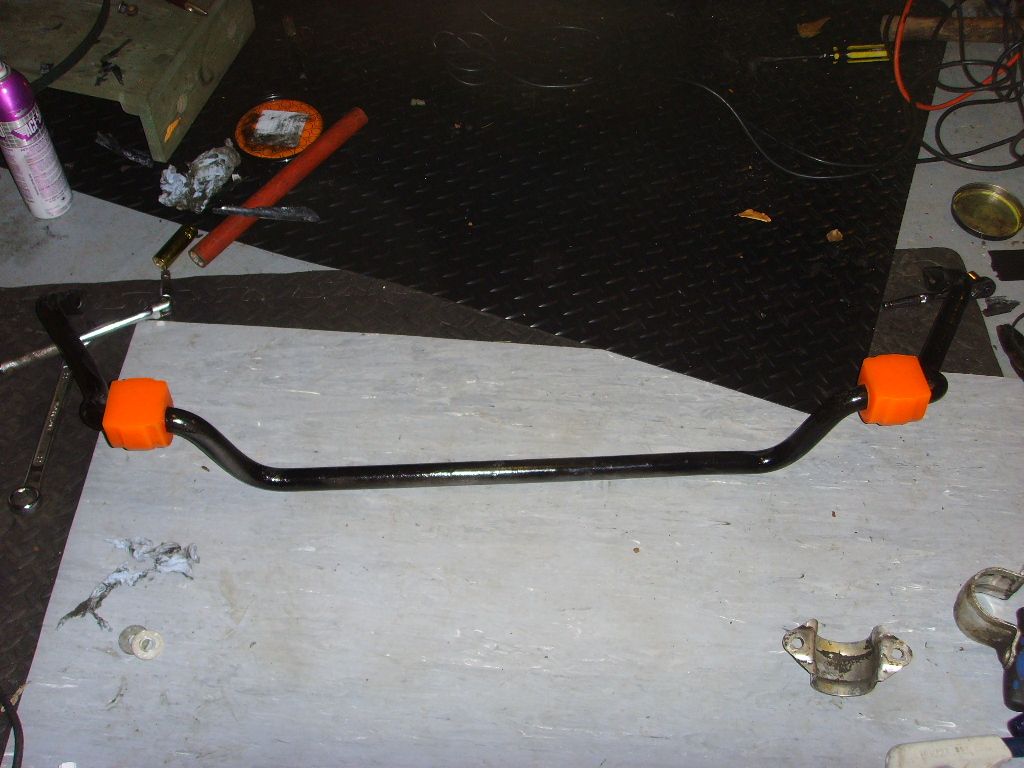
Now tackle the ARB!
I removed the ARB from the drop links and car but its not really necessary. Undo the the 4 nuts that hold the ARB saddles 2 on each side from the chassis. Remove the old bushes. Cut the new bushes on the bottom of the circumference of the 'D' with a sharp blade. You can just see the cut in the second photo
Peel over the ARB fit saddles and bolt back up.

1. Jack car up at front and place on axle stands BE SAFE
2. Remove plastic engine cover bolts that attach the plastic tray to the chassis subframe 3 x 8mm (updated)
3. Remove the metal tray that is bolted to the chassis rails and subframe 8 x 16mm bolts.
Access to bushes can now be progressed
2 x 16mm bolts releases the rear bush. I found the jacking the car up furter allowed the wish bone to drop clear on the chassis.
Now for the difficult bit removing the old bushes.
Finally I had to resort to an angle grinder but on the first wishbone I was not sure what I was cutting into!
The next bush was easier. I used a hot air gun which allowed the outer alloy bush housing to be wrestled off (rubber didn't like the heat much) then using an angle grinder I cut the inner bush along its length and peeled it off.
The new bush versus what was left of the old bush!
The bare wishbone, alloy hexagonal.
TOP TIP: Fitting the new bush Use washing up detergent as a lubricant for the rubber bush. This allows correct positioning. Grease or WD40 did not seem to work.
Bolt every thing back up.
I have repeated the exercise by fitting Poly bushes today. In comparison to the first time this was a breeze and the old lollipops came off easily

***************

What a difference in the cars handling the old bushes were clearly knackered. They didn't last long!
Now tackle the ARB!
I removed the ARB from the drop links and car but its not really necessary. Undo the the 4 nuts that hold the ARB saddles 2 on each side from the chassis. Remove the old bushes. Cut the new bushes on the bottom of the circumference of the 'D' with a sharp blade. You can just see the cut in the second photo
Peel over the ARB fit saddles and bolt back up.