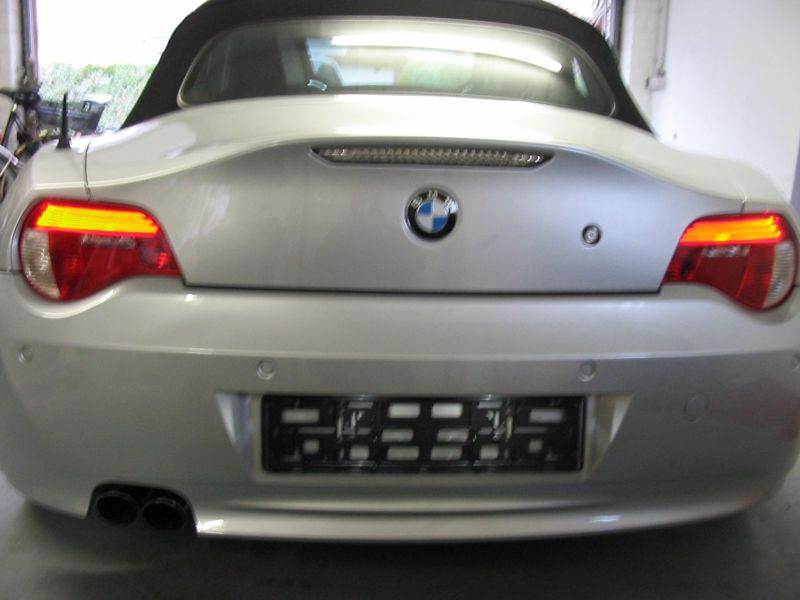
yg54sg wrote:Hi All, I have been lurking round these forums for quite a few years so thought I would do a how to on updating the rear lights from 2004 to 2007 model.
Things you will need:
Parts
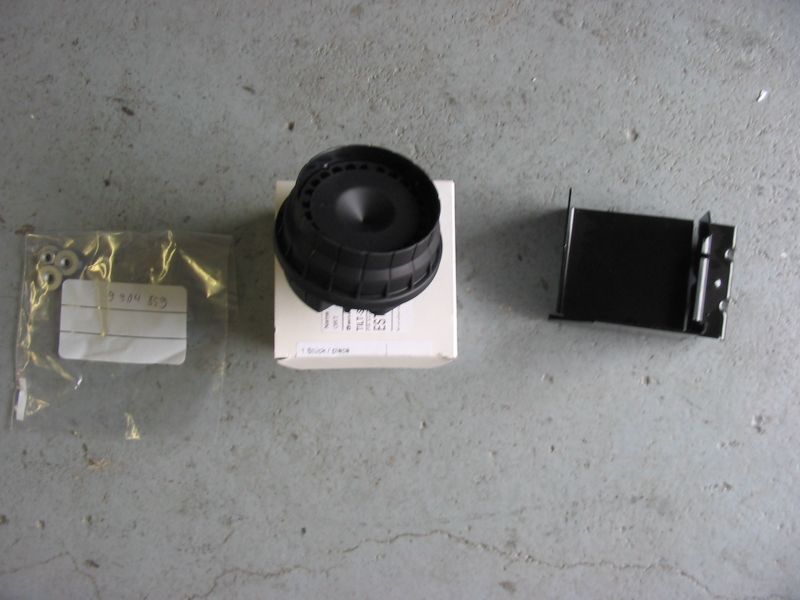
Rear 2007+ E85 Bumper Skin <I paid £70 from ebay and £190 for bodyshop to rub down and spray sterling grey>
2007+ E85 Rear Lights <£120 for pair on ebay>
Twin Wire (same thickness as bmw light wiring) <£2 from local electrical shop>
Frame surrounds (not essential) <£68 for pair from bmw>
Long Plastic Panel Under boot (not essential) <£38 from bmw>
I will be avoiding buying the expensive light control module needed to run the facelift lights by doing a bit of simple electronics!

Tools
9mm Socket or spanner
Philips Screwdriver
Flat Screwdriver
Electrical Screwdriver
Multimeter (not essential)
Electrical tape
Soldering Iron (of you can use those horrble press splice connections)
Heat Shrink Tubing
The Steps:
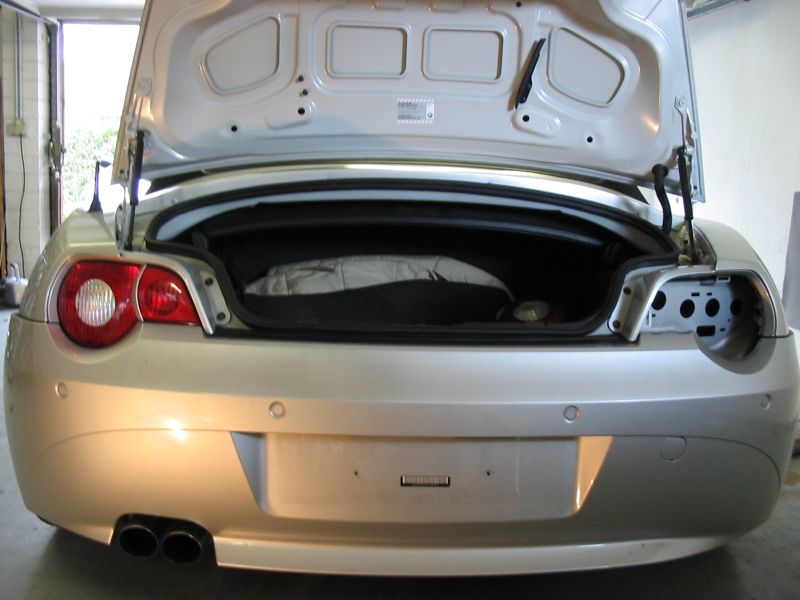
1. Remove old tail lights by undoing 3 nuts behind each light clusters, unplug the 1 cable and it should then pop out.

2. Bumper Removal: The bumper removal is pretty straight forward, 5x 9mm bolts underneath, then 3 press in studs in each wheelarch which pull out with pointed nose pliers. You then tug hard on lip nearest the wheel arch and it all comes away... tug means tug hard!!

3. Frame surrounds: You have a choice, the old frame surrounds for the lights (these are the painted pieces of plastic that sit above the lights) it will work to an extent if you cut of the small lugs that stick down where the old light fits into. The downside to doing this is you wil see a bit of a gap in the top left and right hand corners when the new lights are fitted, but it still looks 100% better than the old lights! So its your choice... I have ordered the frame surrounds but it looks like they will need paiting so unlike me, better to get it done with the bumper at the same time! Look at the pics and see if its something you dont mind (the small gap) its all water tight so its purely costmetic issue. If you do remove the frame surround there are 3 really easy to see screws on top then one hidden one in the corner which you can unscrew and remove once the bumper is removed.

4. Remove the screws holding the piece of long plastic (about length of the boot under the boot behind the bumper) you have the option to cut this down with a hacksaw or use a grinder eg put a curve on it so the new bumper fits over it (we are talking 2-3cm of plastic to cut off it) or order a new one for the 2007 model. I ordered a new one but left this piece off the car until it arrives so I can still drive the car. When the boot/trunk is shut you dont know its missing its there to stop the bumper flexing and add additional fixing clips its the only removable piece of plastic behind the bumper below the boot so you will know what I am talking about.

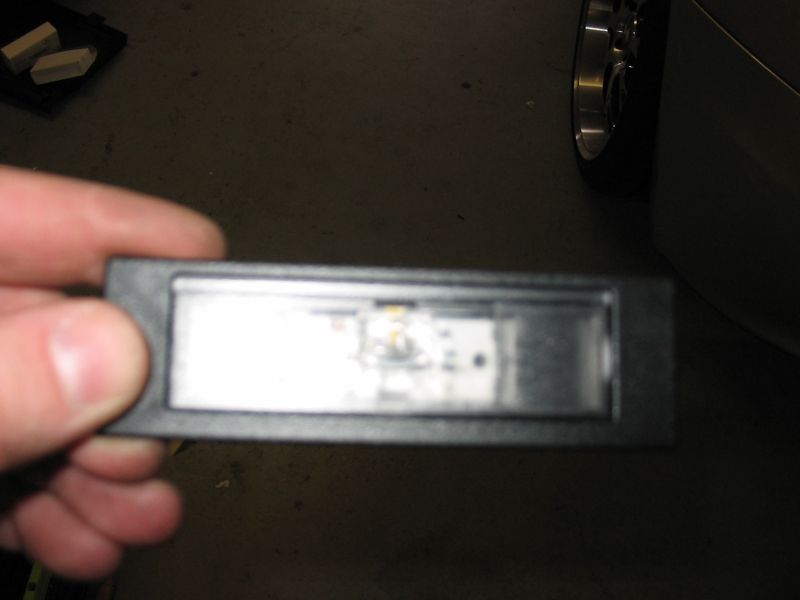
5. Remove license plate lamps from the old bumper just by pushing the clips out, fit them into the new bumper.
6. Cut the positive wire going to each license plate lamp and join 1 strand of new wire to it, cover with hear shrink tubing and solder it for a water tight seal. The positive wire is the grey one, the negative is the brown. Run this wire through the spare rubber gromit on each side of the car. Make as small a hole as possible in the spare rubber gromit so you have watertight fit.


* The reason why we are doing this is because the standard pre facelift light control module feeds 6v to the tail lamps (the circle) and increases to 12v when the brake is applied. Since the new lights use 12v with LED's for the tail light we need a 12v supply marker lamp power from somewhere, since its LED in the new lights the load wont present a problem for existing fuses etc so the license plate light feed are ideal to take the tail light positive feed from also with no bulb out light issues.
7. Tape using black electrical tape your new singular wires leading from the positives on each license plate lamps to the wiring harness leading to each plug for the taillights, I did this every 10cm or so.
8. The Left Lamp wiring .................
Open up the plug by undoing the white clip you can then see all the little terminals inside the plug, using a small screwdriver push down on the tiny catch on the terminal and then tug the wire, the whole terminal should slide out you are going to do the following:


Pin Out Old Cluster:
1 = Nothing
2 = Reversing Lamp +
3 = Tail Lamp +
4 = Indicator +
5 = Negative -
6 = Brake +
Pin Out New Cluster
1 = Fog Lamp (we will not use) +
2 = Reversing Lamp +
3 = Negative -
4 = Brake +
5 = Tail Lamp +
6 = Indicator +
Then:
-Remove pin 3, pull the wire out and carefully remove the 'pin' from the wire using wire cutters, open up the gripper then Tape the wire from pin 3 back up the harness out the way making sure you tape the end of it so it cant short anywhere, for now we will not be using it.
-Pull pin 5 move to pin 3
-Swap Pins 4 and 6.
-On your new wire you ran from the license plate lights, put the pin you removed from wire 3/pin3 onto this new wire by soldering it and insert into pin hole 5
You should now have 5 wires going into the plug with one taped back up the harness.
* We do not use this taped up wire as its 6v and useless. With the new light cluster, we can do 1 of 3 things 1: leave it taped up if you do not mind the bulb out light coming on the dash 2: Put a load resistor on it to fool the car into thinking there is a bulb connected 3: Add a bulb for extra lighting in the trunk/boot so the bulb out light goes out because its lighting up something... I think I will go with the load resistor as there is plenty of metal around the rear lights to screw one too, they get quite hot so you need to keep them away from plastics. For now I will just let the dash bulb out light come on... more explained later...
Conect the light while it is in the boot and test all lights... if al is well move on:
9. Right Side:
Old Cluster:
1 = Brake
2 = Negative
3= Indicator
4 = Tail Light
5 = Fog Light
6 = Nothing
New Cluster:
1 = Indicator
2 = Tail
3 = Brake
4 = Negative
5 = Reverse (We will not use)
6 = Fog Light
- Remove wire from pin 4 and remove the actual pin from the wire.
- Pull pin 2 and move to pin 4
- Swap pins 1 and 3
- add wire from license plate lights + into pin hole 2 suing pin you removed from wire we are not using.
* Note that if you wanted to you could run the fog light from one side to the other and same with reversing light so that they come on both sides, however i was not too bothered and perhaps worried that the extra load might cause a relay of triac somewhere to fail. After all, how often do we use these?? Not much so to me not an issue would rather keep as close to stock wiring as possible but I my be tempted with the reversing lights!
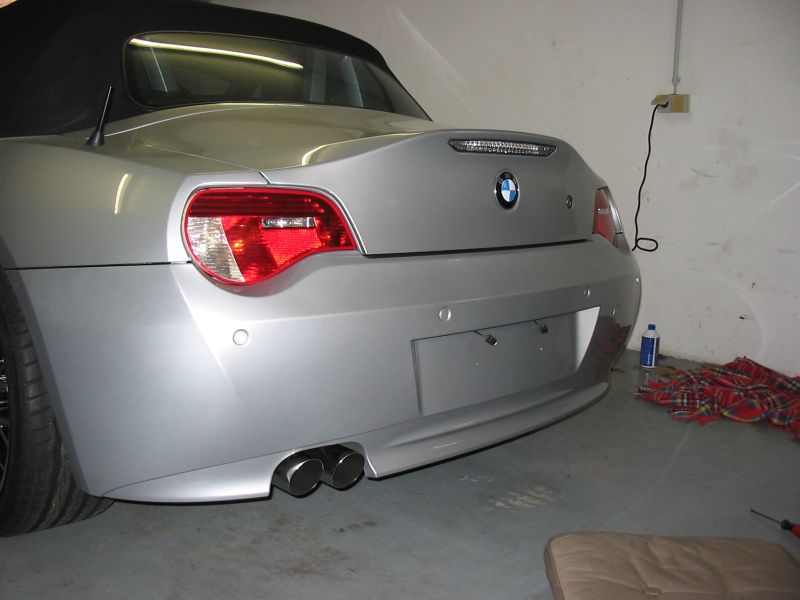
10. Fit new bumper in same way you took off the old one everything matches up perfectly (screws etc)

11. Remove the large bulbs from the new light clusters (indicator and brake lamp) take a small hacksaw and saw off the excess plastic grip on the back of the holder (picture below)


* the correct procedure would be to use a metal saw and saw out the new holes on the body panel behind the light cluster BMW actally provides a template for this... however since I have never replaced a bulb in the 5 years I have had the car i dont see why I should saw up part of the metal on the car. Using my method if you really have to change a bulb just undo the 3 nuts and let the whole cluster come out, takes 2 minutes! The lights fit perfect and you can still change the bulb easily... so no hard done!

12. test all lights to check they are working.


Points to note:
Ok so as mentioned above we will need load resistors on those unused wires in order to get that light out on the dash, I will add a how to on that shortly when I have bought them. Another issue is that the brake lamp wire also carries 6v for the other half of the circle on the old light cluster, this translates to showing the brake section same brightness as the LED section when the tail lights are on. We do not want this to happen so I plan to use a relay so the brake section only comes on fully when the brakes are applied and does not light dim at all on tail lights, I will post a how to when I add the new frame surrounds it should be quite straightforward. Note that this again is purely cosmetic and totally road legal as is from behind you see a T shape as in the pic below for the tail lights with the brake section part getting really bright when applied like on the old light cluster (outer circle)


Thats it for now!!! Note to moderator, please move to how to section also, if you want to host the images on z4 forum feel free as my hosting will expire in a couple of months.
Thanks
All i need now is clear fronts!!
yg54Shane
 . i just got home from the dealer and apparently they couldn't code my car!!! The moron working on it said the wires were wrong and that he moved them so that both reverse lights would work, and that he just couldn't code my Light control Module. that it might be too old or something? so idk if they are just stupid or what. any ideas?