>

Meds 3.0si Coupe - ZedNation 2025

The slightly concerning electrical type whine/whirring from the engine bay has gone, too.
That is a common symptom of a collapsed oil filter. What a result! It sounds MUCH better and quieter, I can now hear the lovely exhaust doing it's thing.

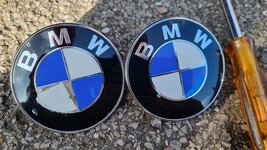
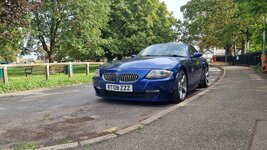
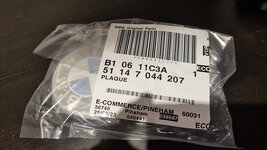
New badges and the original grills are back on. (Thanks to Sean for sending the grills over)
53220822062_9e2e8a81c5_c.jpg
53222193330_04ce7d87a7_c.jpg

53235185577_929dea096f_b.jpg
 
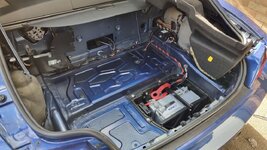
Today, I got inside the boot lid to check for any corrosion.
It's free from any signs of rust, clean as a whistle.
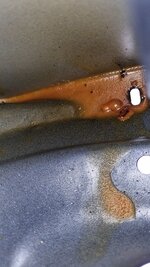
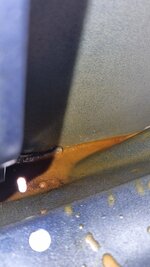
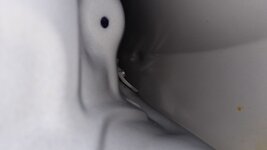
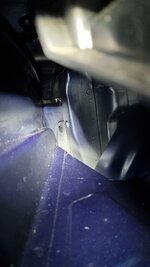
I did freak out when the endescope revealed a huge load of orange. But when I removed all the plastics to get a closer look using the larger holes in the inner skin, It's some sort of greasy oil/paint. I suspect some corrosion inhibitor from the build?
I pushed the scope into all the creases and found no issues.. Fantastic.

53244397790_22339a0f7b_z.jpg

53243906941_e0318b16f7_z.jpg

53244397715_ffb070850c_z.jpg
 
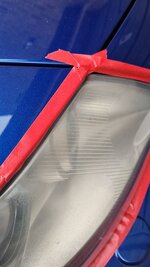
Headlight polish time:
53220822302_3afc91e97f_c.jpg

These have come up really well after using the Quixx Headlight Restoration Kit.
The lens caps had a bad case of sunburn, rough to the touch and just looked a state.
30mins of wet sanding, polishing and sealing and they're good as new.
 
Next is to tackle a slightly damp carpet near the drivers door. This is less of a concern, as this week the roof is being installed onto the car port so the Z4 will be dry, soon enough.
Then onto some sound insulation in the doors (while I'm there I plan to install some mid speakers), wheel arches, and boot.
Then find some OEM wheels so I can remove the 203's.
Then onto removing the drivers rear wing to attend to a tiny bubble of rust. I've already had my local body shop look at it, they can remove the rust, seal, repaint and protect the wing for a small sum, so I'm glad it can be sorted with minimul fuss. :)
 
That's great news on the tailgate. :thumbsup:

Some years back I remember a few forum members getting theirs repaired, and in a couple of cases replaced, under the 12 years corrosion warranty.

Good luck with the other jobs. :thumbsup:
 
Mr Tidy said:
That's great news on the tailgate. :thumbsup:

Some years back I remember a few forum members getting theirs repaired, and in a couple of cases replaced, under the 12 years corrosion warranty.

Good luck with the other jobs. :thumbsup:

Yes, it was a huge relief.
I do admit, I get paranoid with issues that have a 1 in 100000 chance of occuring. I'm a worrier, and I dont stop until I know either way.
So getting inside the boot lid to find no problems was a happy moment.

I'm working out wheel options.
She's currently running 19x8J ET37 225/35 and rubs.
I'd love to go to some of the 18" (or 17") ET34's but I do not want a stretched tyre so 225 it has to be. I'll then be in the same situation I guess.
So it's OEM ET47.
Orrr......... I remove the Eibachs and go back to the stock ride height, that then opens up a load of wheel designs that I love the look of.
 
The front drivers fog light was pretending to be a fish tank so, I removed it to clean up and drill some holes in the underside, hopefully limiting the amount of condensation in the future. It's no surprise they fill up with water. Inside the bumper it's really wet and the fog lights sit below the headlight that has a large gap between it and the bumper.
Until I either find a replacement, paint them Montego Blue or find some blanking plates.

53290627379_73df2601f6_b.jpg

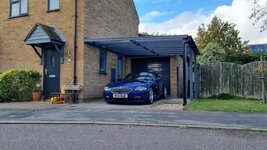
The car port is finsihed, now she can stay dry. Ready fo me to tackle 2 jobs.
Front bumper removal to get both headlights out for a proper refurb.
Rear drivers wing so deliver it to my local bodyshop for a tidy up.

53292161255_7cdc259224_b.jpg
 
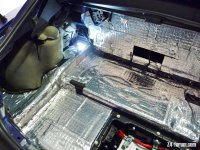
Project sound insulation a go go!
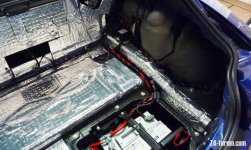
Surprisingly, the rear strut towers have insulation, as does some of the rear carpets and the carpet along the rear bulkhead. The nearside void behind the passenger shoulder had a little but I've added loads more.
The drivers side void is empty and I suspect this causes a load of resonance.
I've pretty much stuck the insulation to everywhere with a gap.

So far:
Underneath the 2 cubby holes with nets.
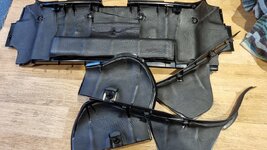
All the rear plastics.
The voids behind your shoulders.
In the empy space above the rear wheels towards the cabin, up towards the rear windows.
The floor between the battery and bulkhead.
The rear bulkhead.
The underside of the battery cover.

Carpets out:
53295283494_6912a2c8fc_b.jpg

Underside of plastics, done:
53295151838_eeaa0e1b4a_b.jpg

Drivers side void, empy:
53295374270_ce9f24260e_c.jpg

Left to do:
Inside the boot lid.
Stuff a load of bubble wrap or foam to fill up the voids behind your shoulders.
The plastics on top of the rear bulkhead. (anyone know how to get into these?)
 
Nice job!

The central sections up top simply pulls out (clips only). Then the two sections directly behind the driver are secured underneath the seat belt guides. Pry off the rear cover on the belt exit “bump”, remove the Torx and lift out.
 
I would love to know how effective your void filling is when you finish it. I have been chasing a resonance ever since I have had my car and have put heavy foil backed bitumen type sound deadening on the boot floor, under it over the exhaust, and along the underside of the tunnel above the prop. Sadly none of this has made much difference. I was thinking of packing the hidden voids with rockwool acoustic insulation or similar - flexible, fireproof and doesn't rot if it gets wet... as used in floors and partitions in houses.
 
Barty said:
Nice job!

The central sections up top simply pulls out (clips only). Then the two sections directly behind the driver are secured underneath the seat belt guides. Pry off the rear cover on the belt exit “bump”, remove the Torx and lift out.

Thanks, I'll try this.. I failed to notice that Torx you mentioned.
 
Spriteracer said:
I would love to know how effective your void filling is when you finish it. I have been chasing a resonance ever since I have had my car and have put heavy foil backed bitumen type sound deadening on the boot floor, under it over the exhaust, and along the underside of the tunnel above the prop. Sadly none of this has made much difference. I was thinking of packing the hidden voids with rockwool acoustic insulation or similar - flexible, fireproof and doesn't rot if it gets wet... as used in floors and partitions in houses.

I took it for a motorway test drive yesterday..
I reckon I've reduced rear road rumble noise by 20%-30%.
The overall noise in the cabin is now equal between the front and rear, rather than everything bombarding from the boot area.
It'll be hard to tell what part made what difference. I basically went crazy, every part of exposed metal that I caould get to, had 6mm insulating foam stuck to it. For the voids, I insulated and then stuffed large amounts of bubble wrap into the corners.

I'll get under the black plastic behind the seats next.
Then move onto the doors and then possibly for floor.
 
Meds said:
I've pretty much stuck the insulation to everywhere with a gap.

What insulation did you use ? I have done the boot floor the same as Spriteracer but it didnt make much difference . I may have a go at the rest of the panels if your results are positive . :thumbsup:
 

Attachments

  • P1110548.JPG
    P1110548.JPG
    190.9 KB · Views: 1,796
  • P1110549.JPG
    P1110549.JPG
    224.5 KB · Views: 1,796
1536Z4 said:
Meds said:
I've pretty much stuck the insulation to everywhere with a gap.

What insulation did you use ? I have done the boot floor the same as Spriteracer but it didnt make much difference . I may have a go at the rest of the panels if your results are positive . :thumbsup:

6mm sticky rubbery foam. Cheap from Ebay. It's really squashy so can be compressed.
Your job looks tidy! I stayed away from the foil stuff as to my untrained logic it looks like it will reflect noise, rather than absord it.?

Did you do behind the plastic trims around the sides and rear? And also the voids behind your shoulders?
 
Meds - Thanks for the update. The foil backed stuff is 5mm bitumen and is meant to stop panels resonating rather than absorbing sound waves. It doesn't seem to have much effect on voids though which is why I thought I would try the Rockwool which should. 1536Z4 has gone further than I have as I just concentrated around the exhaust area which is where the booming seem to be generated. Some days it seems worse than others but that might just be my perception. I thought at one point the exhaust back box had been altered but I didn't see any sign of that when it was removed for other work. Car sounds fine from outside so I don't think it has broken internally.
 
Meds said:
Did you do behind the plastic trims around the sides and rear? And also the voids behind your shoulders?

No just what you can see . I put some sticky felt tape around the plastic edges to stop the rattles . Don`t really want to add any more bitumen sheet as it is all added weight :) but may give the foam a go .
 
The cheap rubber foamy stuff I used weighs next to nothing, so I went crazy and stuck it everywhere I could get to.

It's definitely a product to absorb noise rather than dampening panel movement like the foil stuff does. I see that attached to large panels like roofs and doors.

When I start the cabin area, I'd like to tackle the rear bulkhead from the other side, and those two voids from behind the seats.
 
Mr Tidy said:
Meds said:
A very mouldy washer bottle.

I've done that job twice on my 2nd E86 and an E46. Cleaned the washer filters with an old toothbrush and then only ever used one brand of screenwash. Never had that issue again. I think using different fluids contributes to the yuckiness!
Sorry for asking but where would the washer filters be located please? A job I'd like to do .
 
TOMGREEN413 said:
Sorry for asking but where would the washer filters be located please? A job I'd like to do .

The filters are on the washer pumps and sit inside the fluid reservoir. You'll find them when you pull the pumps out of the reservoir - they are a push fit.
 
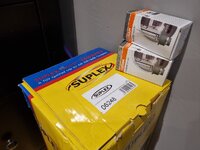
Delivery:
53304199457_bbb98184dc_b.jpg

Bulbs:
I noticed one of my headlight bulbs was orange and a little dim, I have an MOT next month so it makes sense to sort it.
While I'm at it, I plan to remove the headlights and attempt to clean up the inside of the plastic lenses, they're a little foggy and bug me.
I understand this process involves a front bumper removal, headlight removal and then remove the projector glass. This should give just enough room to poke a cloth through, glued to a chop stick and give it a wipe over.
I'll also look to clean the projector glass.

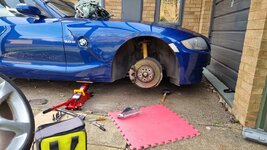
M Sport (Suplex) springs:
Who knows what the car will feel like with Eiback Pro springs rear and Suplex springs front.. :rofl:
But it's an experiment I'm willing to try until I get some Suplex rear springs delivered.
If it feels fine after tracking and doesnt look odd, I might even keep it.
I need to raise the front end of this car, it rubs the front arch liner, scraps the flaps infront of the front wheels, and Mrs Meds is scared to drive it.
It's a right royal PITA and takes most of the enjoyment away when I'm clenching and grimacing behind the wheel.
 
Back
Top Bottom