
That is interesting that you bought the bush press kit and also have a hydraulic press. I recently invested in one of those kits after realising that I didn't have the space/cash for a decent press. Good to know that they're up to the job! I haven't had any issues so far either, although eccentric bushes presented a bit of a challenge (solved just by using the thinnest threaded rod at a slight angle).
Another forum member, bradz, had his rear subframe sent off for shot/peen blasting and a powder coat. It feels like a good idea for a component that takes as much abuse as it does.
Not joined yet? Register for free and enjoy features such as alerts, private messaging and viewing latest posts and topics.
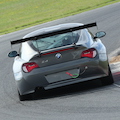
Liam's Z4C race car project
-
MrPT

- Lifer

- Posts: 4746
- Joined: Sun Oct 21, 2012 7:44 pm
- Location: Bucks/Oxon
Liam's Z4C race car project
2008 Z4MC: heavy wheels | crap suspension | skittish rear end | wobbly engine | not enough induction noise | underwhelming turn in | inconsistent braking | lardy battery | chubby steering wheel
2006 Z4 2.5si: gone
2006 Z4 2.5si: gone
-
Liam22
- Member

- Posts: 645
- Joined: Thu Dec 06, 2018 2:28 pm
- Location: Herts/Cambs
Liam's Z4C race car project
The hydraulic press is good for small, flat items with plenty of "meat" around the edges. The front lollipops work well in it, but the trailing arms and subframe are too big to fit squarely in the press.
No time to send things away for blasting. POR15 will seal the rust and provide a hard wearing surface. It won't be super-smooth but it'll be pretty good. I want to have the subframe and trailing arms painted and ready to go back on the car by the end of the weekend
No time to send things away for blasting. POR15 will seal the rust and provide a hard wearing surface. It won't be super-smooth but it'll be pretty good. I want to have the subframe and trailing arms painted and ready to go back on the car by the end of the weekend
-
Liam22
- Member
- Posts: 645
- Joined: Thu Dec 06, 2018 2:28 pm
- Location: Herts/Cambs
Liam's Z4C race car project
That was a productive weekend!
Masked up the bores of the bushes so that the paint wouldn't reduce their size.
While the first coat was drying I set about the trailing arms with flap wheel and wire brush.
Managed to get 2 coats on during Saturday and left them to harden overnight.
Sunday afternoon started with the painstaking job of removing all the masking tape and cleaning up all the mating faces. Then the fun job of fitting the new bushes. A bar clamp was very useful for this.
The rear upright also needed new inboard joints for the wishbones. New balljoints top and bottom.
And finally, after a little head-scratching about the orientation of the front subframe bushes, I'm ready to start getting all this back on the car.
Masked up the bores of the bushes so that the paint wouldn't reduce their size.
- 20190316_103601_HDR.jpg (227.14 KiB) Viewed 3095 times
- 20190316_123707_HDR.jpg (310.64 KiB) Viewed 3095 times
- 20190316_162018_HDR.jpg (288.67 KiB) Viewed 3095 times
- 20190317_161039_HDR.jpg (236.74 KiB) Viewed 3095 times
- 20190317_172411_HDR.jpg (231.6 KiB) Viewed 3095 times
- 20190317_184220_HDR.jpg (224.26 KiB) Viewed 3095 times
-
R60BBA

- Senior Member

- Posts: 1776
- Joined: Sat Sep 30, 2017 7:53 pm
- Location: London, United Kingdom
Liam's Z4C race car project
Nice thread and car OP.
Good to see things done properly.
Good to see things done properly.
Current: 2002 E46 M3
Current: 2005 997 Carrera S
Gone: 2004 R53 Cooper S
Gone: 1998 E31 840Ci Sport
Gone: 2007 Z4 E86 3.0Si Sport
Gone: 2001 Z3 E36/7 2.2i San Remo Individual
Gone: 2015 F21 116d M Sport
Gone: 2012 A3 Sportback 1.2TFSI
Current: 2005 997 Carrera S
Gone: 2004 R53 Cooper S
Gone: 1998 E31 840Ci Sport
Gone: 2007 Z4 E86 3.0Si Sport
Gone: 2001 Z3 E36/7 2.2i San Remo Individual
Gone: 2015 F21 116d M Sport
Gone: 2012 A3 Sportback 1.2TFSI
-
Liam22
- Member
- Posts: 645
- Joined: Thu Dec 06, 2018 2:28 pm
- Location: Herts/Cambs
Liam's Z4C race car project
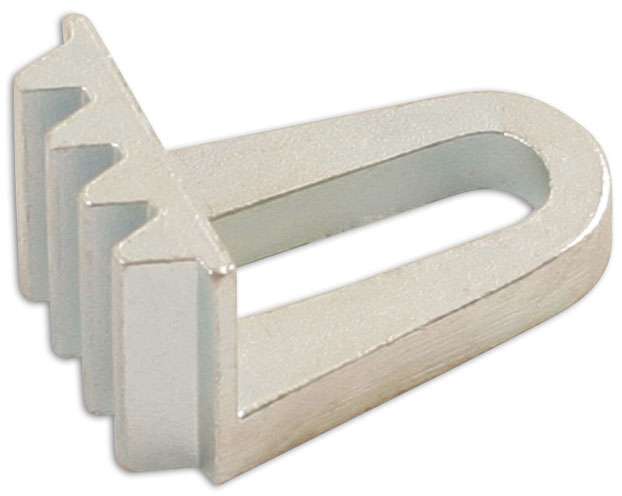
First time I've used Strongflex bushes and quite pleased so far. Thought this was a nice touch:
- 20190318_090702_HDR.jpg (149.08 KiB) Viewed 3076 times
-
Liam22
- Member
- Posts: 645
- Joined: Thu Dec 06, 2018 2:28 pm
- Location: Herts/Cambs
Liam's Z4C race car project
Progress has been slow this last week. Today was my original target for a shakedown trackday, but I've not yet even started re-assembling the suspension.
It doesn't help that I decided to overhaul the gear shift/selector bushes while access is improved without a propshaft installed. One of the retaining pins for the shift arm front bushes is seized in the gearbox casing so I'm gonna have to remove the transmission mounts/bracket to get bigger tools in there. Why didn't I wait until I was changing the clutch...
The only tangible progress has been to replace the diff oil. Mine doesn't have a drain plug so with the diff currently out of the subframe I just tipped it upside down and drained it that way. Just under a litre came out so I put 1 litre back in.
My spirits were lifted yesterday when I came home from work to find a box of shiny bits from GAZ. These are Gaz Monotubes (not the usual Golds). Dampers and top mounts from the E46 330 Cup race series, spring rates from the ZCars series. I expect I'll fine tune the spring rates once I get down to race weight and add some aero.
- Attachments
-
- 20190325_210633_HDR.jpg (241.06 KiB) Viewed 3023 times
-
- 20190325_210700_HDR.jpg (227.41 KiB) Viewed 3023 times
-
- 20190325_210737_HDR.jpg (281.46 KiB) Viewed 3023 times
-
Liam22
- Member
- Posts: 645
- Joined: Thu Dec 06, 2018 2:28 pm
- Location: Herts/Cambs
Liam's Z4C race car project
Sod it! I'm going to drop the 'box and change the flywheel/clutch while I have the propshaft off. Ordered the TTV Racing single-mass lightweight flywheel, and Sachs Performance clutch kitLiam22 wrote: ↑Tue Mar 26, 2019 10:15 am It doesn't help that I decided to overhaul the gear shift/selector bushes while access is improved without a propshaft installed. One of the retaining pins for the shift arm front bushes is seized in the gearbox casing so I'm gonna have to remove the transmission mounts/bracket to get bigger tools in there. Why didn't I wait until I was changing the clutch...
-
MACK

- Lifer
- Posts: 3600
- Joined: Mon Jun 15, 2015 11:38 am
- Location: Manchester
Liam's Z4C race car project
If your talking standard open diffs there's a 3.64 available on post face lift 3.0 autos and pre face lift 2.5 autos. there's even a 3.73 fitted to post face lift 2.5si autos if you can find any of these. Aftermarket wise I'm not sure about others but I know Quaiffe do a slip diff in these sizes.Liam22 wrote: ↑Tue Mar 12, 2019 10:58 am Kaaz DBW3020 should drop straight in with the 3.46 FD. That seems reasonably short and should see 145mph at the redline in 5th. Are shorter FDs available?
I've got a 3.64 fitted to my pre 3.0i (open diff still no LSD just yet) in my road going zed. But I am running the M tyre sizes so it actually equates to the 3.46 with standard tyres. Going from a standard 3.07 which effectively became a 2.93 with these tyres, to effectively a 3.46 made a huge difference to the car, really livened it up and as this is the diff ratio a standard coupe runs not the extreme at all. I think the move from 3.07 in pre 3.0i to the 3.23 in the 3.0si vert and the 3.46si in the coupe (all using the same box/ratio) go along way to explaining why folks often say the later cars have a lot more urgency about them. That and an extra 30bhp of course!
Silver 05 3.0i SE
Mods inc - F/L Xenons Clear Ind Rear Lights M Sport Seats & Wheel Eibach/B4 3.64 DIFF (SOLD)
White E89 20i M Sport
Mods inc- B12 kit, M3 Arms, 18" Zito 935's with PS4's, Decat & Remap, Switchable Exhaust Flap (SOLD)
Mods inc - F/L Xenons Clear Ind Rear Lights M Sport Seats & Wheel Eibach/B4 3.64 DIFF (SOLD)
White E89 20i M Sport
Mods inc- B12 kit, M3 Arms, 18" Zito 935's with PS4's, Decat & Remap, Switchable Exhaust Flap (SOLD)
-
Liam22
- Member
- Posts: 645
- Joined: Thu Dec 06, 2018 2:28 pm
- Location: Herts/Cambs
Liam's Z4C race car project
Flywheel and clutch kit have arrived and I finally had a chance to drop the gearbox today.
Spent way too much time trying to remove the gear lever. The plastic cup just didn't want to come away from the carrier. But thankfully that was the hardest part. Worked my way around the bell housing, removing the E-bolts, all of which came away with ease thanks to the being aluminium.
The gearbox glided away from the engine on a transmission cradle atop a trolley jack. This has come in useful many times now.
With the gearbox on the floor I could finally tap out the pin that was stuck in the gear shift carrier. What a faff!
The clutch is in great condition. Looks almost new, but it's clear that the gearbox has never been removed before. Impressive.
Unfortunately my T60 torx socket sheared apart after the second flywheel bolt, so I had to pack up for the day without removing the flywheel. Gonna need a 1/2" drive impact version, and a flywheel locking tool before I can finish the job.
Spent way too much time trying to remove the gear lever. The plastic cup just didn't want to come away from the carrier. But thankfully that was the hardest part. Worked my way around the bell housing, removing the E-bolts, all of which came away with ease thanks to the being aluminium.
- 20190415_160317_HDR.jpg (244.52 KiB) Viewed 2885 times
- 20190415_155439_HDR.jpg (163.84 KiB) Viewed 2885 times
- 20190415_161133_HDR.jpg (213.13 KiB) Viewed 2885 times
- 20190415_161124_HDR.jpg (224.56 KiB) Viewed 2885 times
- 20190415_162118_HDR.jpg (235.65 KiB) Viewed 2885 times
-
stupot1
- Senior Member
- Posts: 1052
- Joined: Sun Oct 18, 2015 1:06 pm
- Location: Sheffield
Liam's Z4C race car project
Great write up and interesting to follow
E86 Sapphire Black, Auto, 224's
-
Liam22
- Member
- Posts: 645
- Joined: Thu Dec 06, 2018 2:28 pm
- Location: Herts/Cambs
Liam's Z4C race car project
Halfords replaced my T60 socket and I spent a long time looking for N52 flywheel locking tools. Could only find expensive kits for cambelt replacement, and YouTube didn't turn up anything useful either. So after extensively looking at photos I'd taken of the flywheel in situ I took a £12 punt on this simple thing for Peugeot diesels. https://www.amazon.co.uk/gp/product/B0039UNWCG
The slot needed drilling out from 10mm to 12mm, at which point it fitted nicely in the 4 o'clock position.
Removed the remaining flywheel bolts without the need of an impact wrench and compared it with the TTV Racing lightweight single-mass flywheel. Shiny, yes? 
The Sachs performance clutch assembly is also lighter than the OEM self-adjusting clutch. All told, it's 3.1kg lighter.
Everything fitted together perfectly. Nice thing about the single-mass flywheel is that there is enough room to use a generic clutch alignment tool. I had ordered new flywheel bolts, but the clutch didn't come with any so I cleaned up the old ones (removing old threadlock) and re-used them. Torqued to 15Nm + 90º
New OEM clutch release bearing+arm assembly fitted to the gearbox but I'm less keen on re-using the aluminium bell housing bolts, so I'll see about ordering a set of those tomorrow.
The slot needed drilling out from 10mm to 12mm, at which point it fitted nicely in the 4 o'clock position.
- 20190420_175754_HDR.jpg (210.67 KiB) Viewed 2815 times
- 20190420_181340_HDR.jpg (242.24 KiB) Viewed 2813 times
- 20190420_181501_HDR.jpg (239.04 KiB) Viewed 2813 times
- 20190421_153818_HDR.jpg (249 KiB) Viewed 2811 times
-
Liam22
- Member
- Posts: 645
- Joined: Thu Dec 06, 2018 2:28 pm
- Location: Herts/Cambs
Liam's Z4C race car project
With the gearbox still on the ground (well, resting on a trolley jack) I took the opportunity to replace the gearbox oil. I had the foresight to drain it before removal. So I just rolled it onto it's side and poured 1.6 litres of Redline MT90 in through a funnel. Once the gearbox is back on I'll remove the filler plug and check the level.
Of course, the main reason I'm working on the clutch and gearbox now is because the shifter cradle got siezed to the box. I had purchased new bushes for the cradle, selector rod bearing and new cup for the shift lever. However, the cradle bushes were way too wide so I ended up cutting them in two and taking 2-3mm out of the centre. The rear bush also had to re-use the metal sleeve so more time with the blowtorch getting that done. The gearshift overhaul has taken more time than the entire clutch/flywheel replacement.
Before it gets refitted, is there a recommended short-shift lever from BMW? I was perfectly happy with the original item, but worth asking.
Of course, the main reason I'm working on the clutch and gearbox now is because the shifter cradle got siezed to the box. I had purchased new bushes for the cradle, selector rod bearing and new cup for the shift lever. However, the cradle bushes were way too wide so I ended up cutting them in two and taking 2-3mm out of the centre. The rear bush also had to re-use the metal sleeve so more time with the blowtorch getting that done. The gearshift overhaul has taken more time than the entire clutch/flywheel replacement.
- 20190419_183851_HDR.jpg (182.75 KiB) Viewed 2809 times
- 20190421_134906_HDR.jpg (182.87 KiB) Viewed 2809 times
-
Liam22
- Member
- Posts: 645
- Joined: Thu Dec 06, 2018 2:28 pm
- Location: Herts/Cambs
Liam's Z4C race car project
Finally, it's time to get the rear axle reassembled and back on the car!
I started off by fitting the lower wishbones to the subframe on the workshop bench. These are adjustable arms with spherical bearings at the inboard pivot. They are heavier than the OEM items but they look strong and I think I'll need the camber adjustment. Next up, the upper wishbones with PU bushes inboard. I could have fitted the ARB after refitting the subframe to the car but I thought it would help to hold everything together. Ultra Racing 21mm rear ARB (that I had to wait 6 weeks for!) with PU bushes.
Torqued up the wishbones and then dropped the subframe over the diff sitting on the floor. Took a little persuasion to get the diff bolts lined up now that there's almost no movement in the mounting bushes. Torqued up the diff mounts (the rear bolt is a monster!) and was then left with the problem of how to carry this lump back to the car!
I ended up straddling the subframe and shuffling like a toddler, but I got it to the back of the car, and rested it precariously on a trolley jack. Now... I *am* a master at lying under a car whilst operating a trolley jack with my leg, but I must say I excelled myself and slotted the whole assembly onto the body mounts on the first attempt.
Torqued up the subframe mounts and then on to the trailing arms. Somehow I had got the left and right RTAB carriers mixed up so lost some time there, but otherwise all went well and the bushes seem to pivot nicely without binding. I can see how some PU bush designs might result in binding but the Strongflex have a stepped central sleeve that the outer washers can rotate over. I'll keep a close eye on them.
So with the rear corners starting to look mostly back together I'm feeling like there's real progress being made, and I might actually be driving it in the next few weeks. Another long weekend would be nice...
I started off by fitting the lower wishbones to the subframe on the workshop bench. These are adjustable arms with spherical bearings at the inboard pivot. They are heavier than the OEM items but they look strong and I think I'll need the camber adjustment. Next up, the upper wishbones with PU bushes inboard. I could have fitted the ARB after refitting the subframe to the car but I thought it would help to hold everything together. Ultra Racing 21mm rear ARB (that I had to wait 6 weeks for!) with PU bushes.
Torqued up the wishbones and then dropped the subframe over the diff sitting on the floor. Took a little persuasion to get the diff bolts lined up now that there's almost no movement in the mounting bushes. Torqued up the diff mounts (the rear bolt is a monster!) and was then left with the problem of how to carry this lump back to the car!
- 20190421_135352_HDR.jpg (296.58 KiB) Viewed 2804 times
- 20190421_155959_HDR.jpg (227.19 KiB) Viewed 2804 times
So with the rear corners starting to look mostly back together I'm feeling like there's real progress being made, and I might actually be driving it in the next few weeks. Another long weekend would be nice...
-
MrPT
- Lifer
- Posts: 4746
- Joined: Sun Oct 21, 2012 7:44 pm
- Location: Bucks/Oxon
Liam's Z4C race car project
Great work. All on axle stands too. 
2008 Z4MC: heavy wheels | crap suspension | skittish rear end | wobbly engine | not enough induction noise | underwhelming turn in | inconsistent braking | lardy battery | chubby steering wheel
2006 Z4 2.5si: gone
2006 Z4 2.5si: gone
-
Jembo

- Lifer
- Posts: 6030
- Joined: Sat Jun 25, 2011 11:59 pm
- Location: 1066 Country
Liam's Z4C race car project
I am not worthy... thanks for continuing to post, makes a fascinating read every time.
Joined the dark side with a ///M Hell Bronze Sepang Coupe 
Ex Aug 2005 Maldives Blue 3 litre cruizer, lots of toyz,
Lifer 54
Ex Aug 2005 Maldives Blue 3 litre cruizer, lots of toyz,
Lifer 54