
I'd previously read that this was an issue that could only be remedied with a new/salvage steering column, because the torque sensor is buried deep within the column housings. But £2000 for a replacement column (+ labour !?) was a little steep for me, so I decided to take the thing apart to see what could be done. I took a few photos along the way, because I couldn't find anything on the web that had any disassembled column images, or any guides indicating what was required.
Before I start, here's a little bit of background to how I found myself looking at a £2000 bill for a replacement column.. I've steadily been fixing up a CAT-C write-off Z Coupe over the last few months, and had finally got it running only to find the power steering wasn't working at all. Checking the fault codes with my OBD reader showed me that this was a fault with the column torque sensor. A bit of internet research told me that the torque sensor wiring is connected to the car loom via a coil of wires that allow the column to move freely lock-to-lock, but not much more. To be honest, I was a little careless with the steering column while the steering rack was off the car, and can only assume that I'd spun the column around too many times and broken these small wires.
So here's some column removal instructions, and images to detail the internals / components of a later-model e86 steering column (any Z4 after 2006). Mines a RHD and from an automatic (but there shouldn't be much difference between any Z4 models).
1a) Move the drivers seat back as far as it goes. I'm 5'9" and working in the footwell was pretty uncomfortable. Moving the seat back is a must, but if you have more sympathy for your back, you may consider taking the seat out altogether.
1b) Disconnect the battery
2) Remove the airbag from the steering wheel (see other guides for this step).
3) Remove the steering wheel
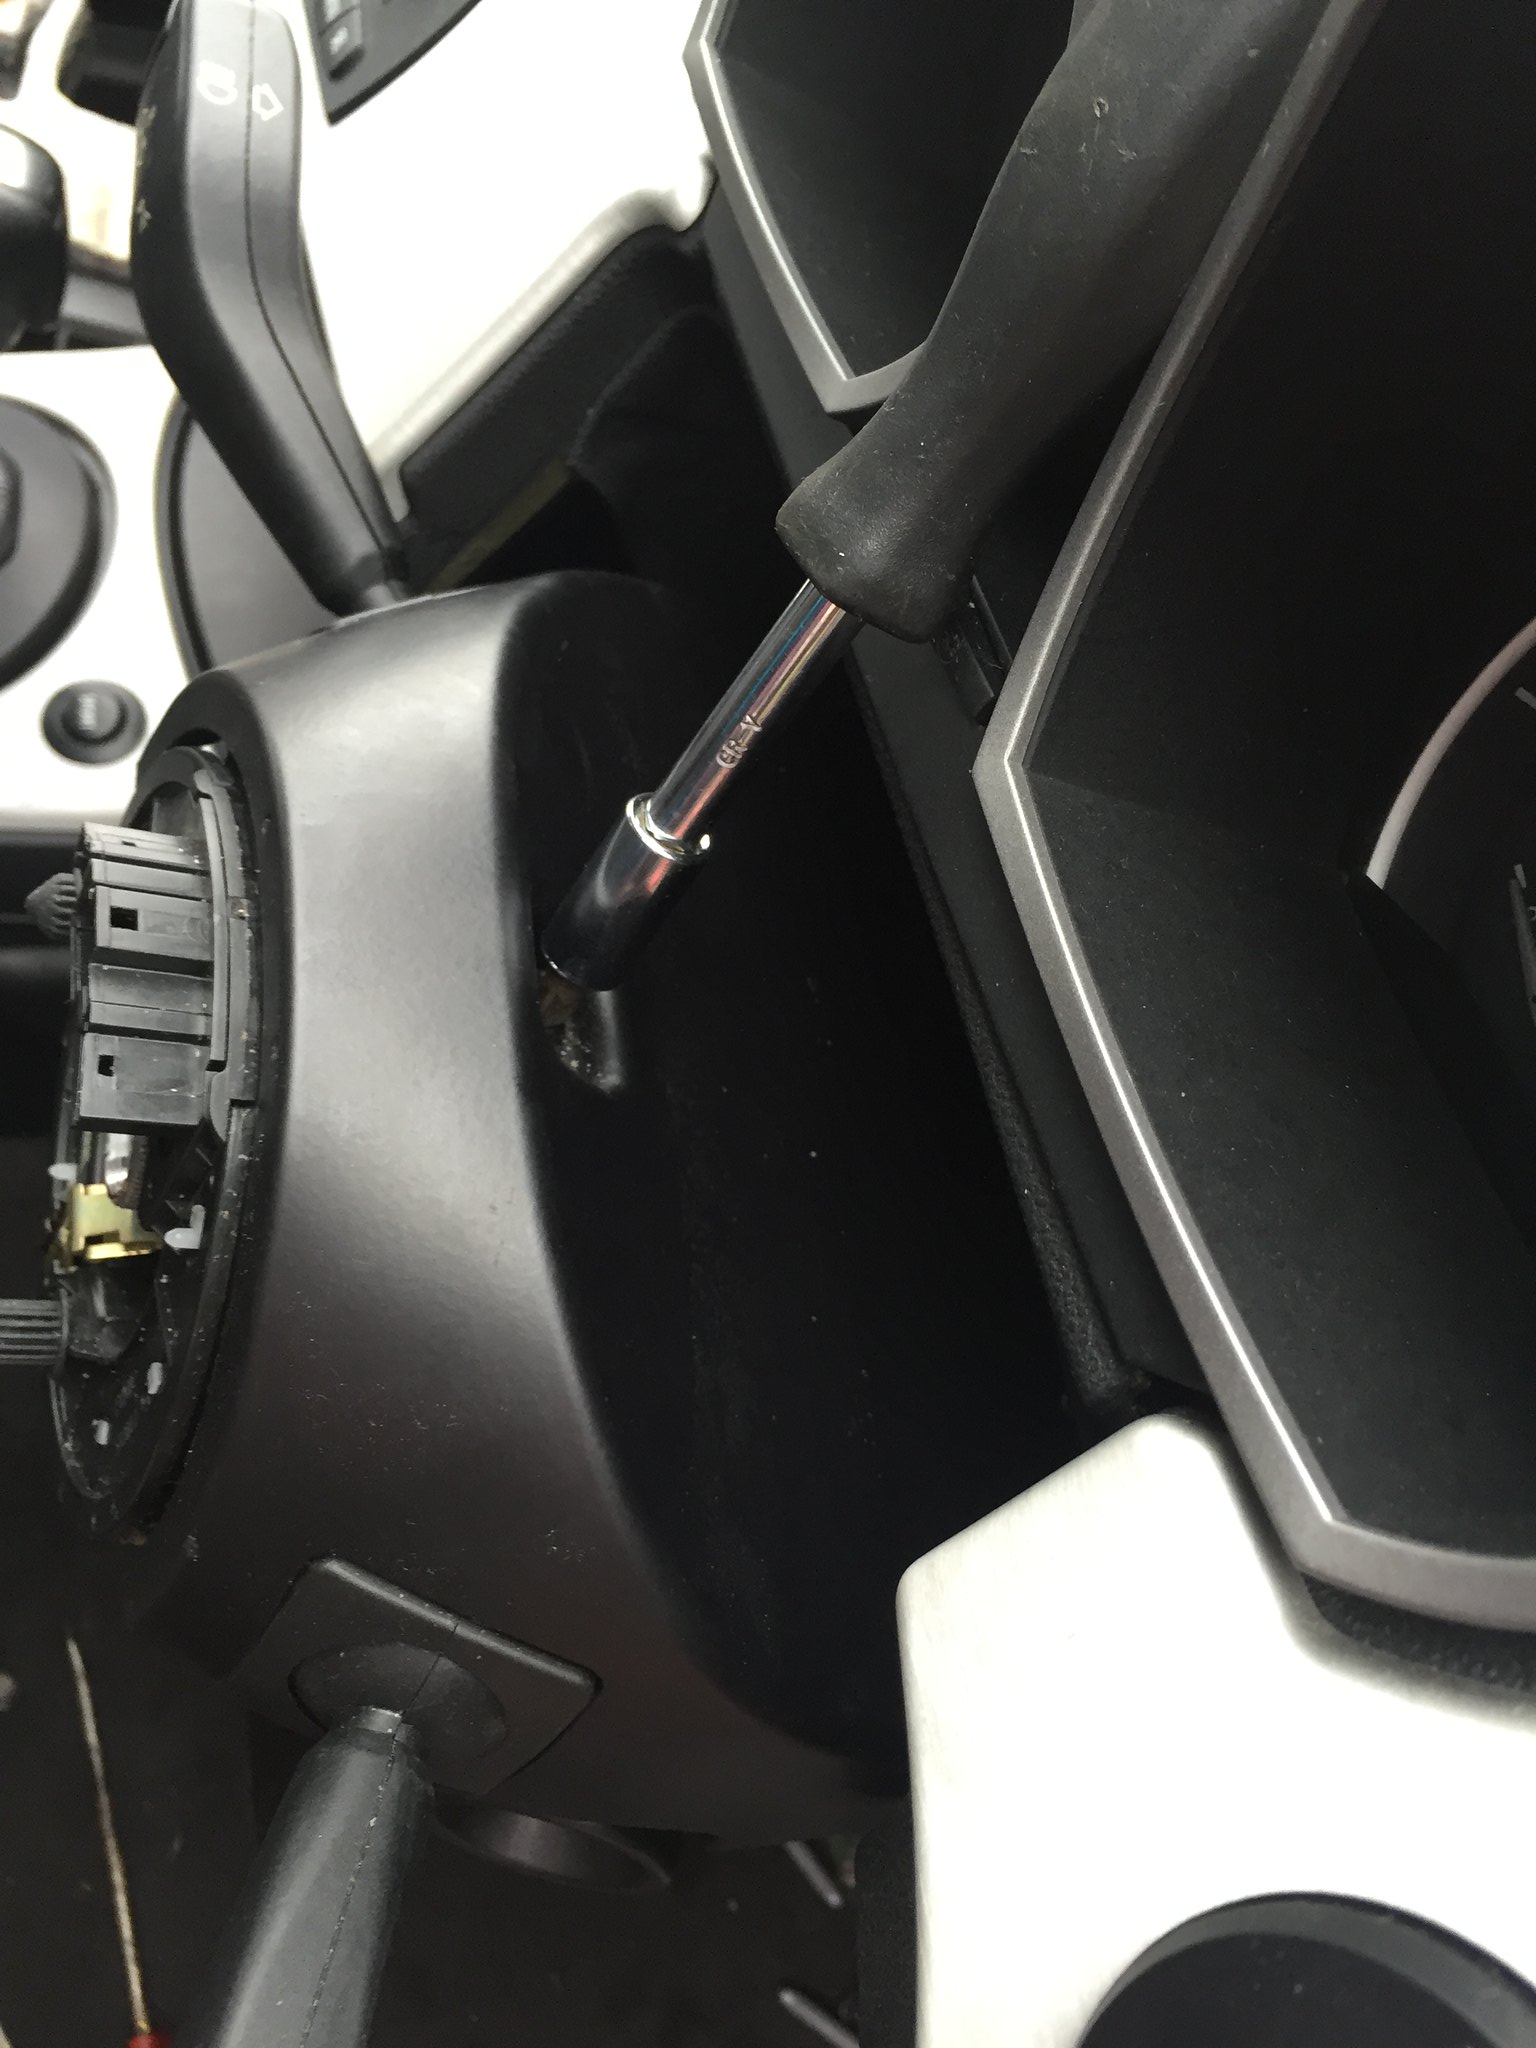
4) Unclip the lower plastic shroud from around the indicator stalks. (theres a clip on either side, it's removed by pulling downwards).
5) Unscrew the upper plastic shroud (adjust the column tilt downwards, then unscrew the '+' head screw at the top).
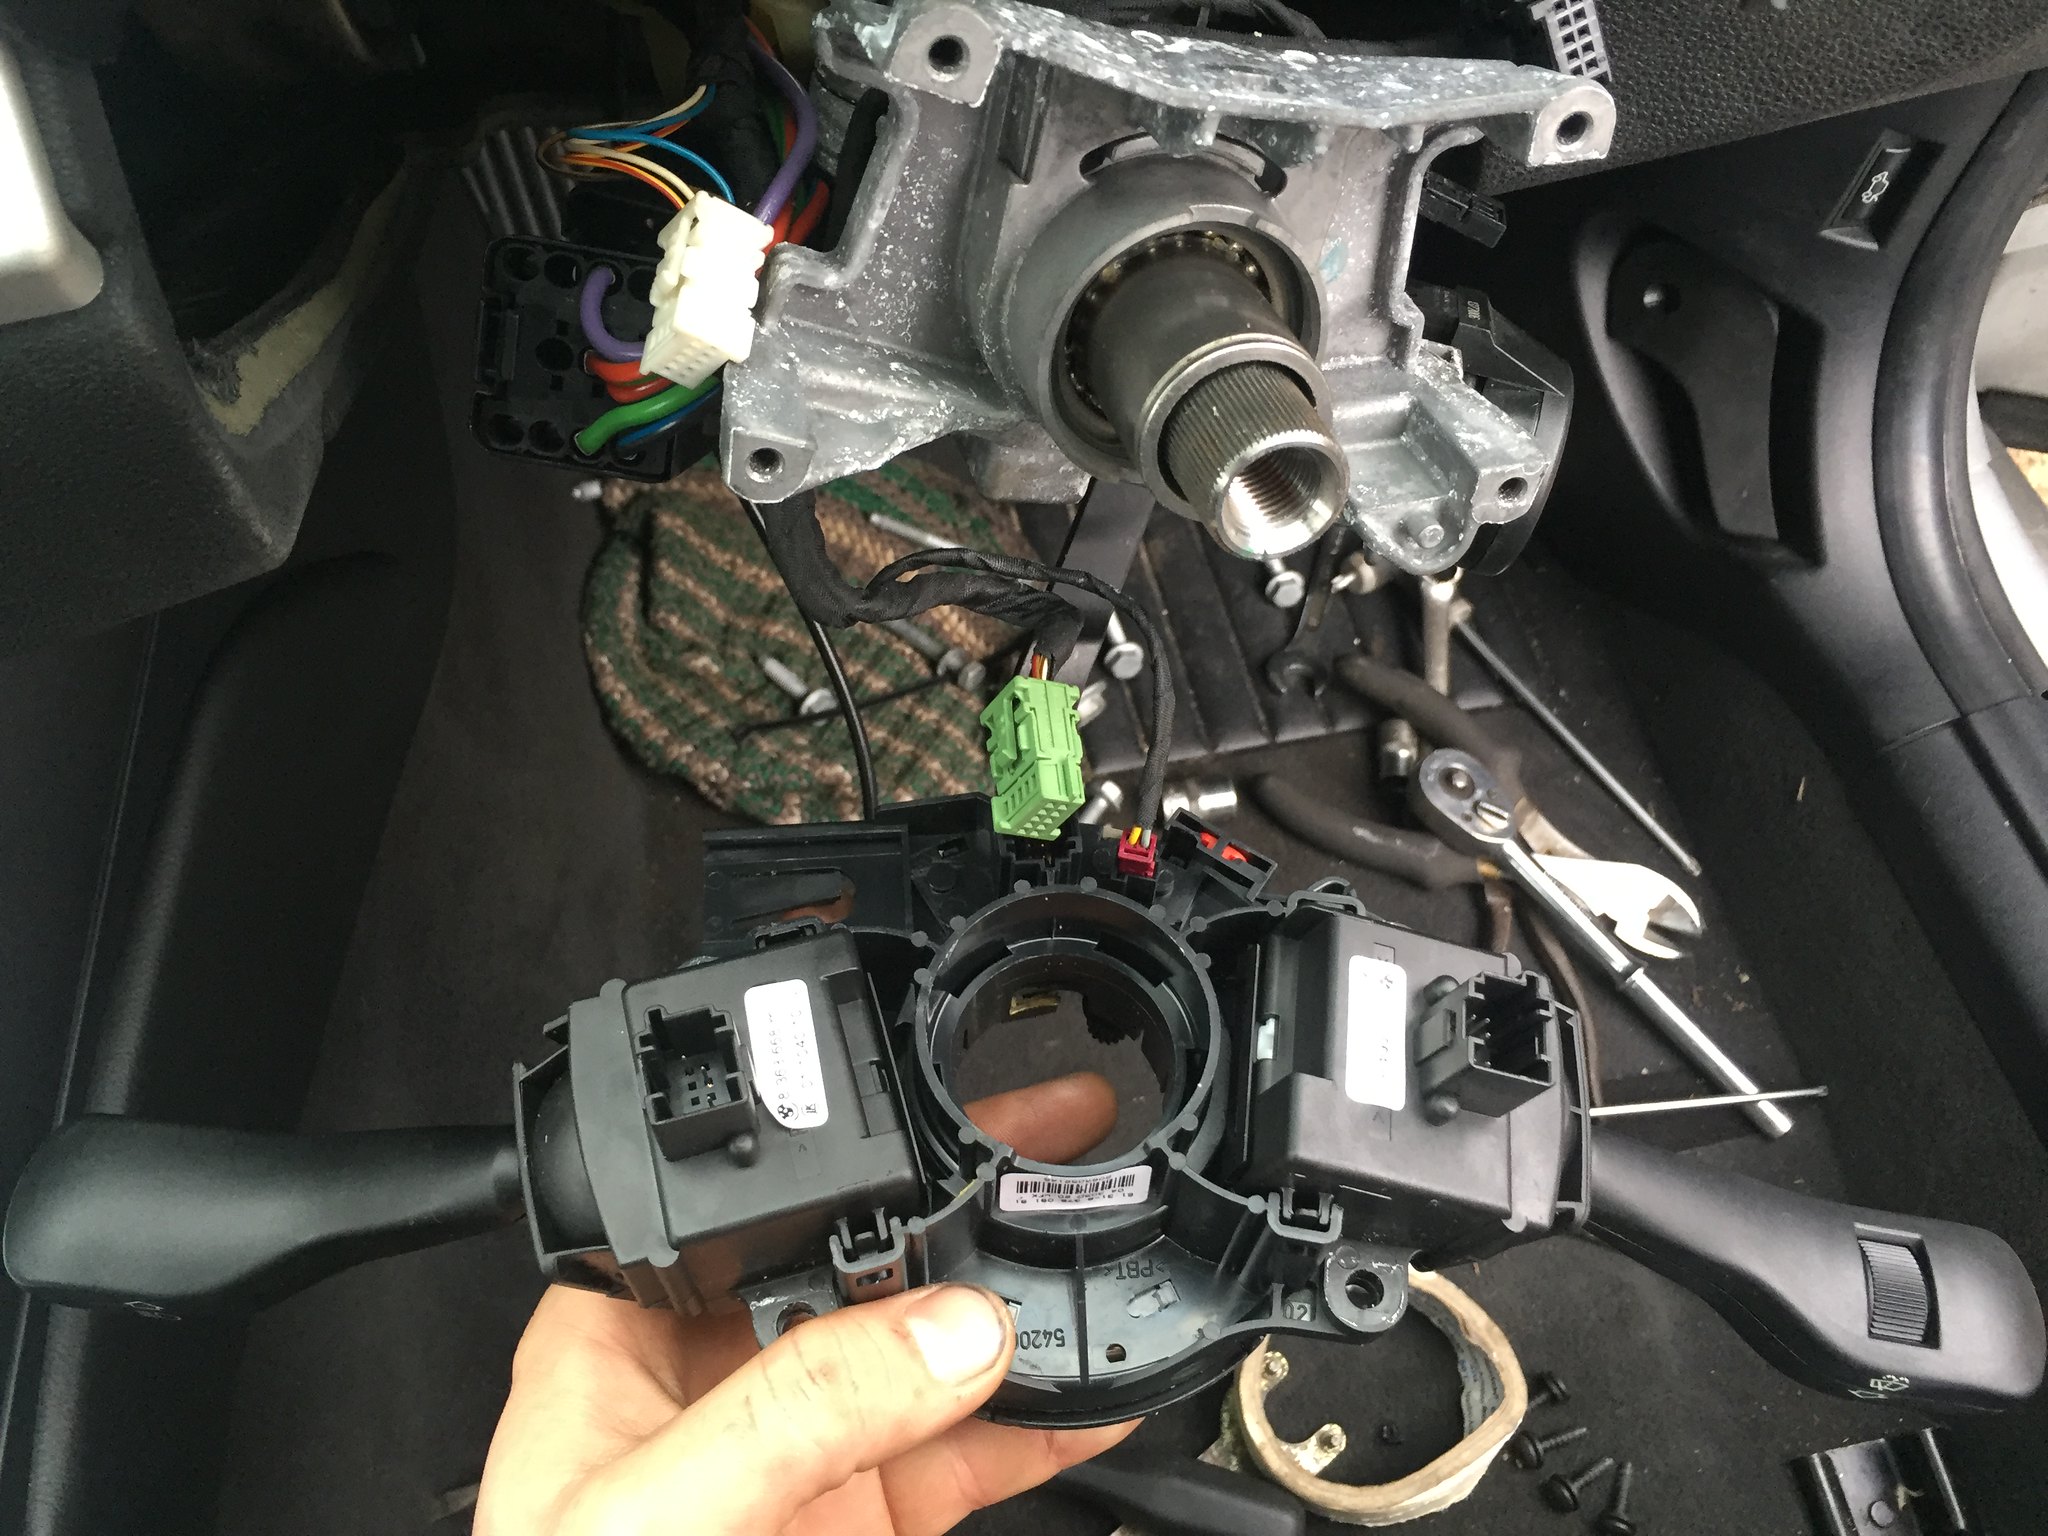
6) Unbold the indicator / wiper stalk unit (4 torx screws), carefully unclipping all cables.
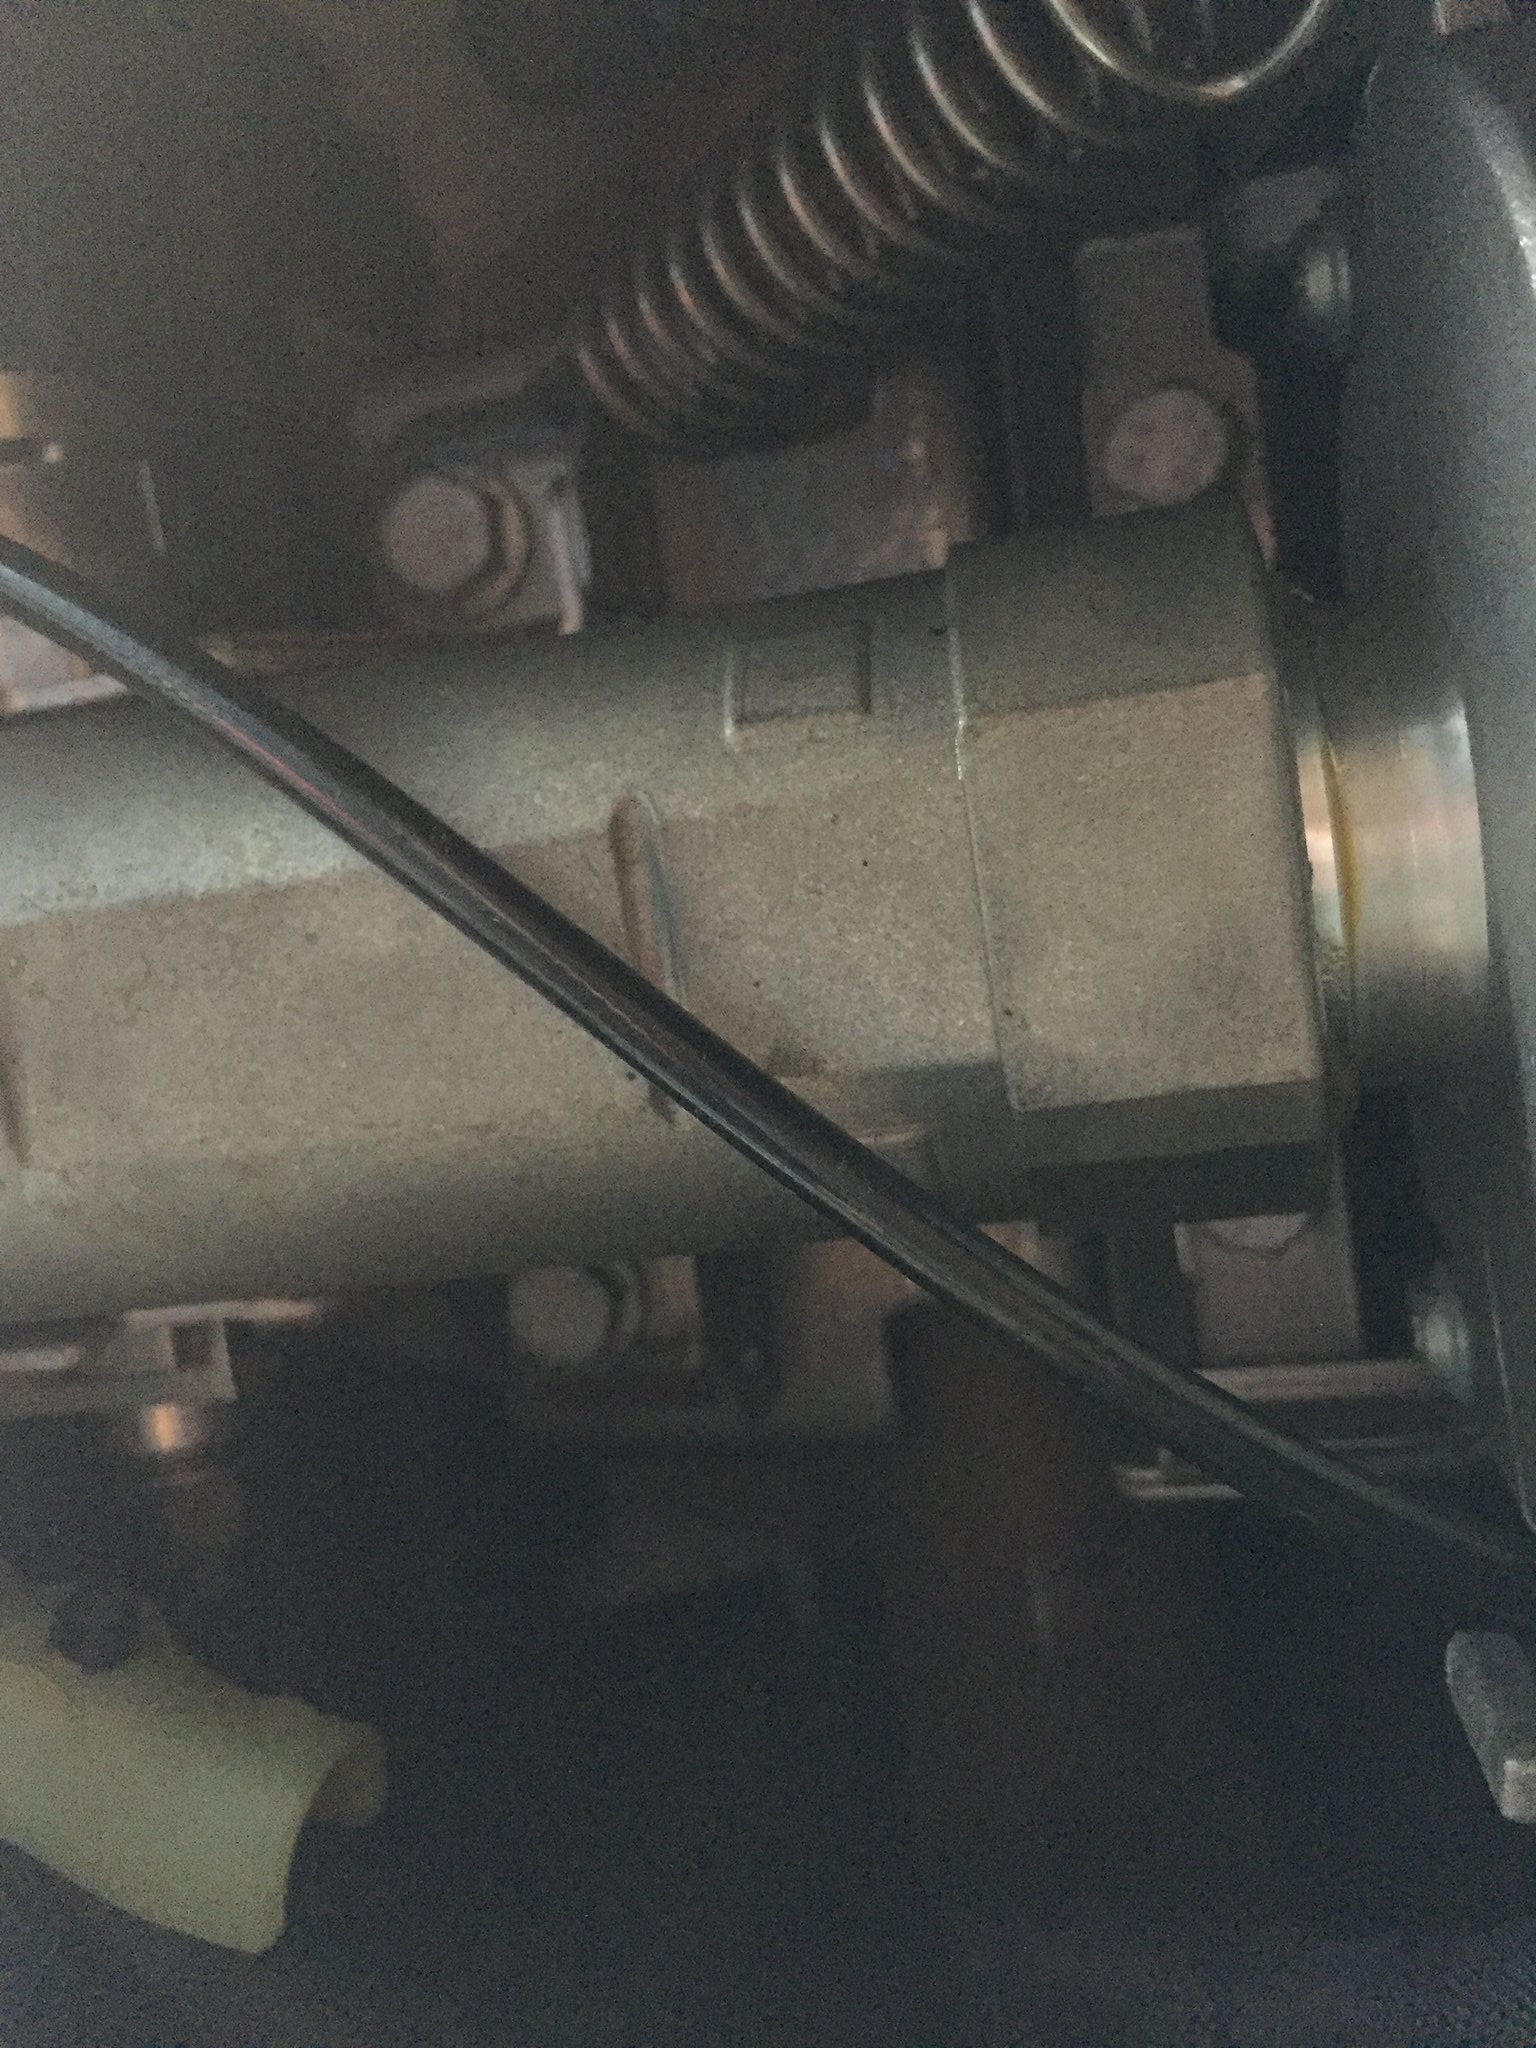
7) Begin removing the column itself. First, loosen the torx bolt holding the column to its universal joint in the engine bay, then slide the lower-steering joint out of the way.
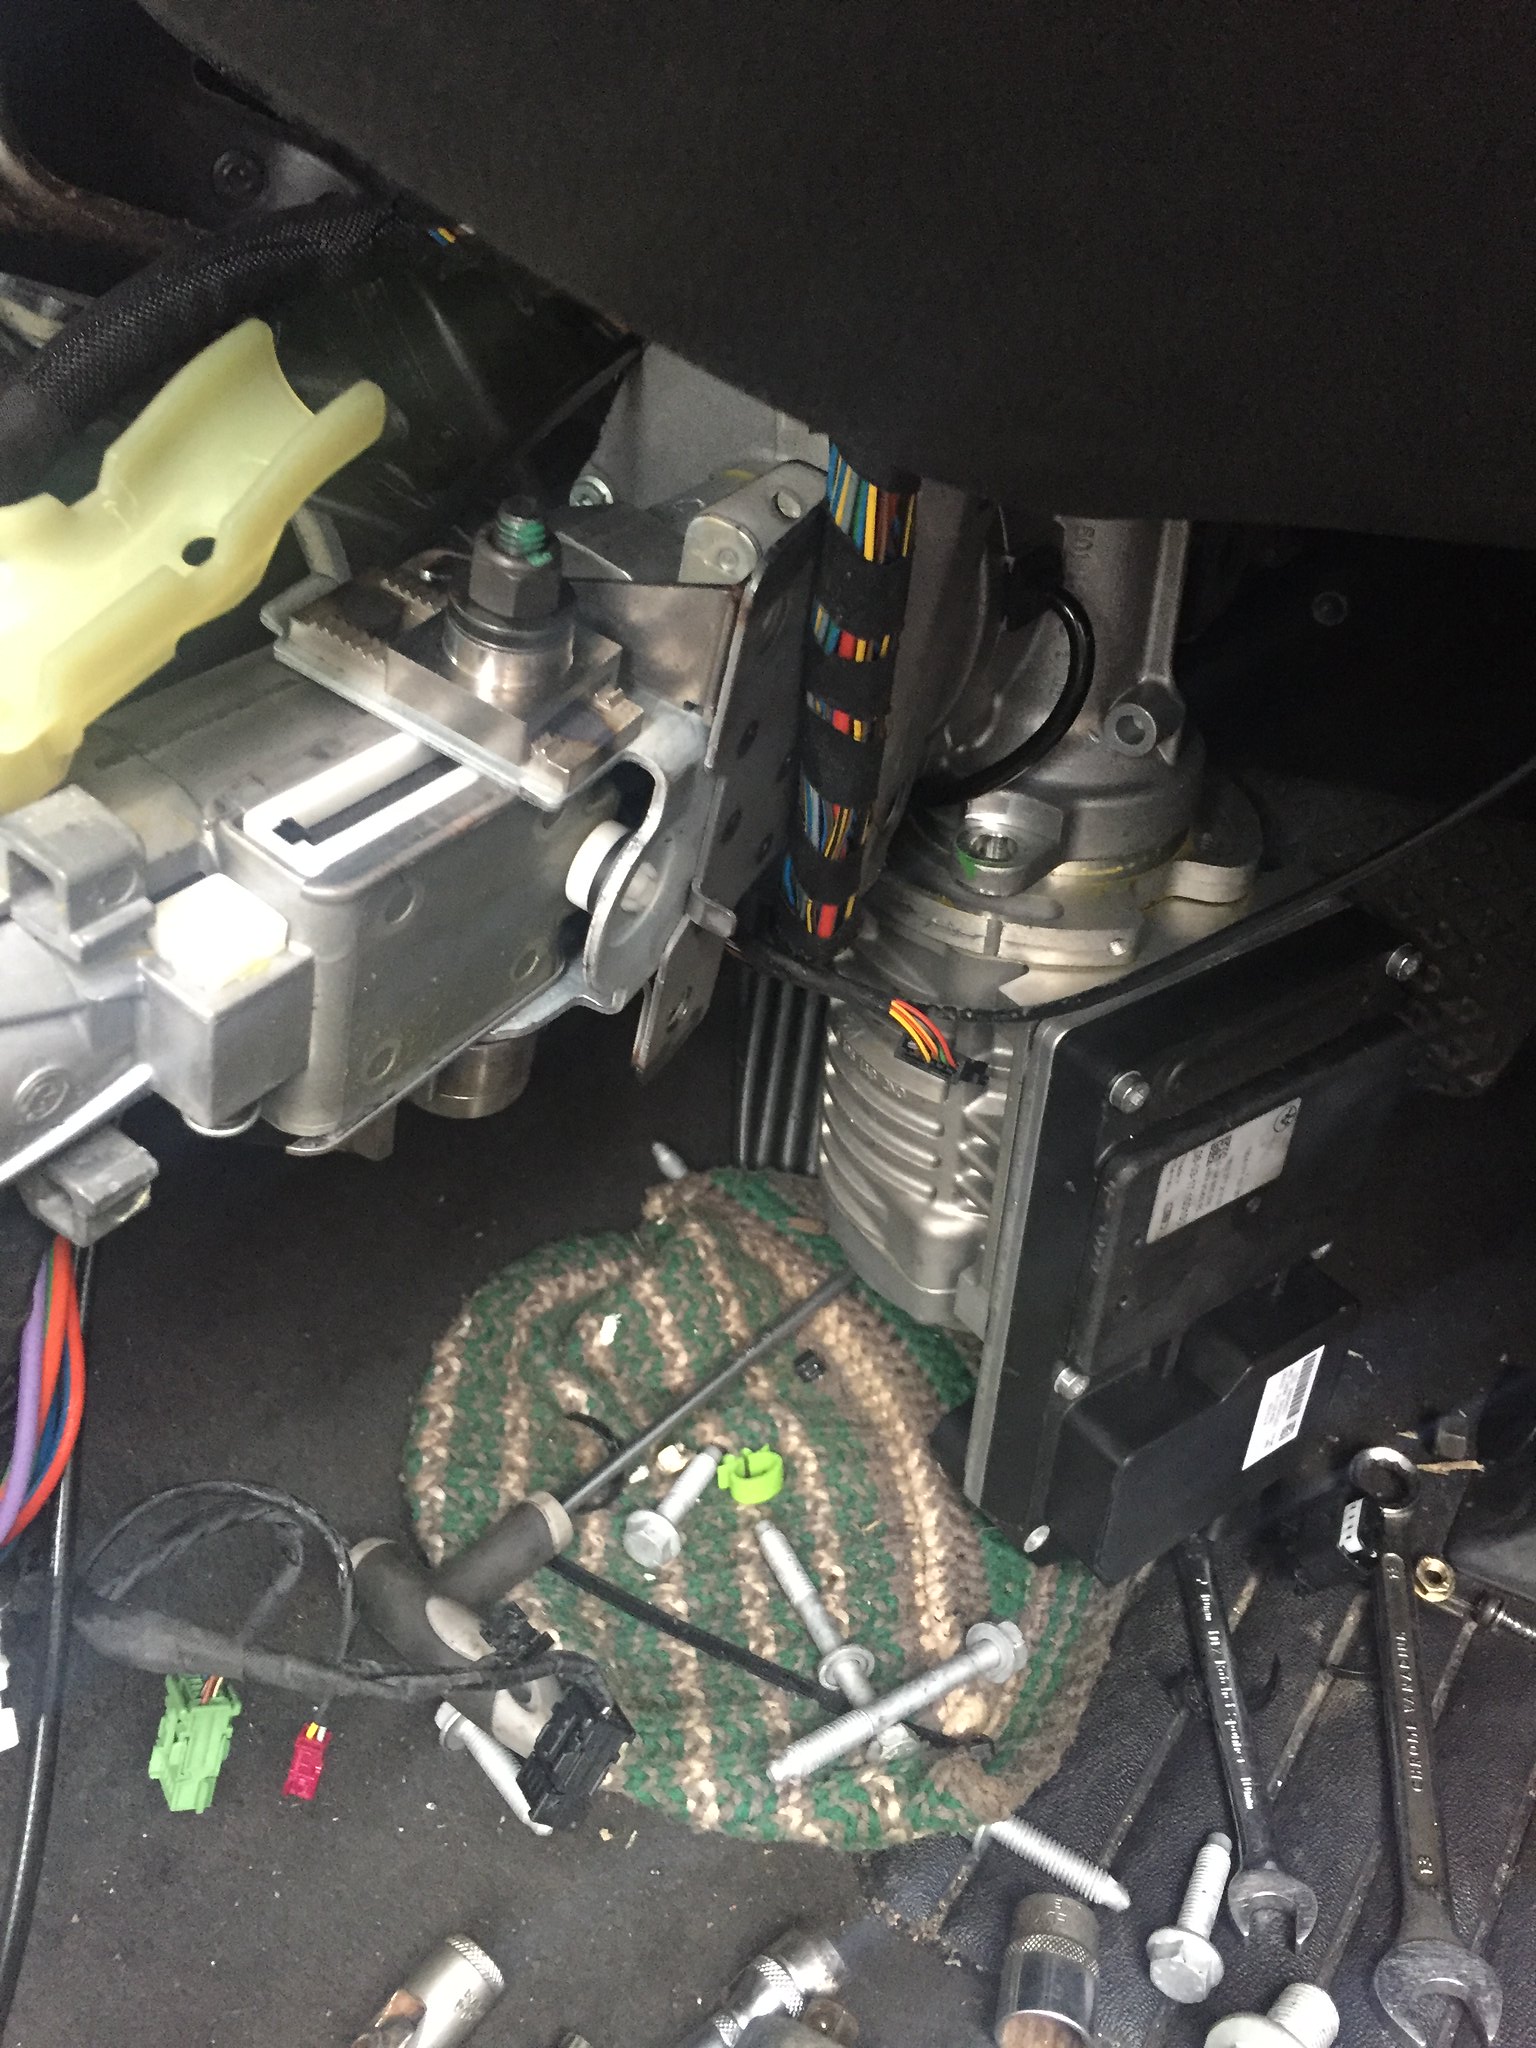
9) Lower the column down as far as it will go at this point. There's a main wiring harness that will prevent it from coming out entirely. Rotate the column 90 degrees so that the motor hangs downwards. I've heard from a friend that it's possible to remove the column with the motor attached, but I couldn't see how this would be possible. So...
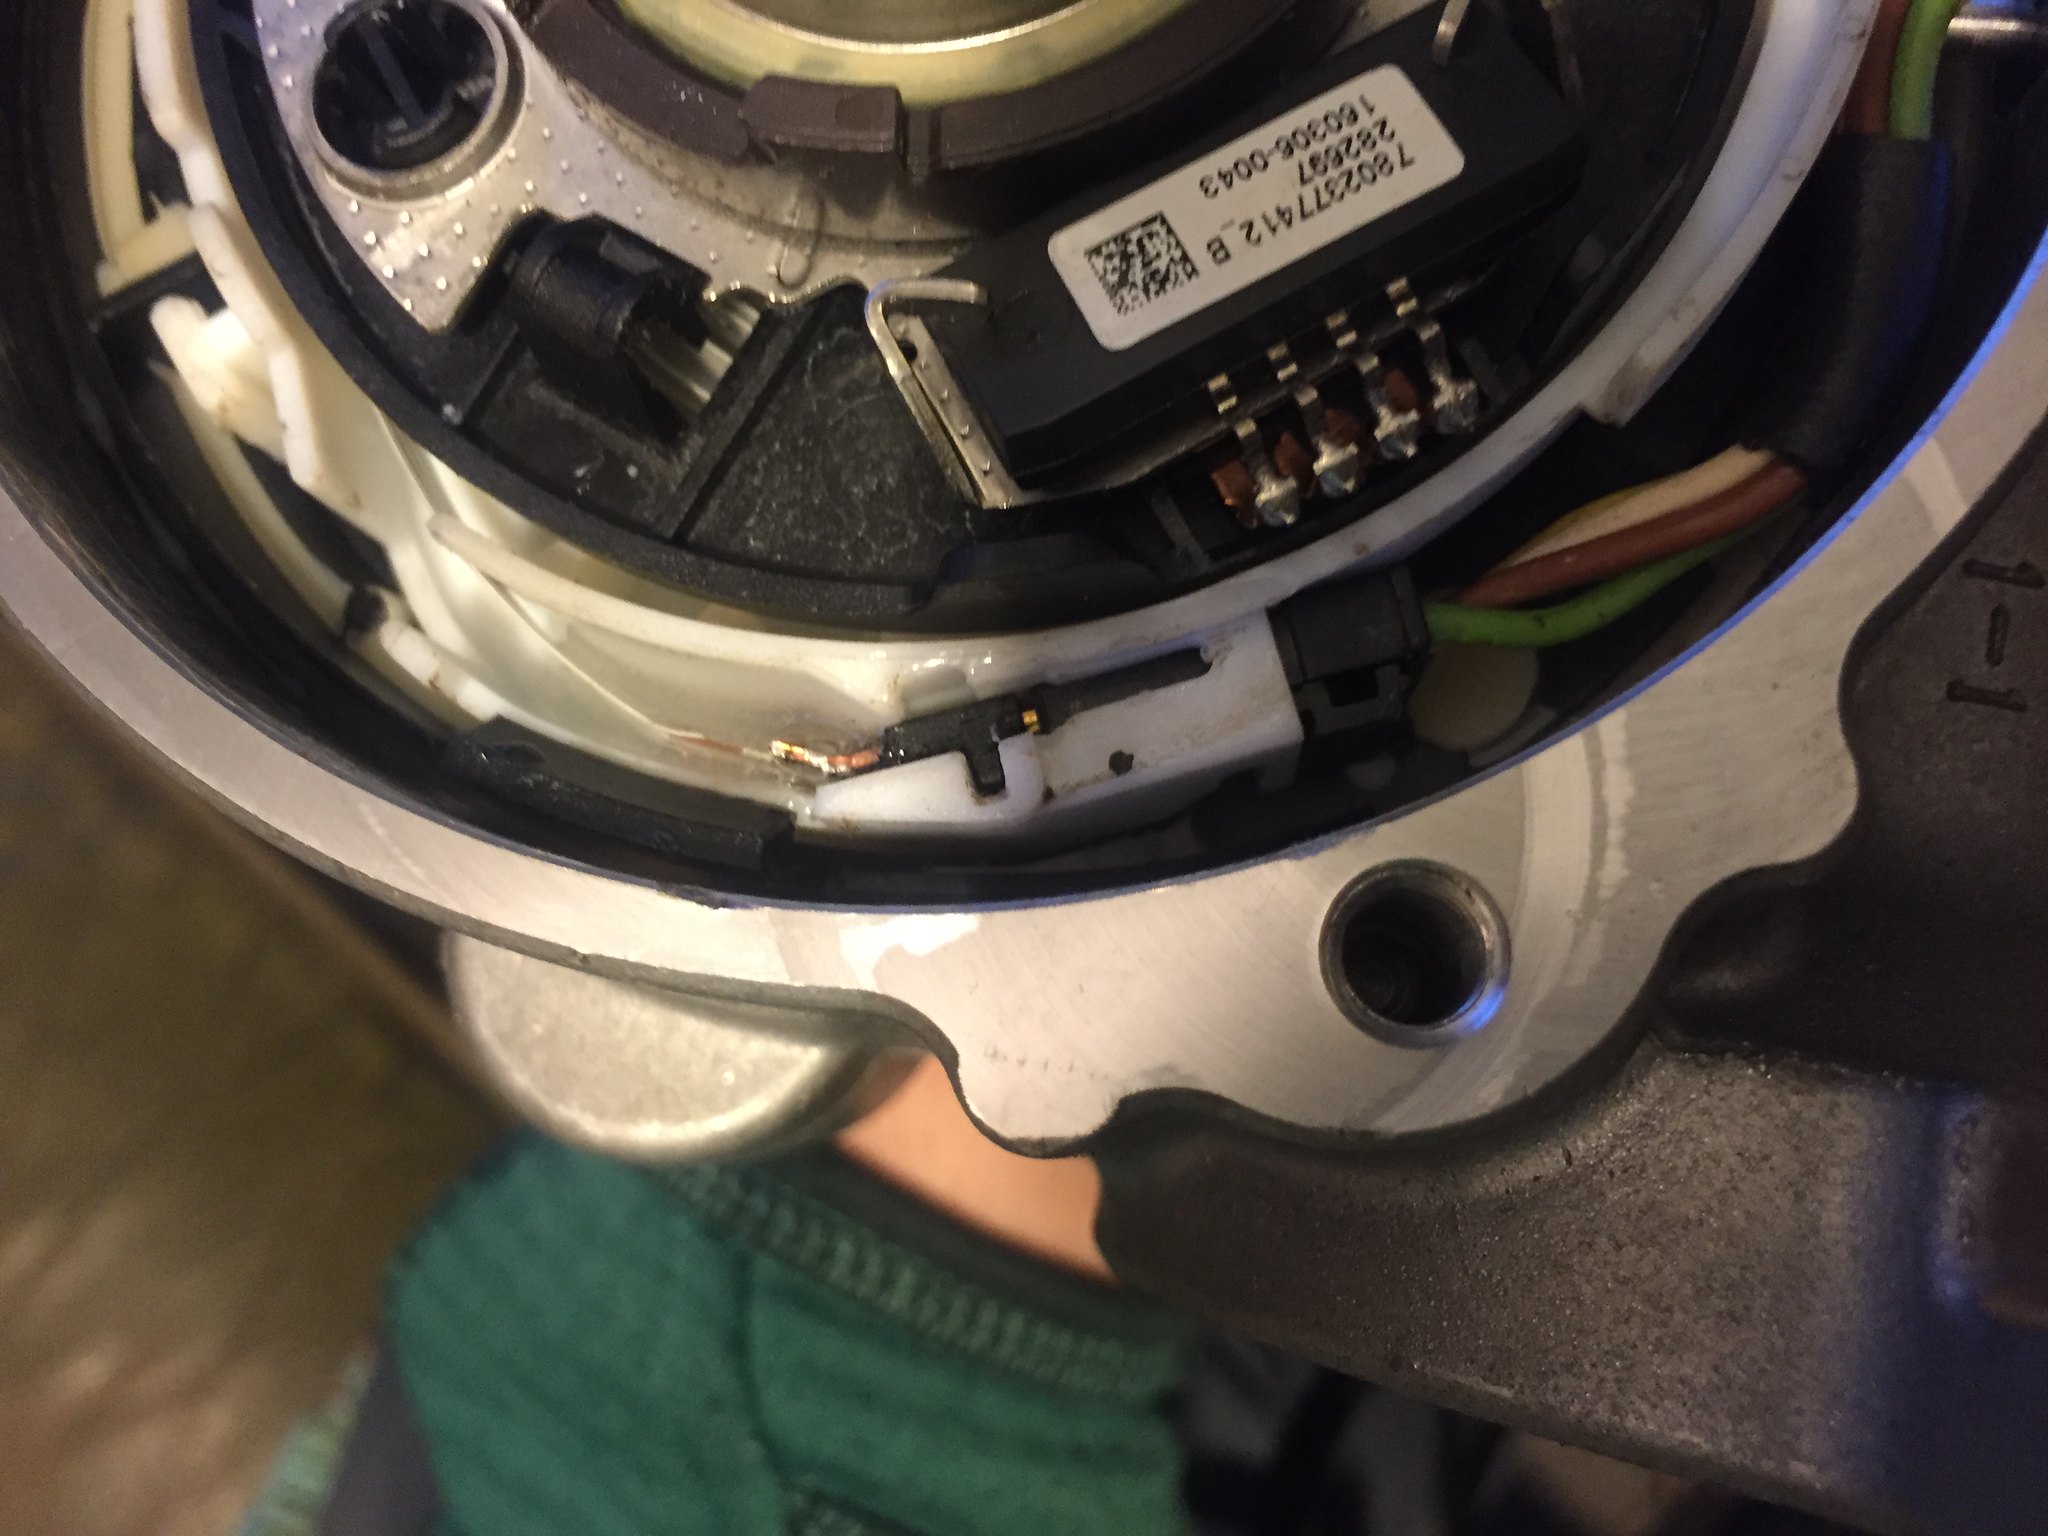
Disconnect the three plugs from the EPS module / motor, and one on the steering angle sensor (black box at the bottom end of the column).
Unbolt the power steering motor from the column (two torx bolts).
10) Remove the column and motor, make yourself a cup of tea, and bring all your tools and parts inside to somewhere more comfortable.

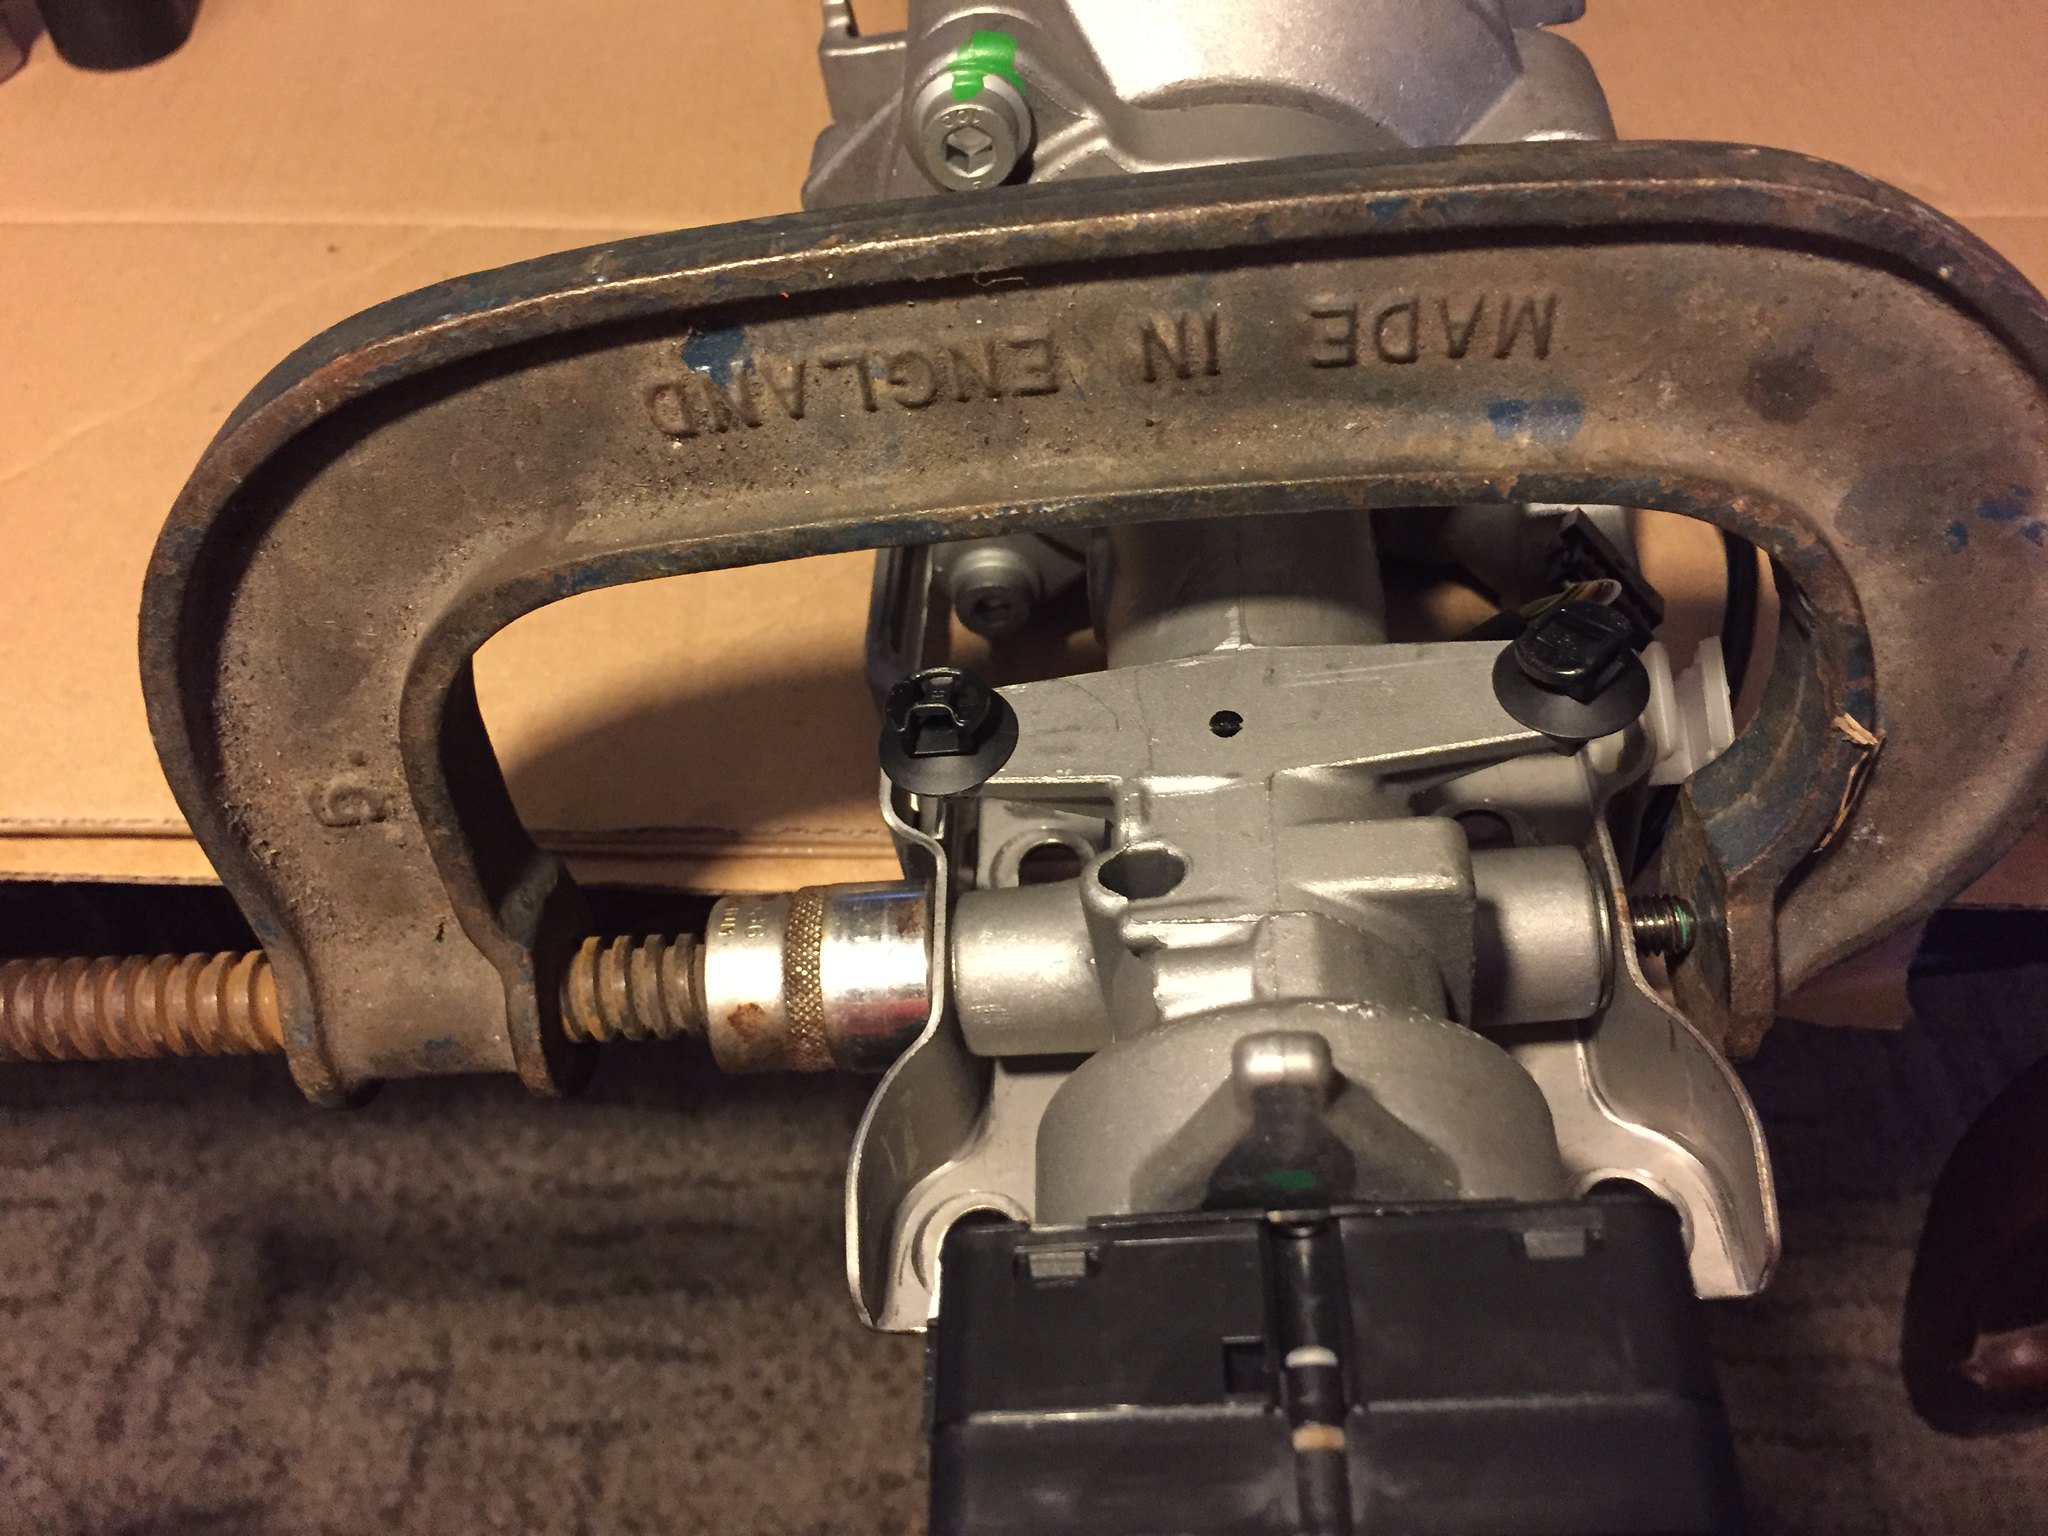
11). Lets start stripping down the column. Unbolt the hinge bolt at the lower end of the column. The bolt is in a snug plain bearing, so twist while pulling to extract it. I had to apply a little extra force with a g-clamp to get it started.
12) Unclip the tension spring, then slide the whole top section (lock barrel etc) away from the main column.

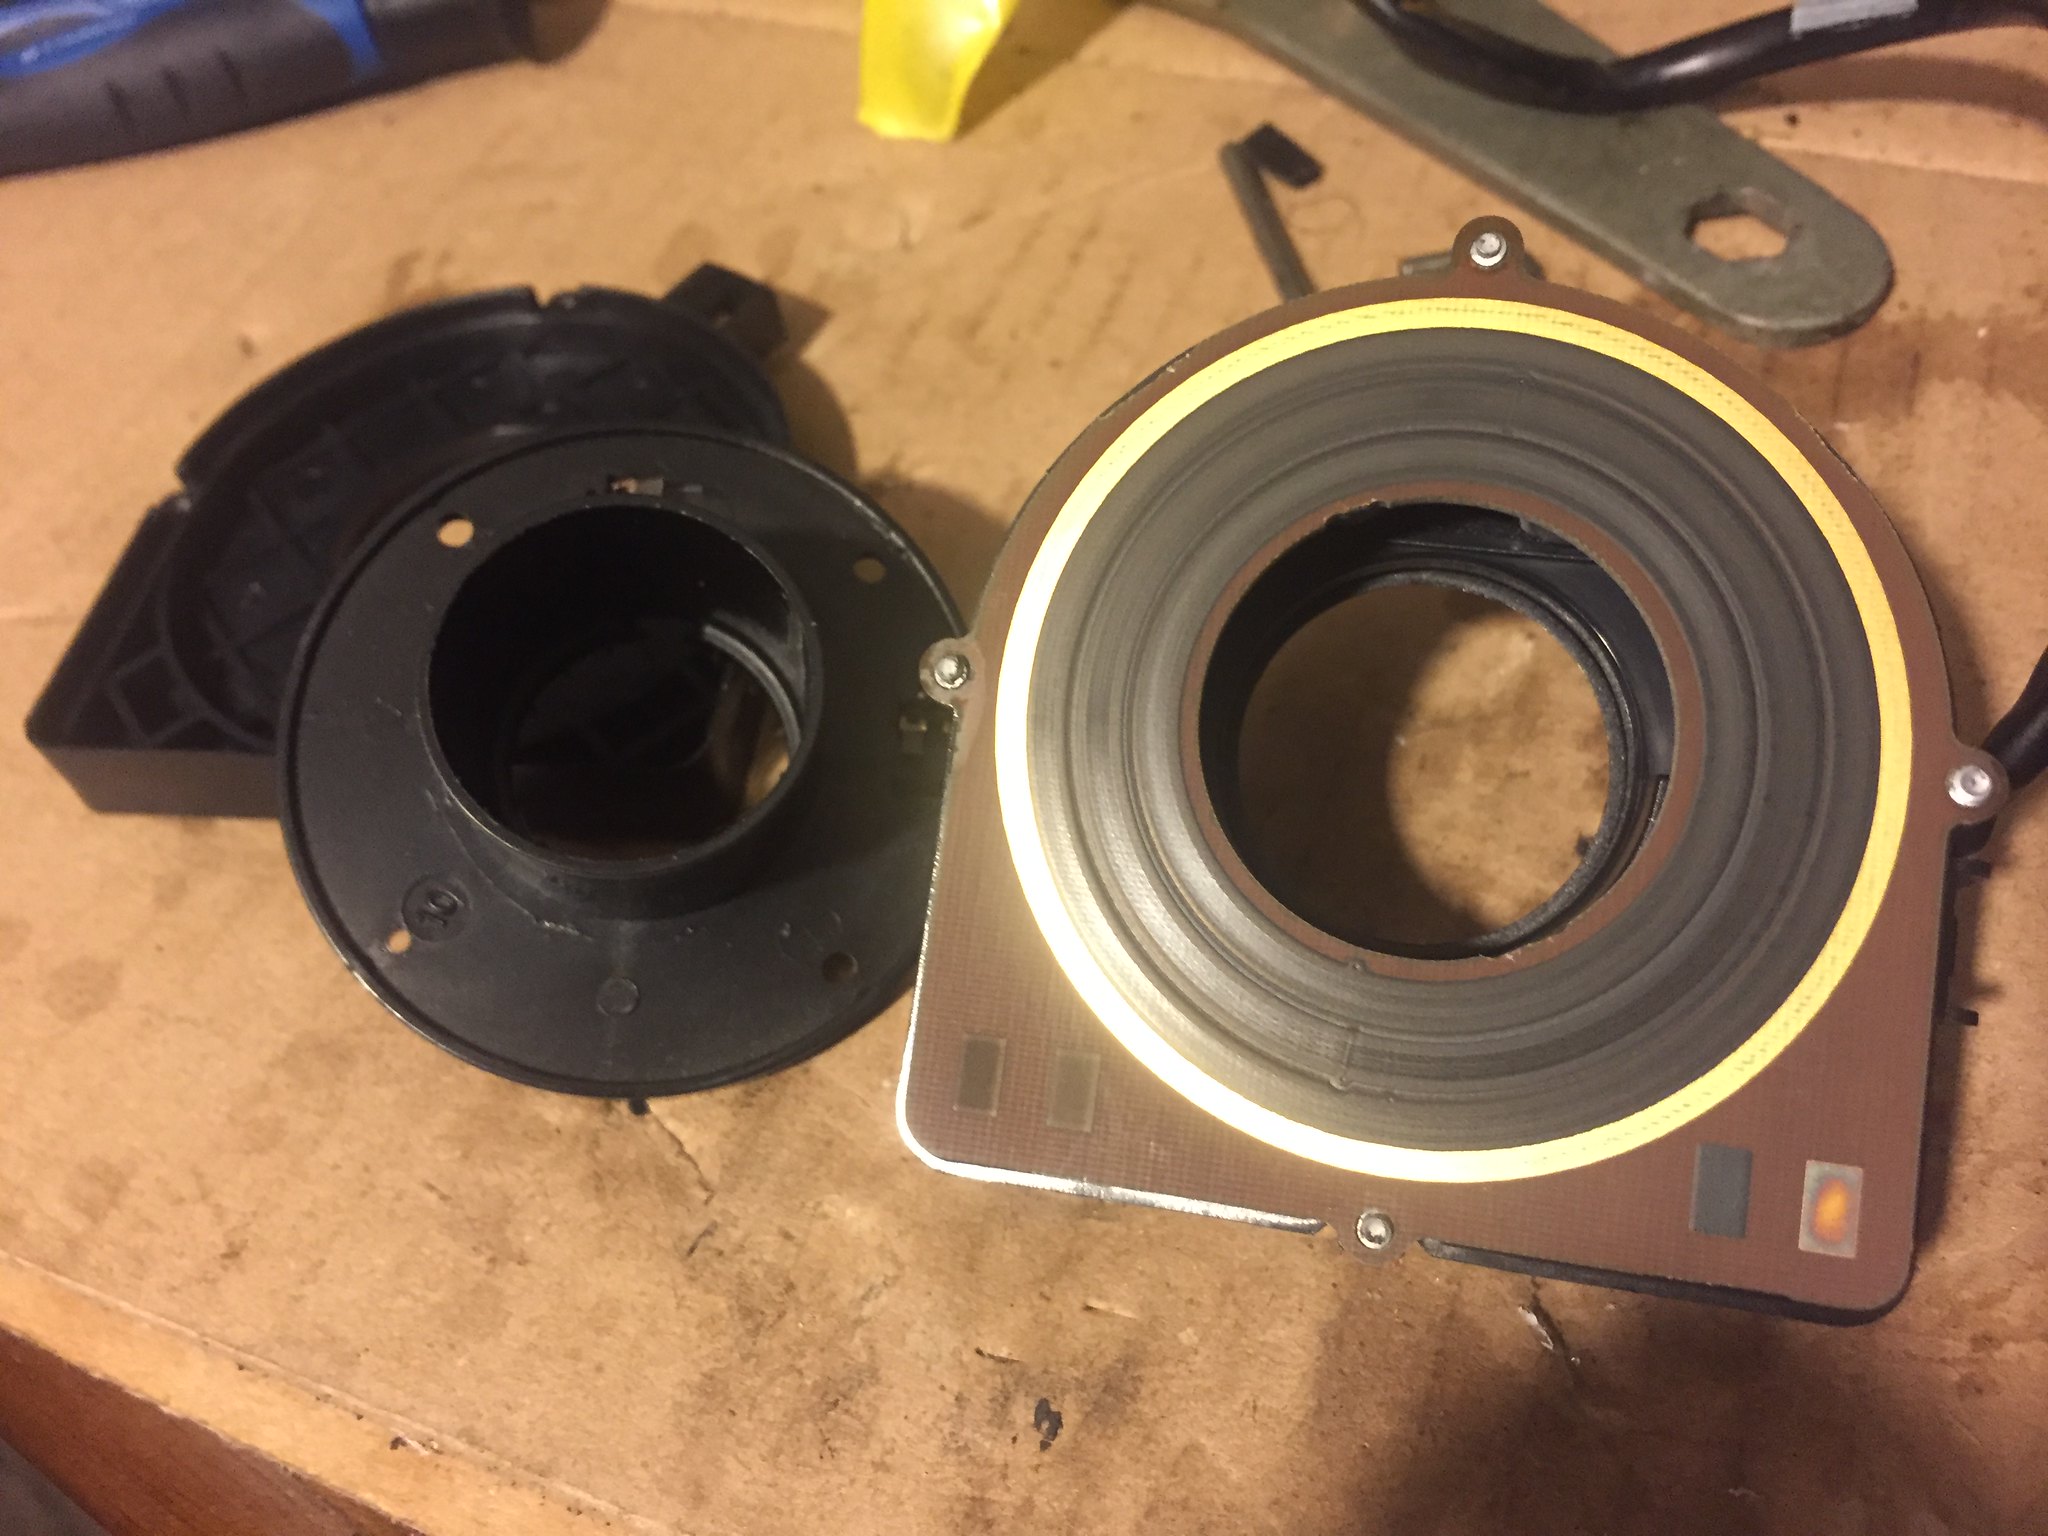
13) Unbolt the 3 torx screws that hold the upper column shroud to the centre section, and remove to reveal the torque sensor.
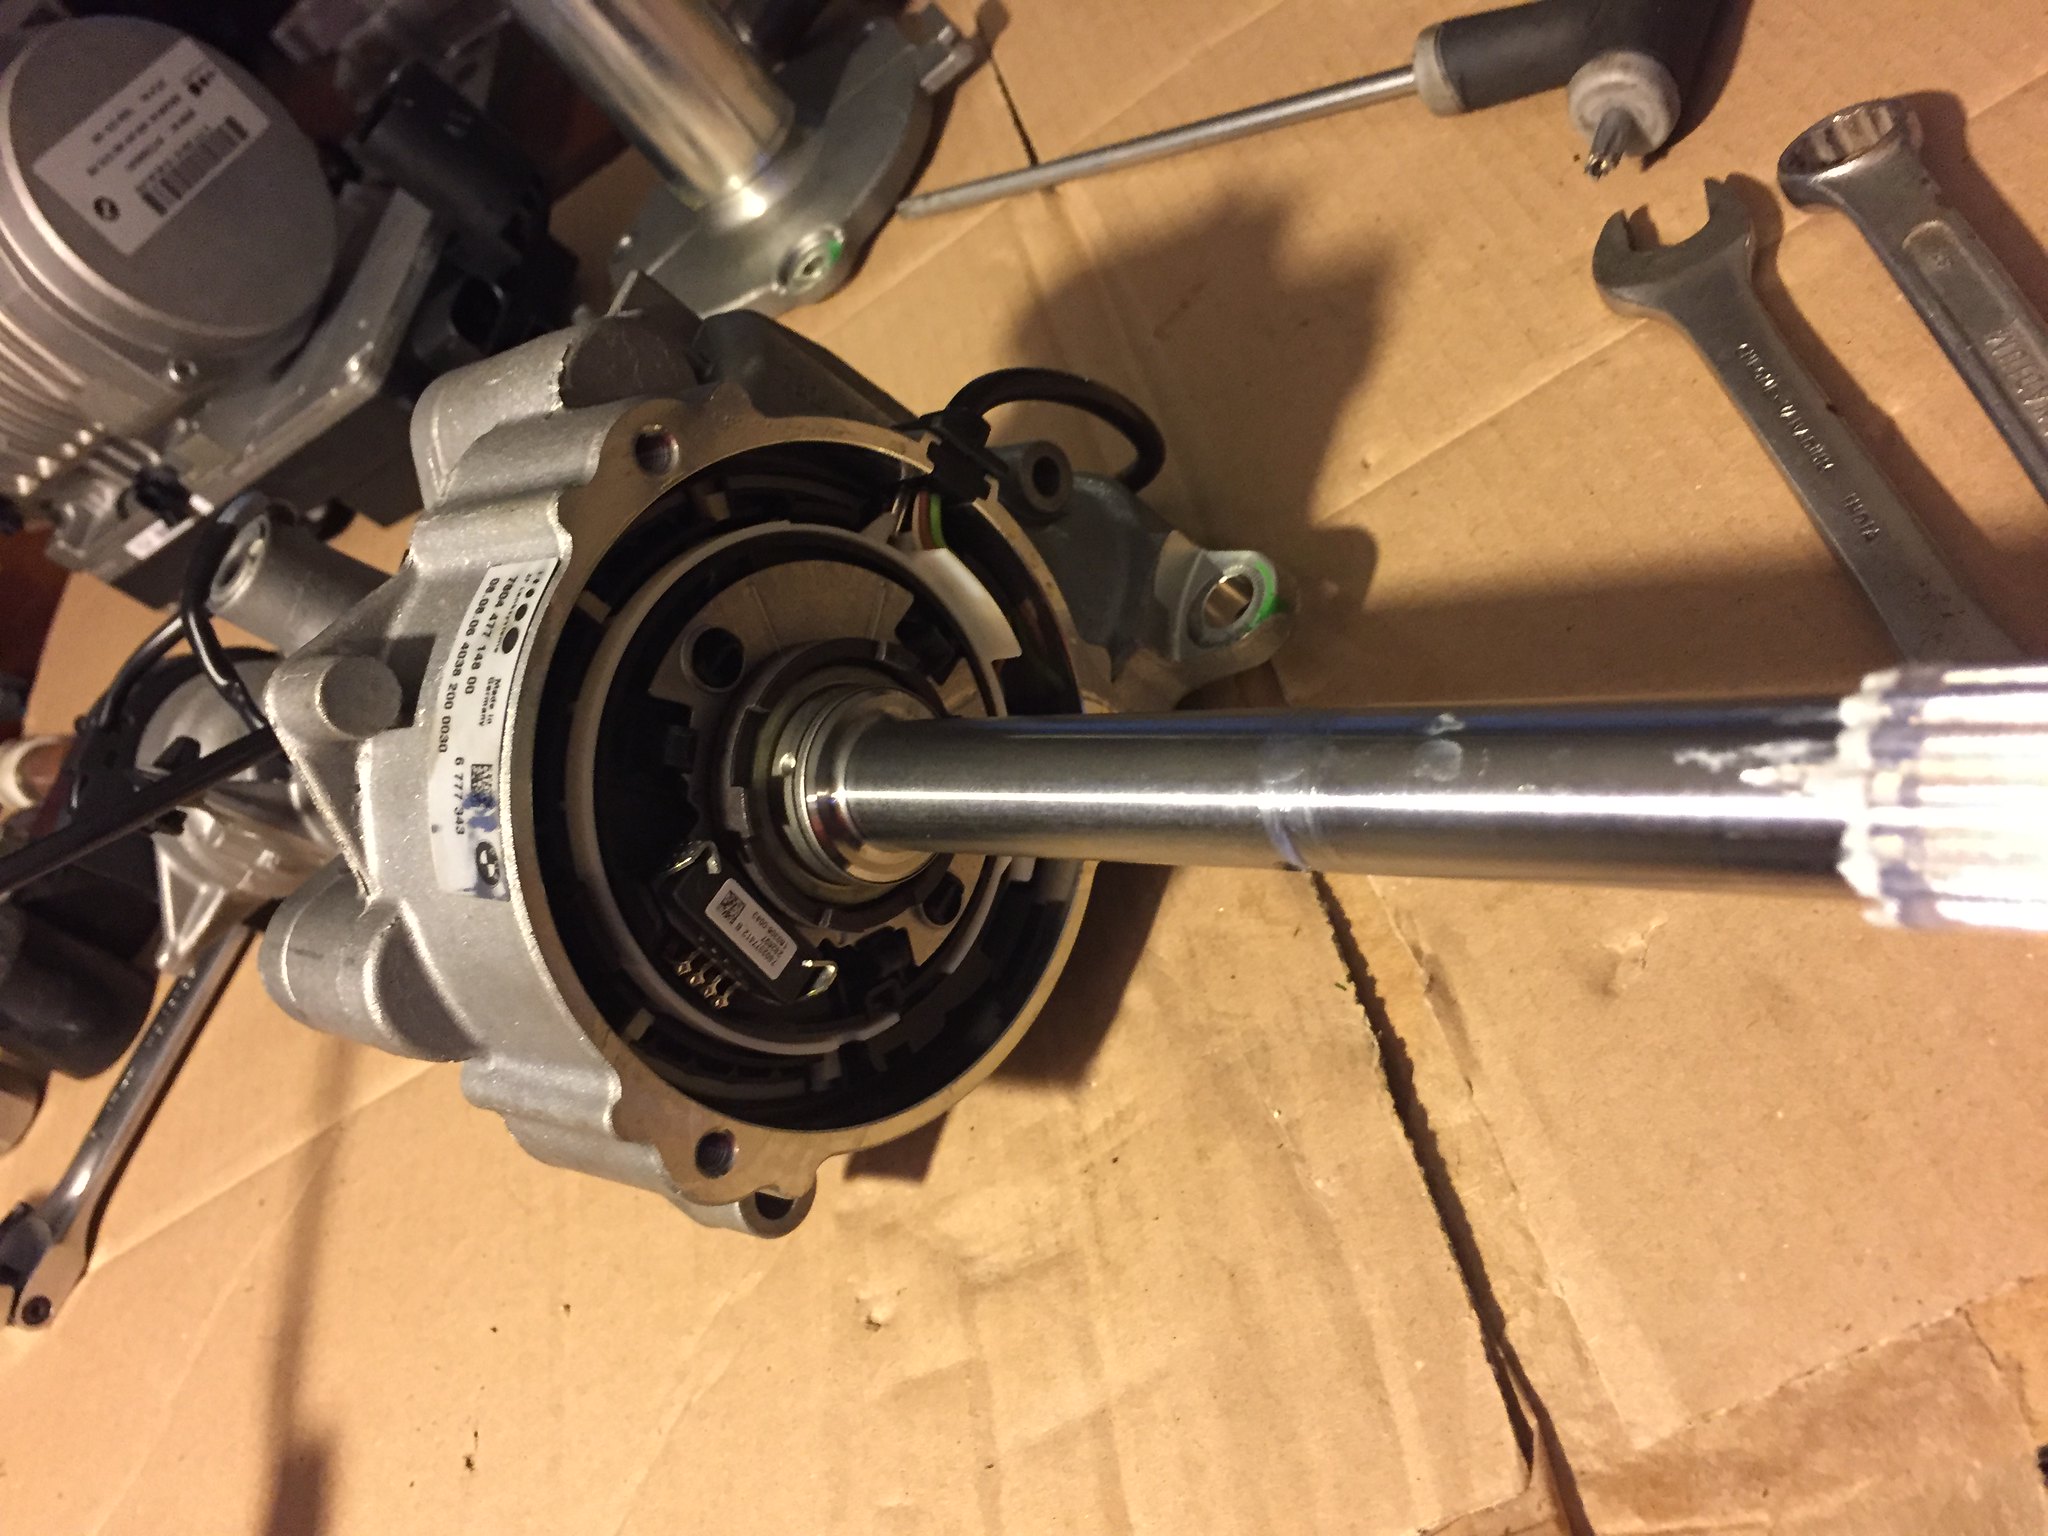
14) Although you can now see the torque sensor, access to it is still pretty limited because its set back within the main central casting. So lets keep going...
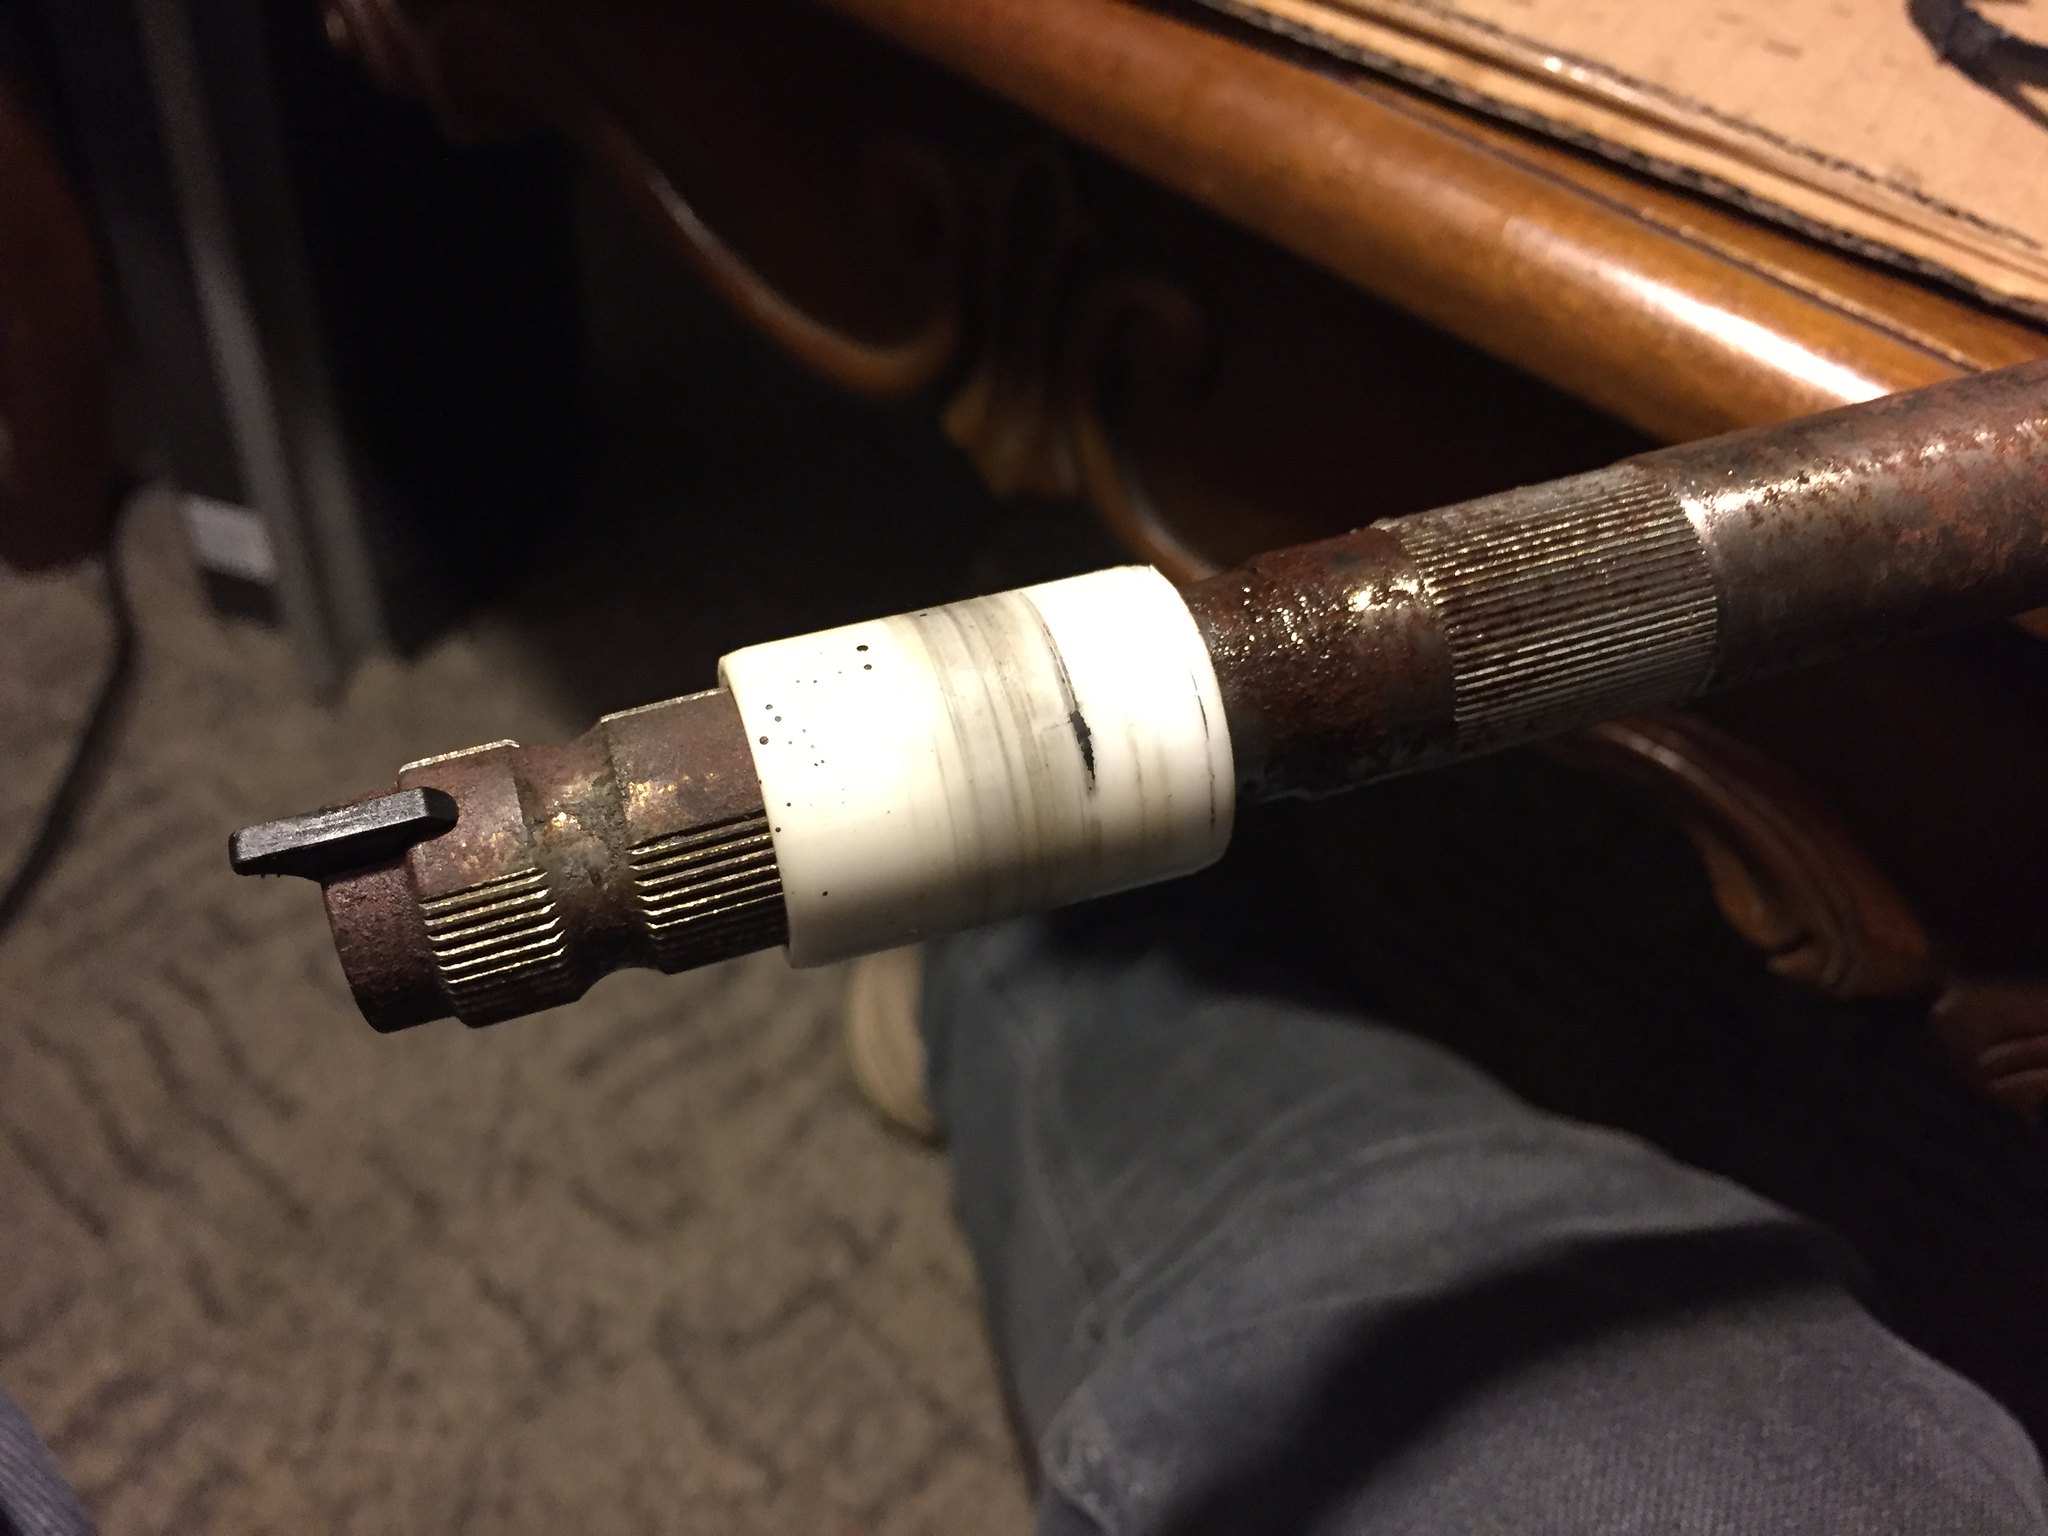
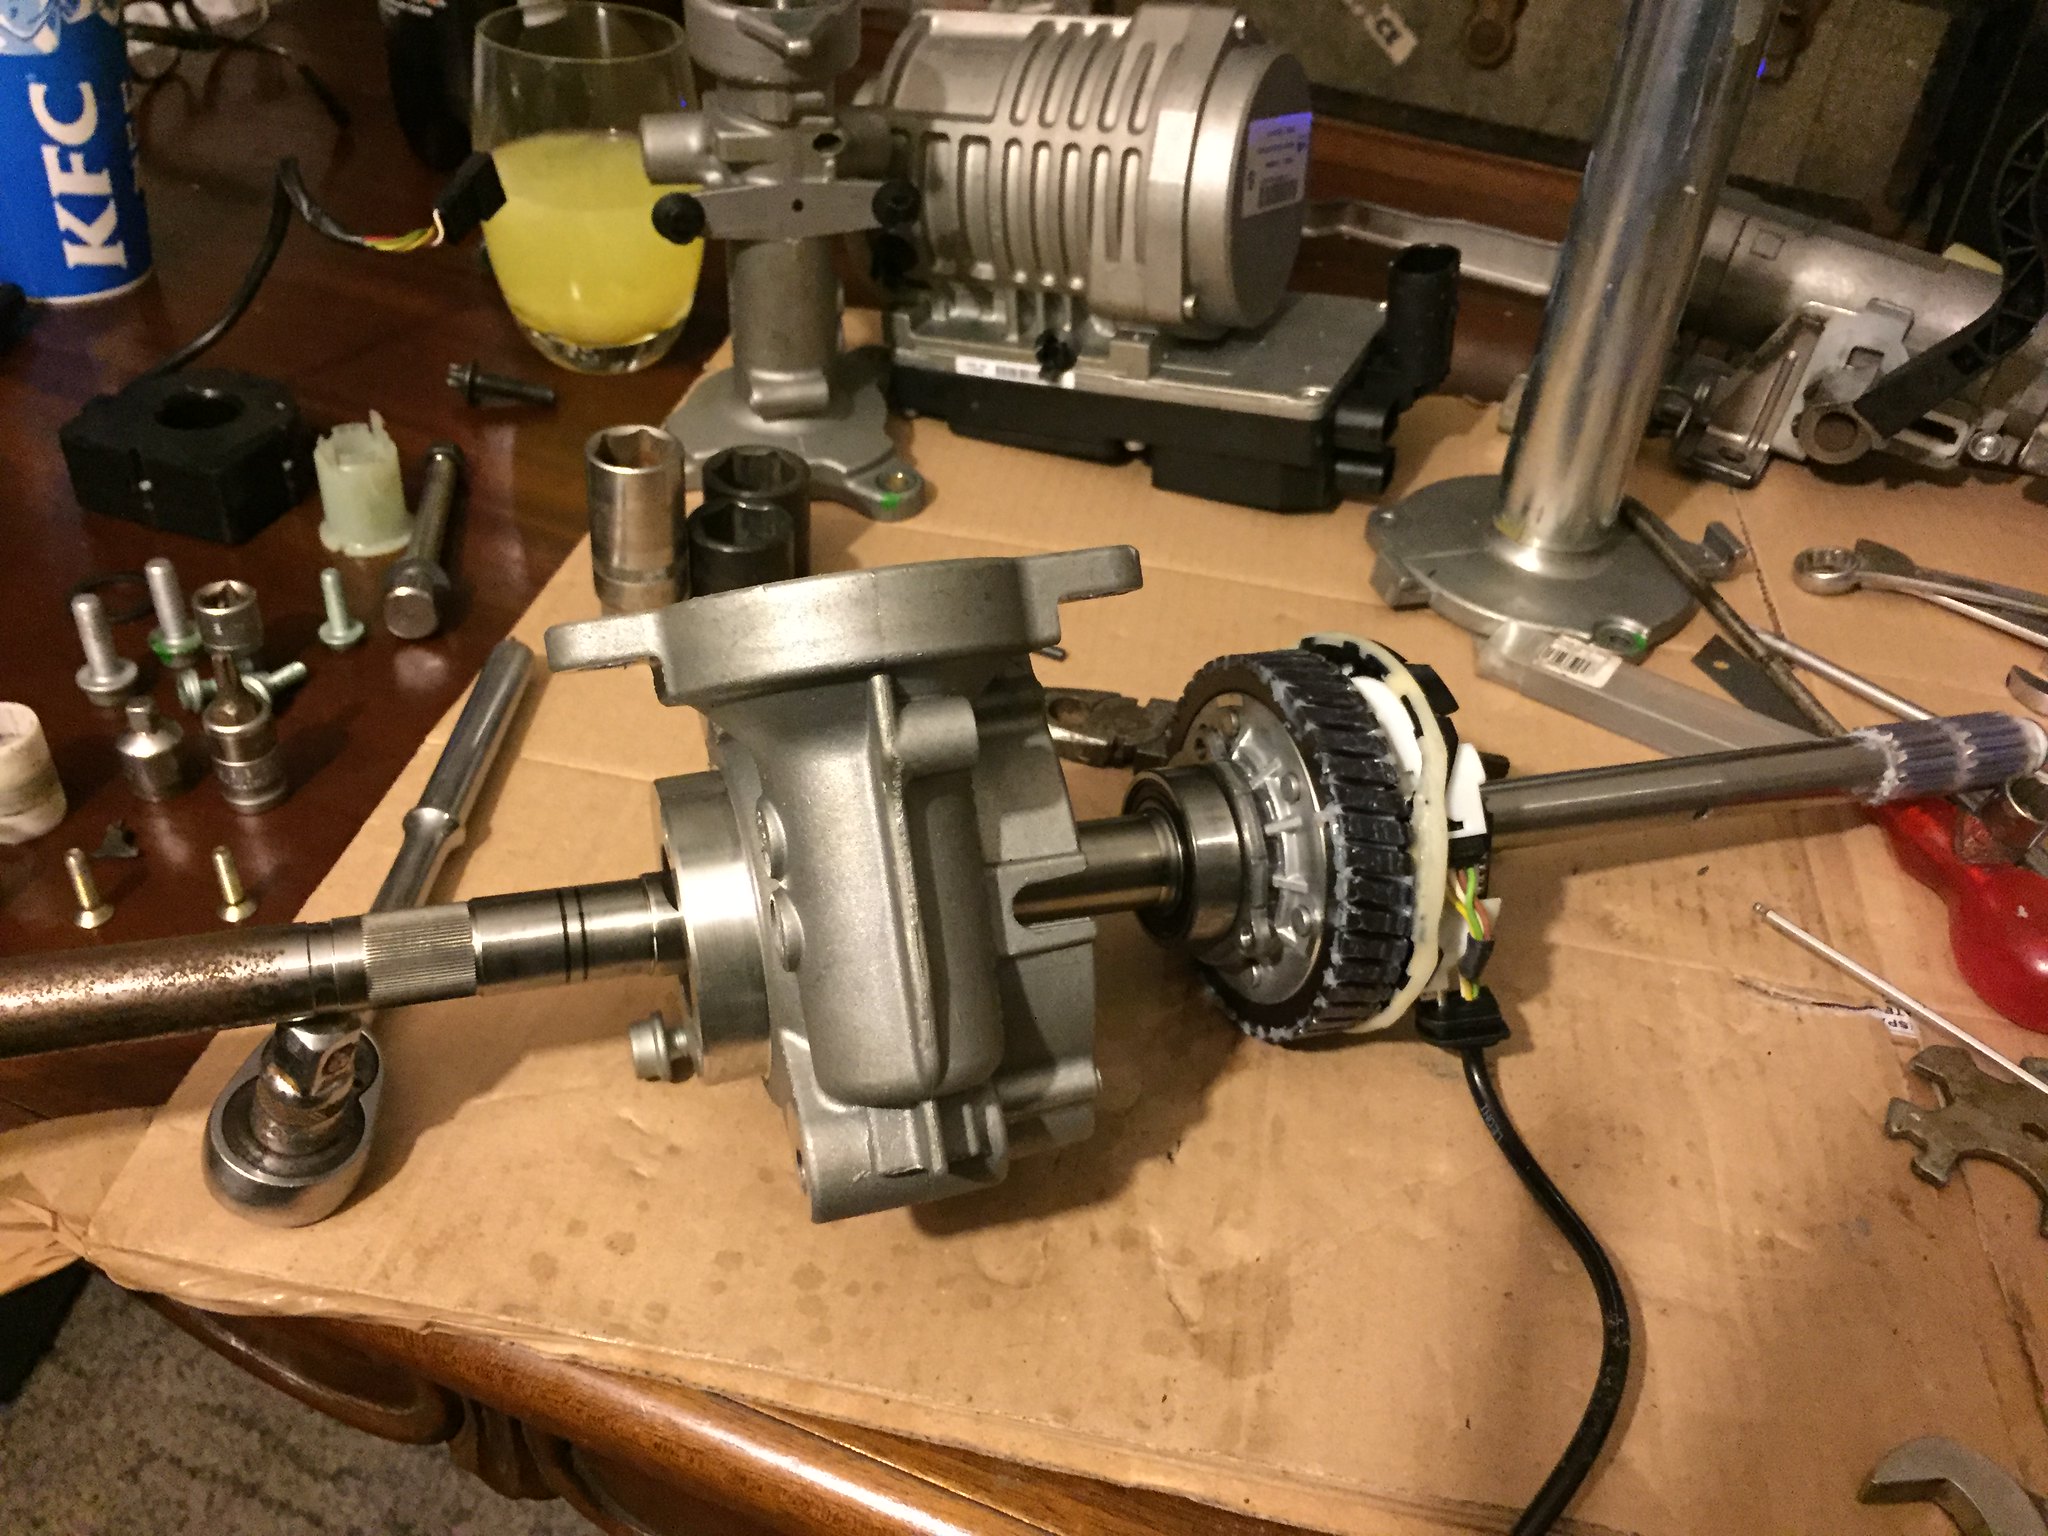
15) Unpin and remove the steering angle sensor. In order to slide it all the way off the column, you'll need to remove the black plastic keyway from the end of the column (apparently a replacement comes as part of the steering angle sensor kit), and slide off the white plastic slieves that sit in the bulkhead bearing.

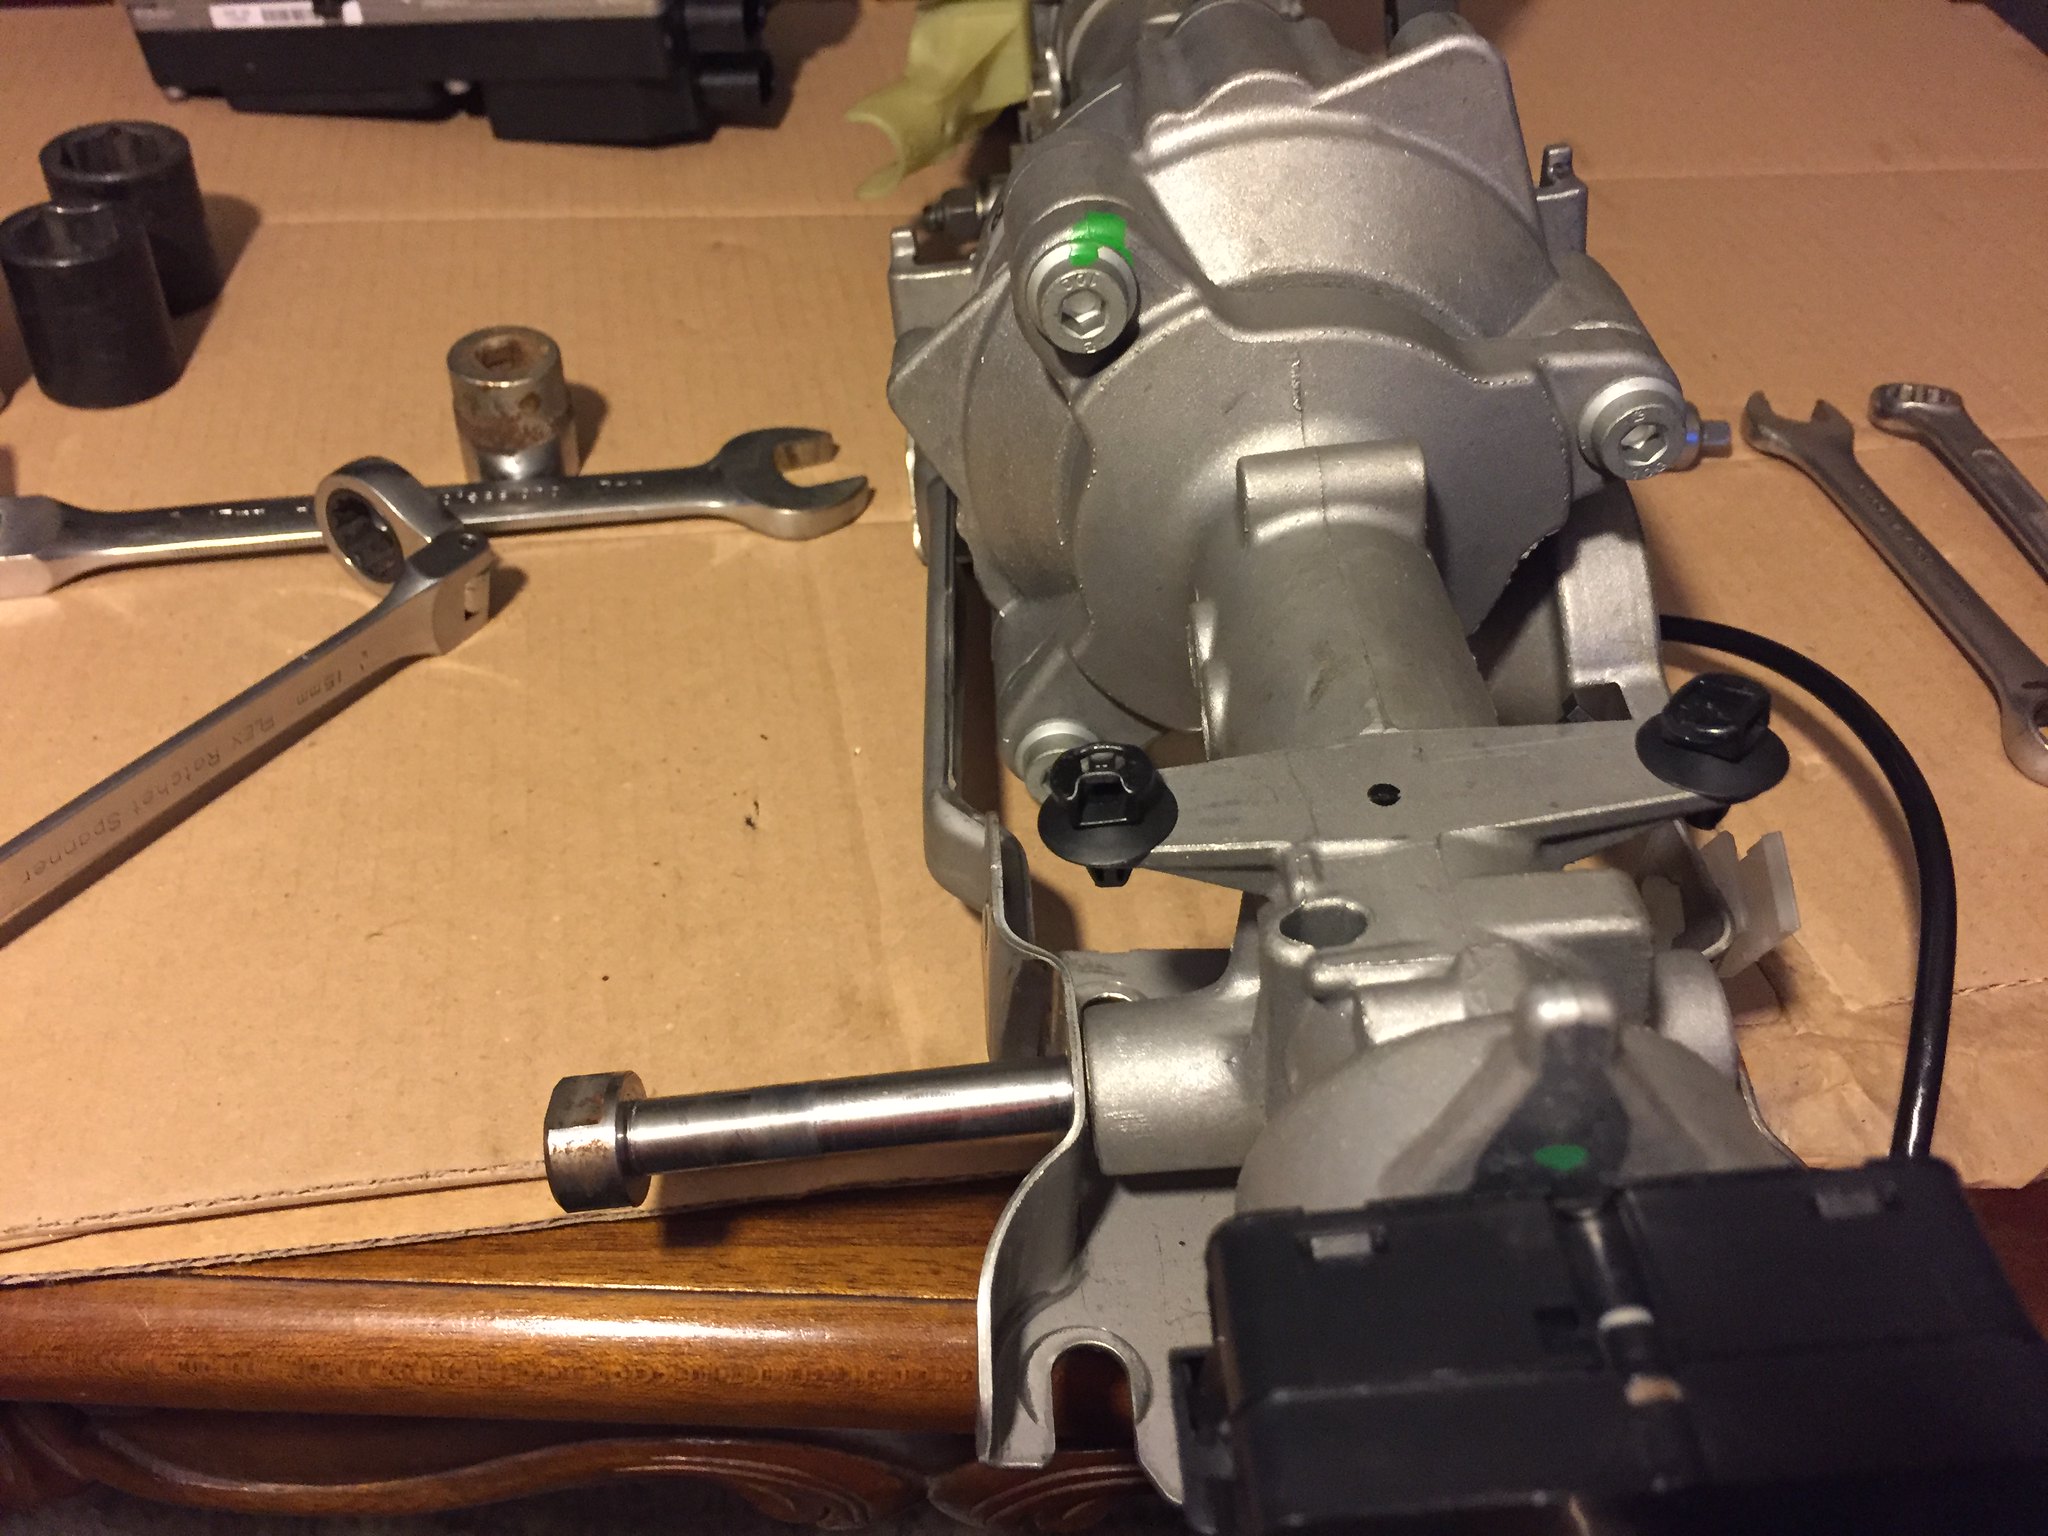
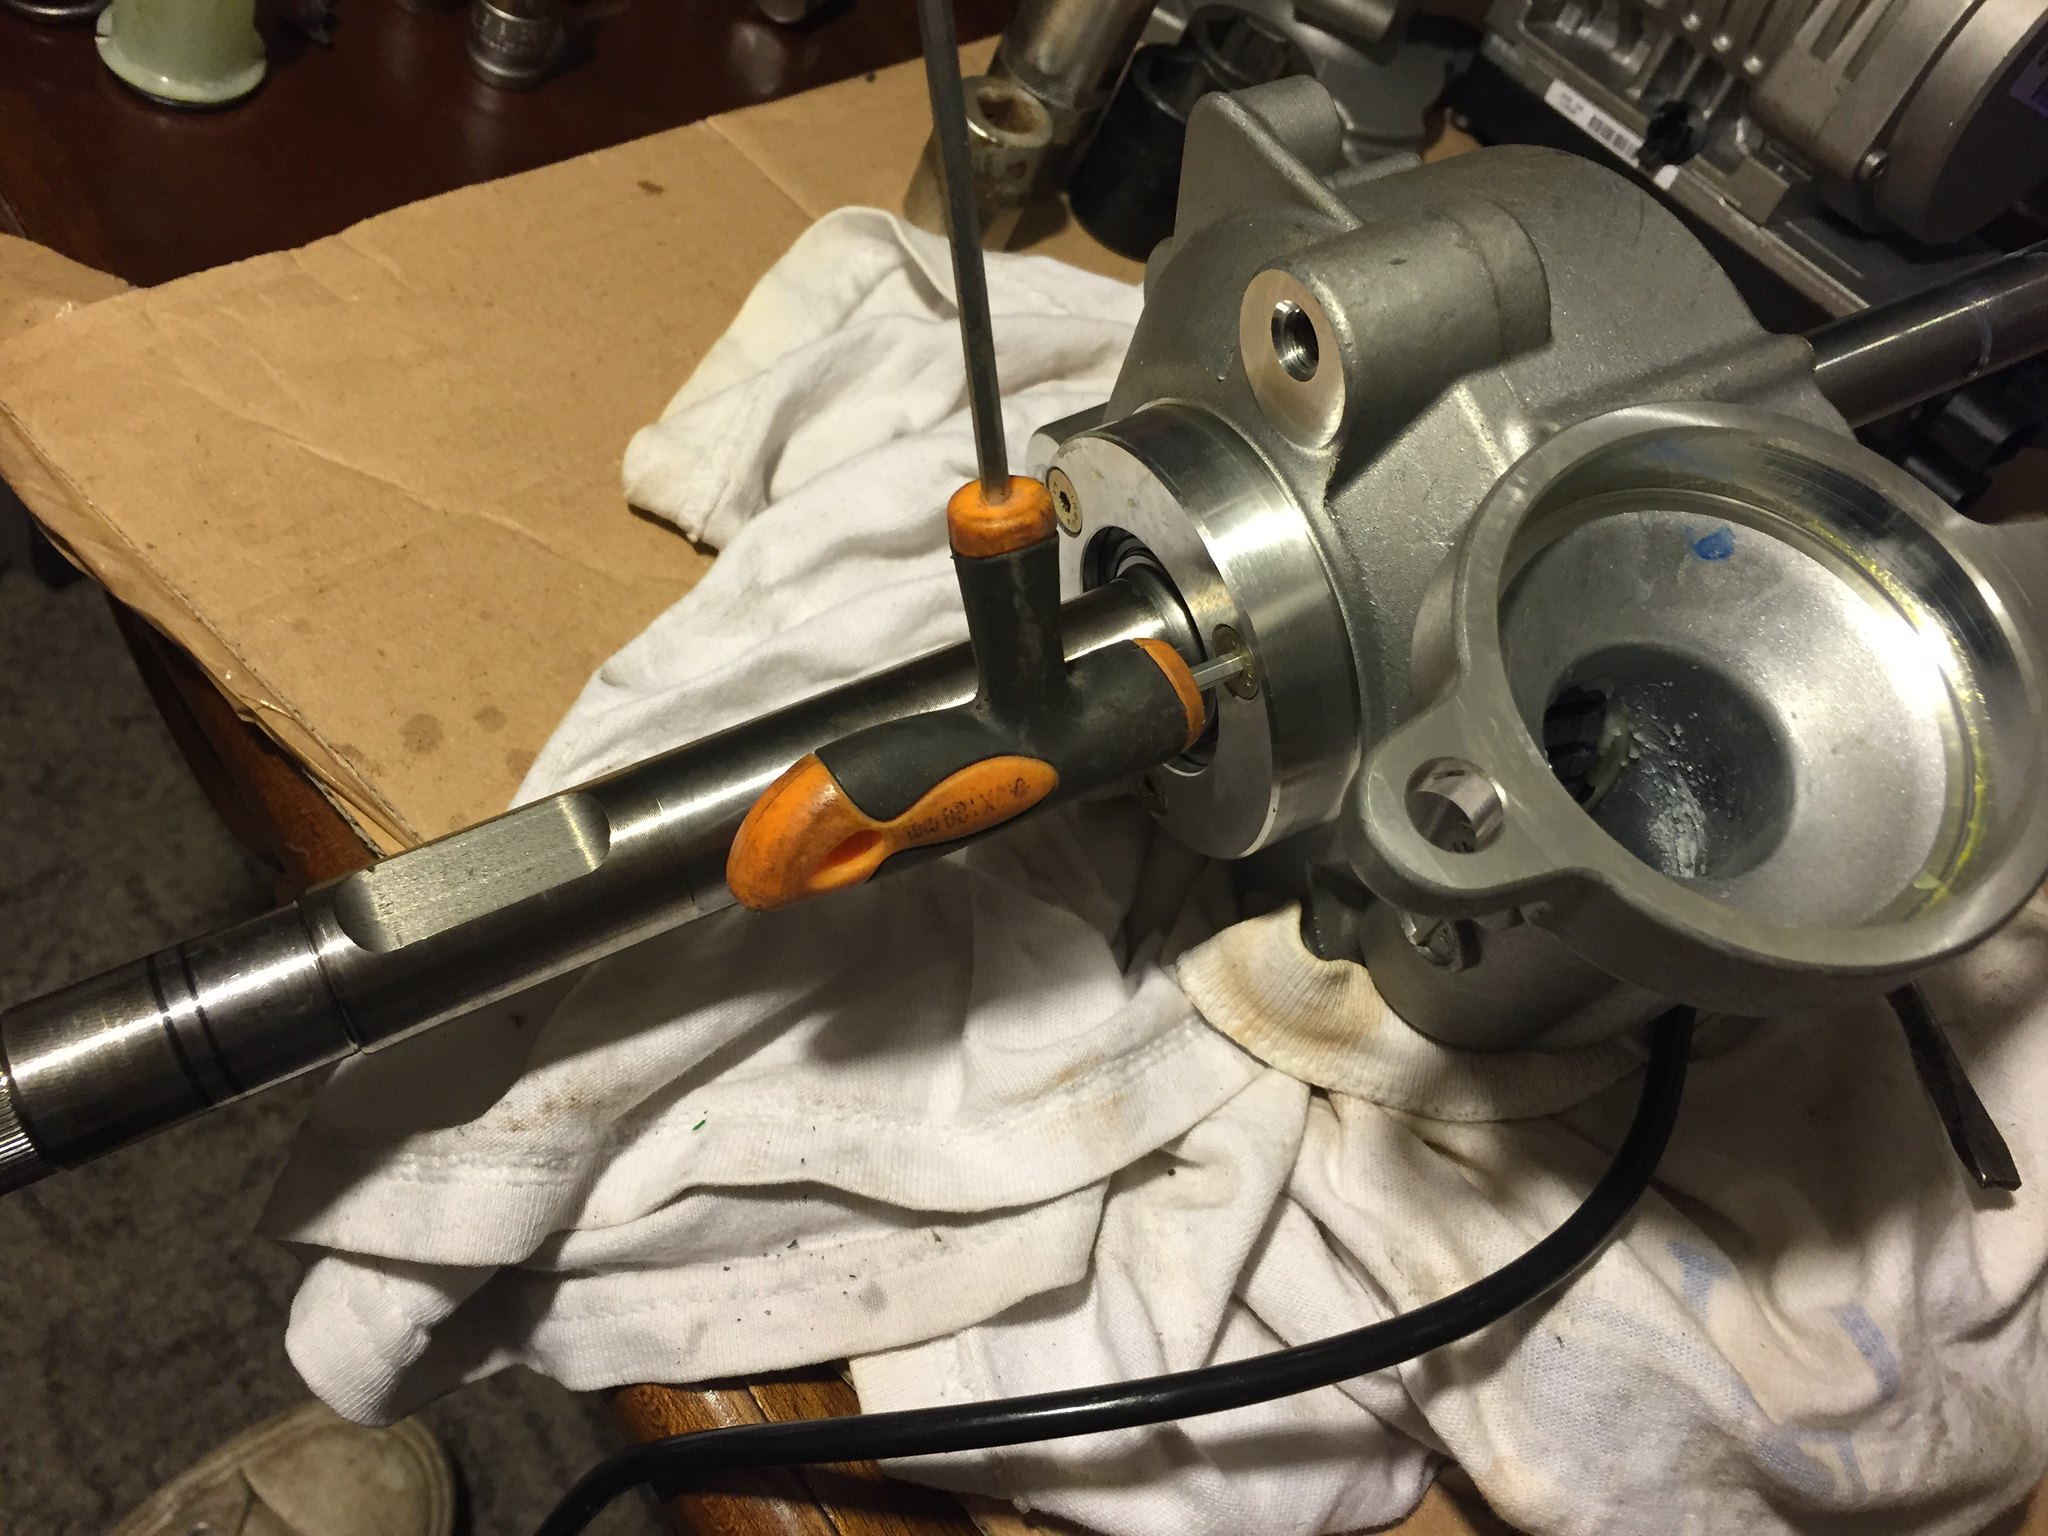
16) Unbolt the three allen-head bolts that secure the lower casting from the centre casting. This joint is spring-loaded, to undo the bolts evenly, and support the casing as it is released.
17) Unbolt the three small allen-head countersunk screws. These hold a plate at the reverse side of the roller bearing. I kept the bearing in place on the column ( i just removed the casing around it ), but if you need to change the bearing for some reason, you may want to keep these screws in place and press out the whole lot together).
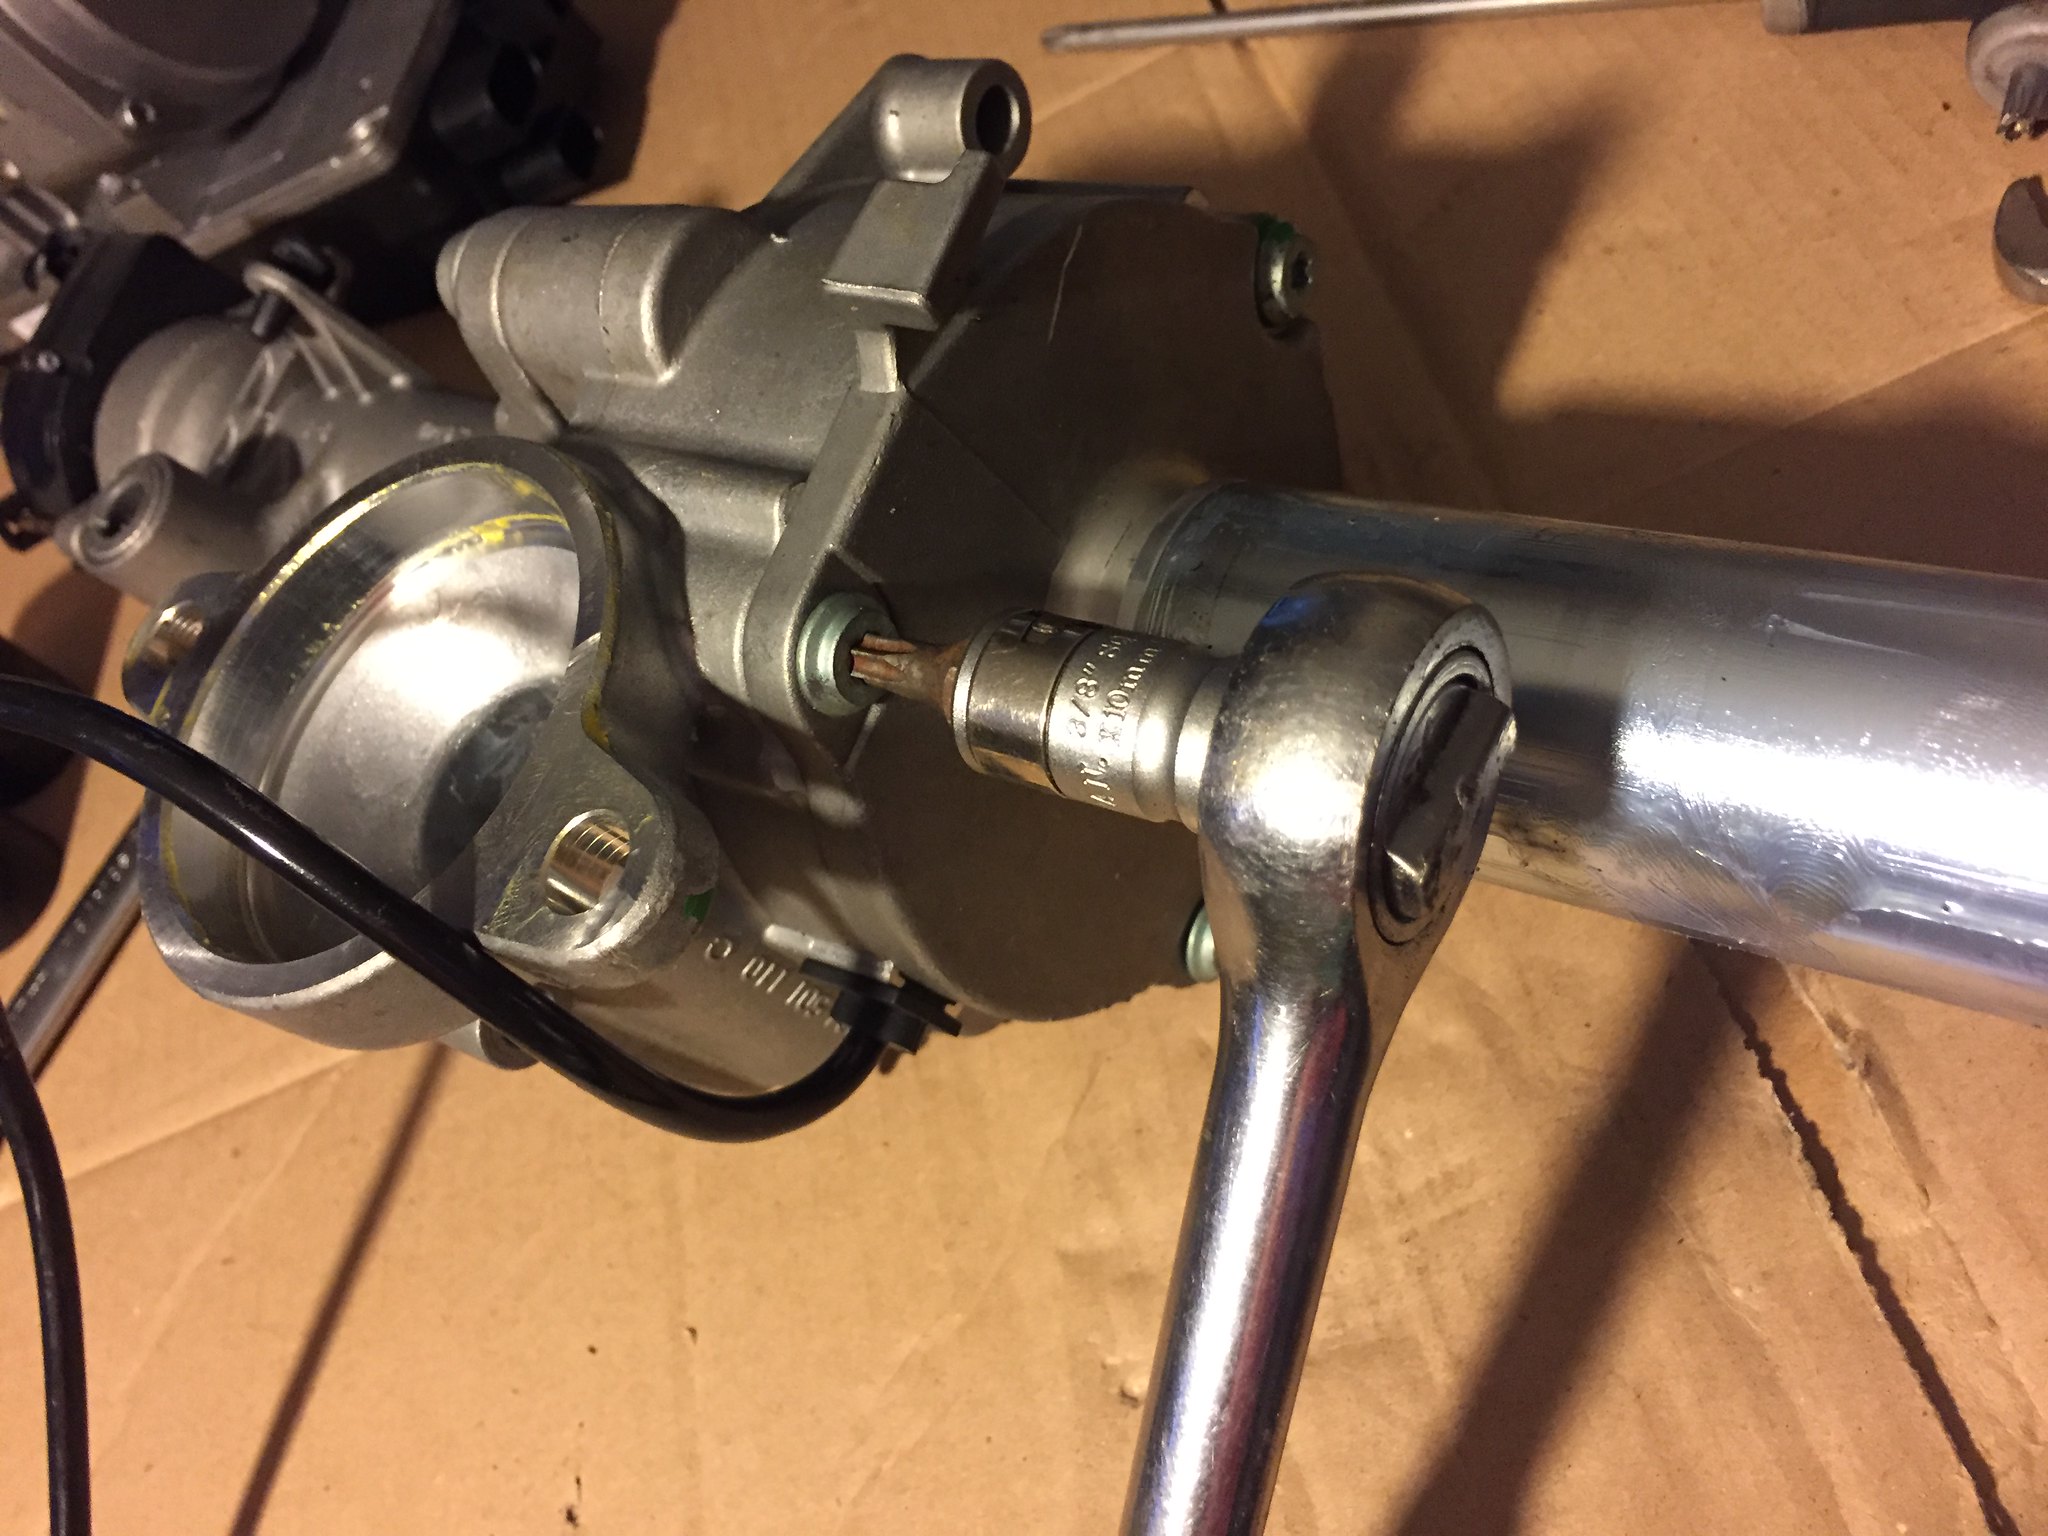
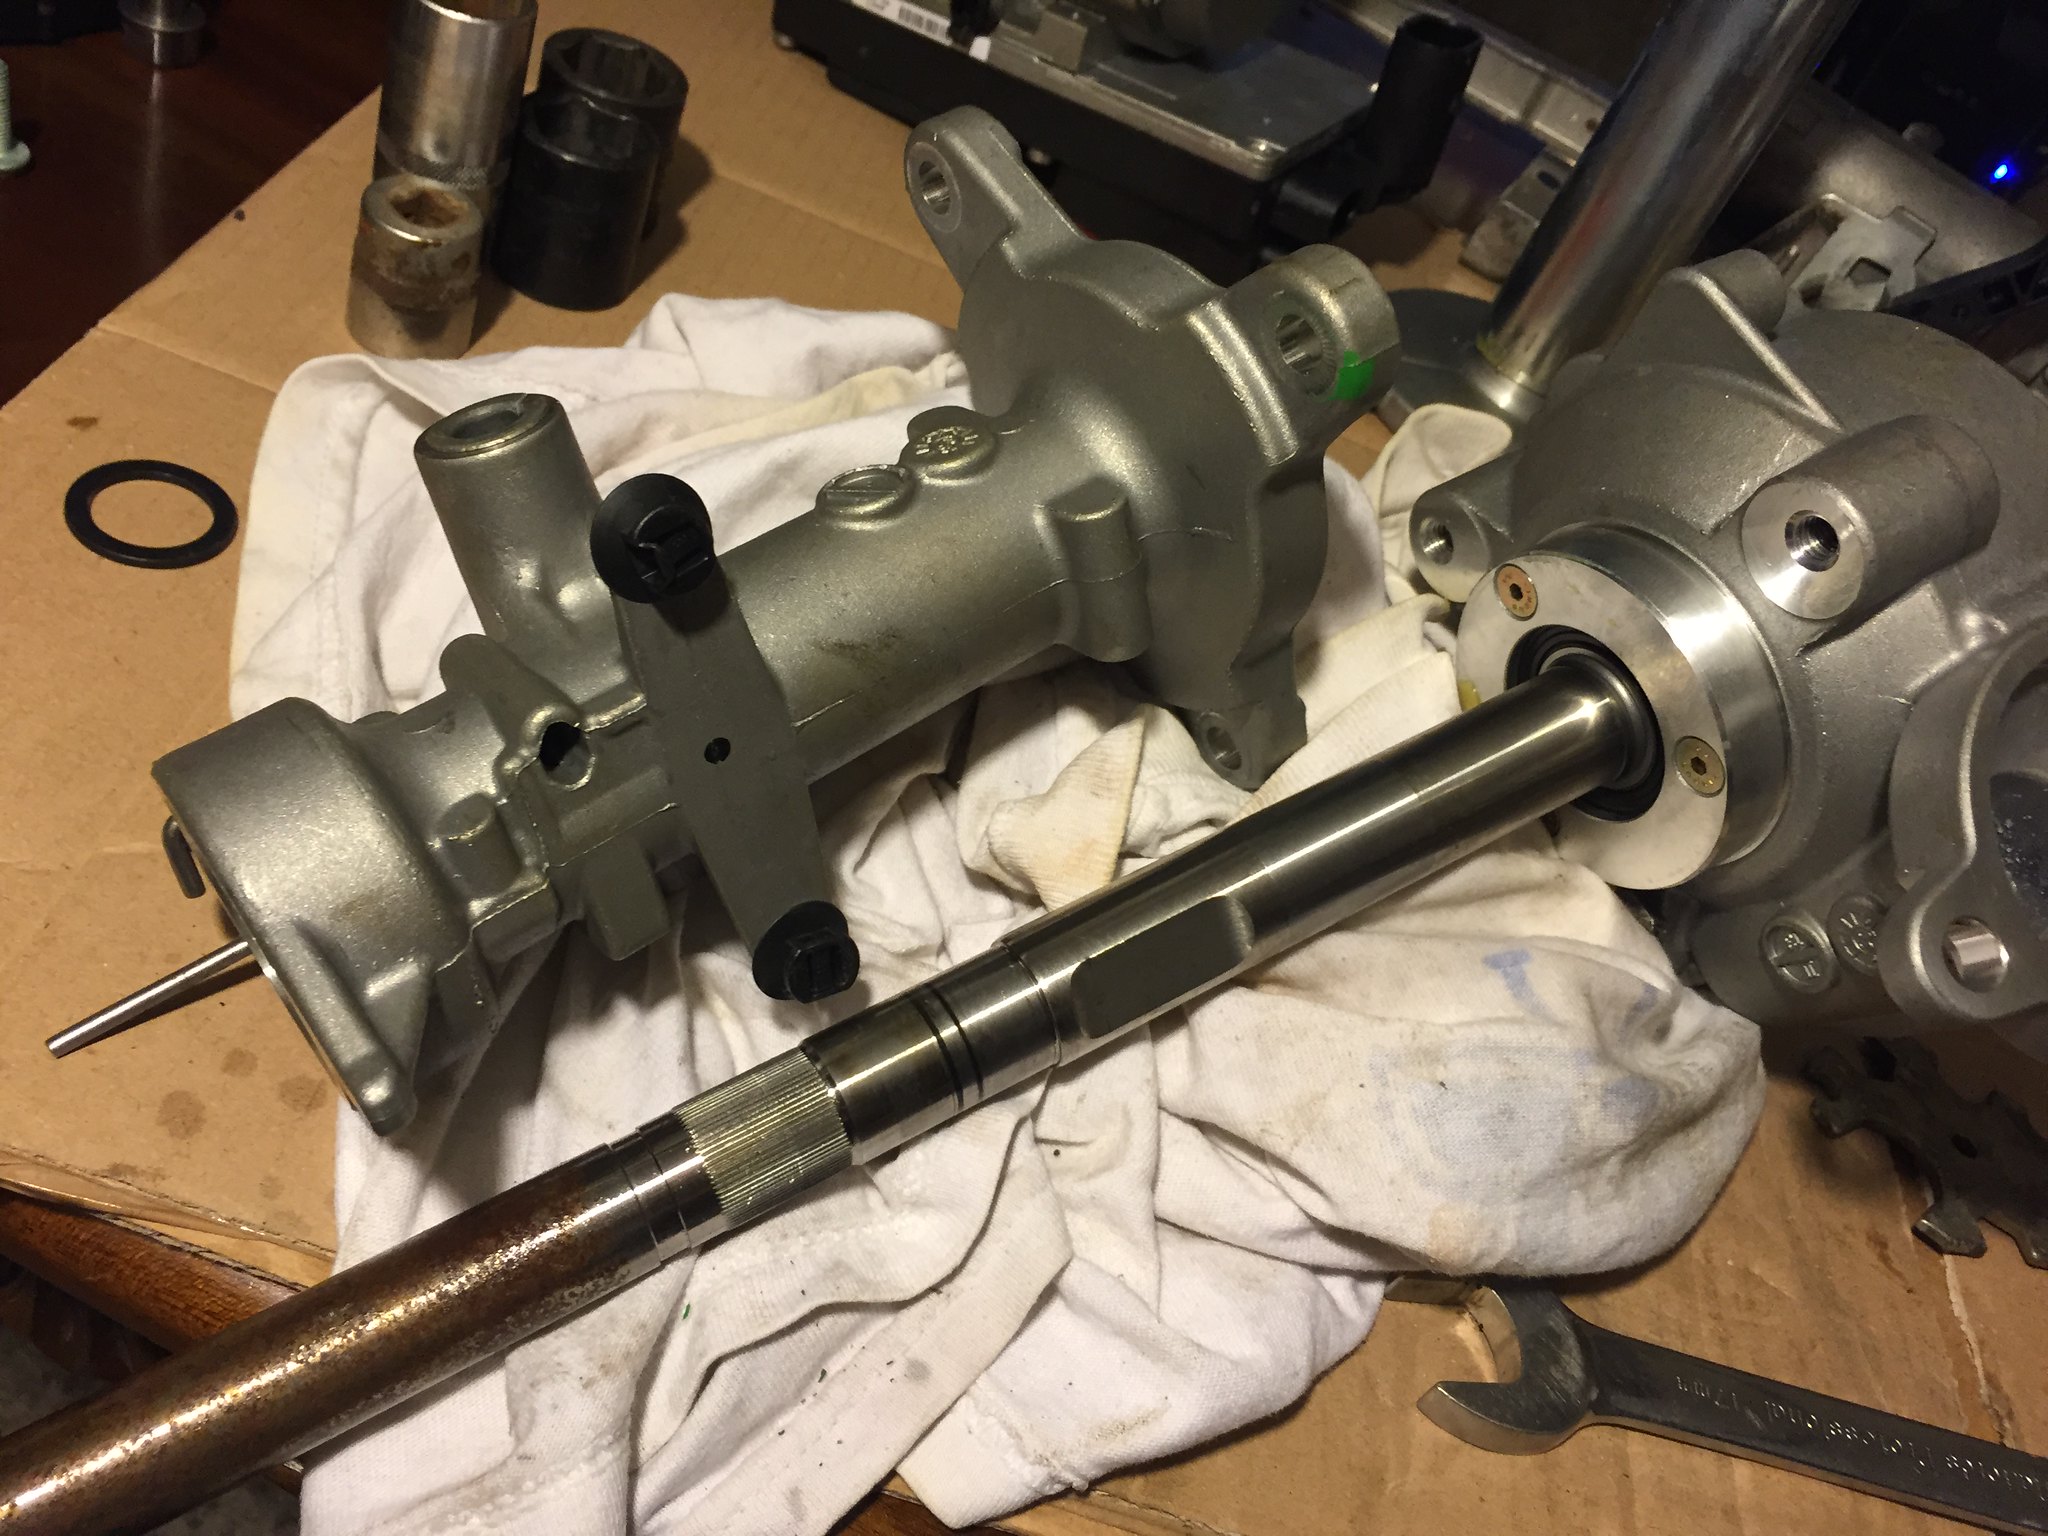
18) Using a hydraulic press or similar (I used some spring compressors and a bearing splitter), press the central casting off its bearing and away from the column shaft.
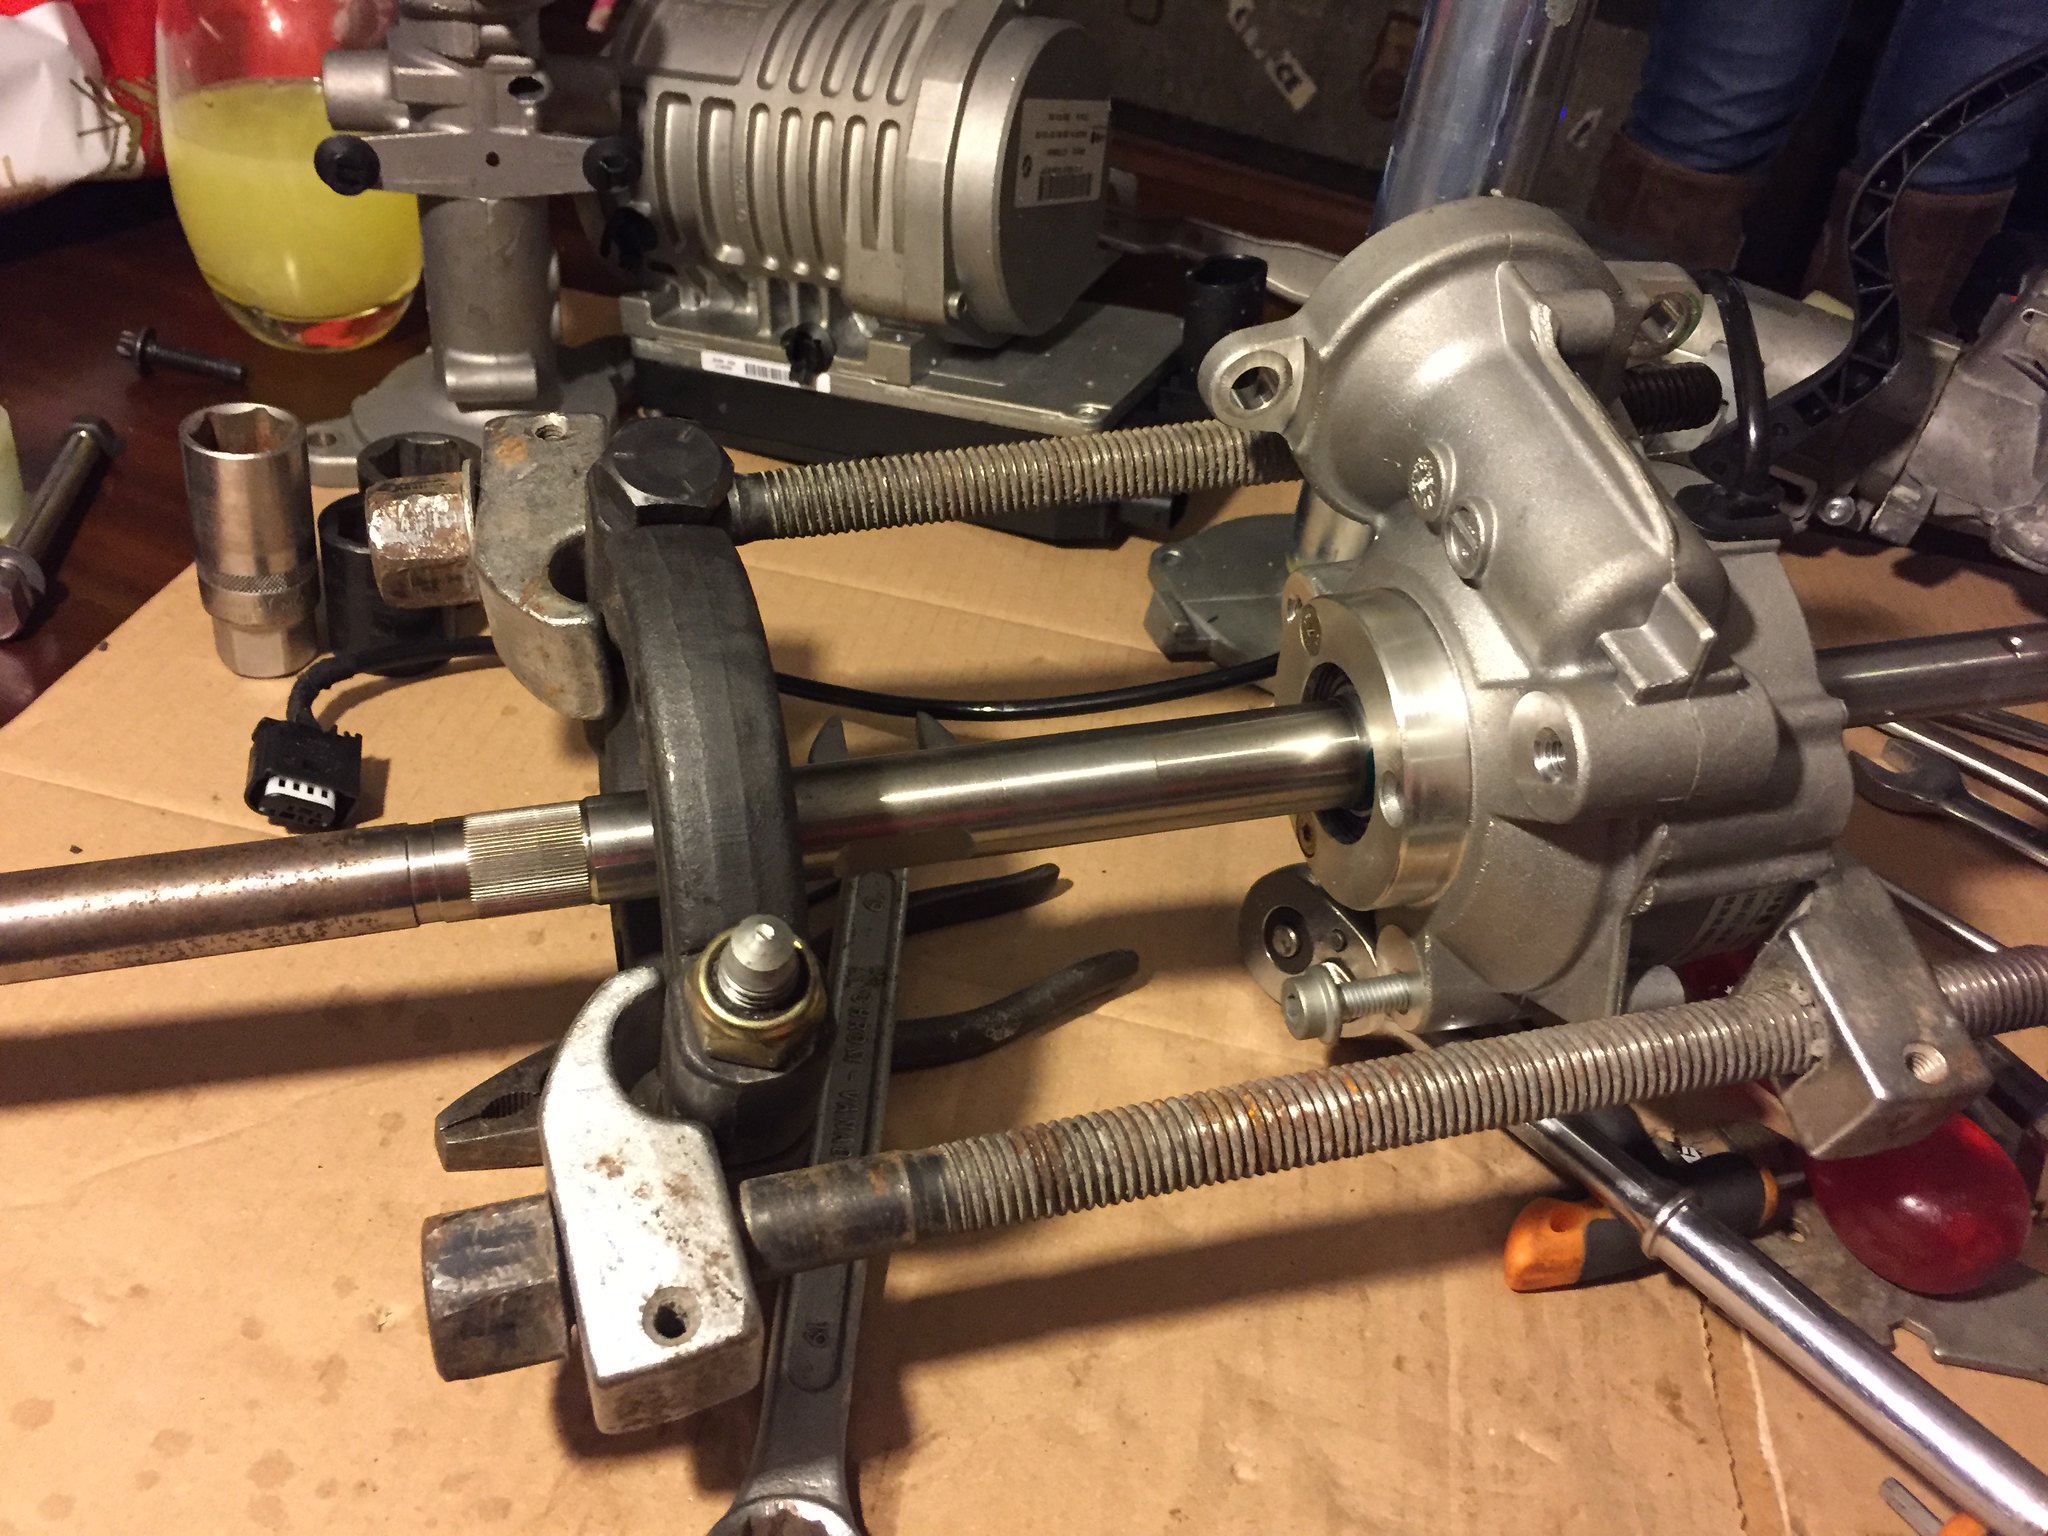
19) You're now left with (as far as I can tell) the steering column as far as it can be dissembled. The torque sensor is crimped to the column at two sections (the torsion bar bit is somewhere between and underneath). I couldn't see how the plastic gear was attached, but assume this was some sort of interferance fit.
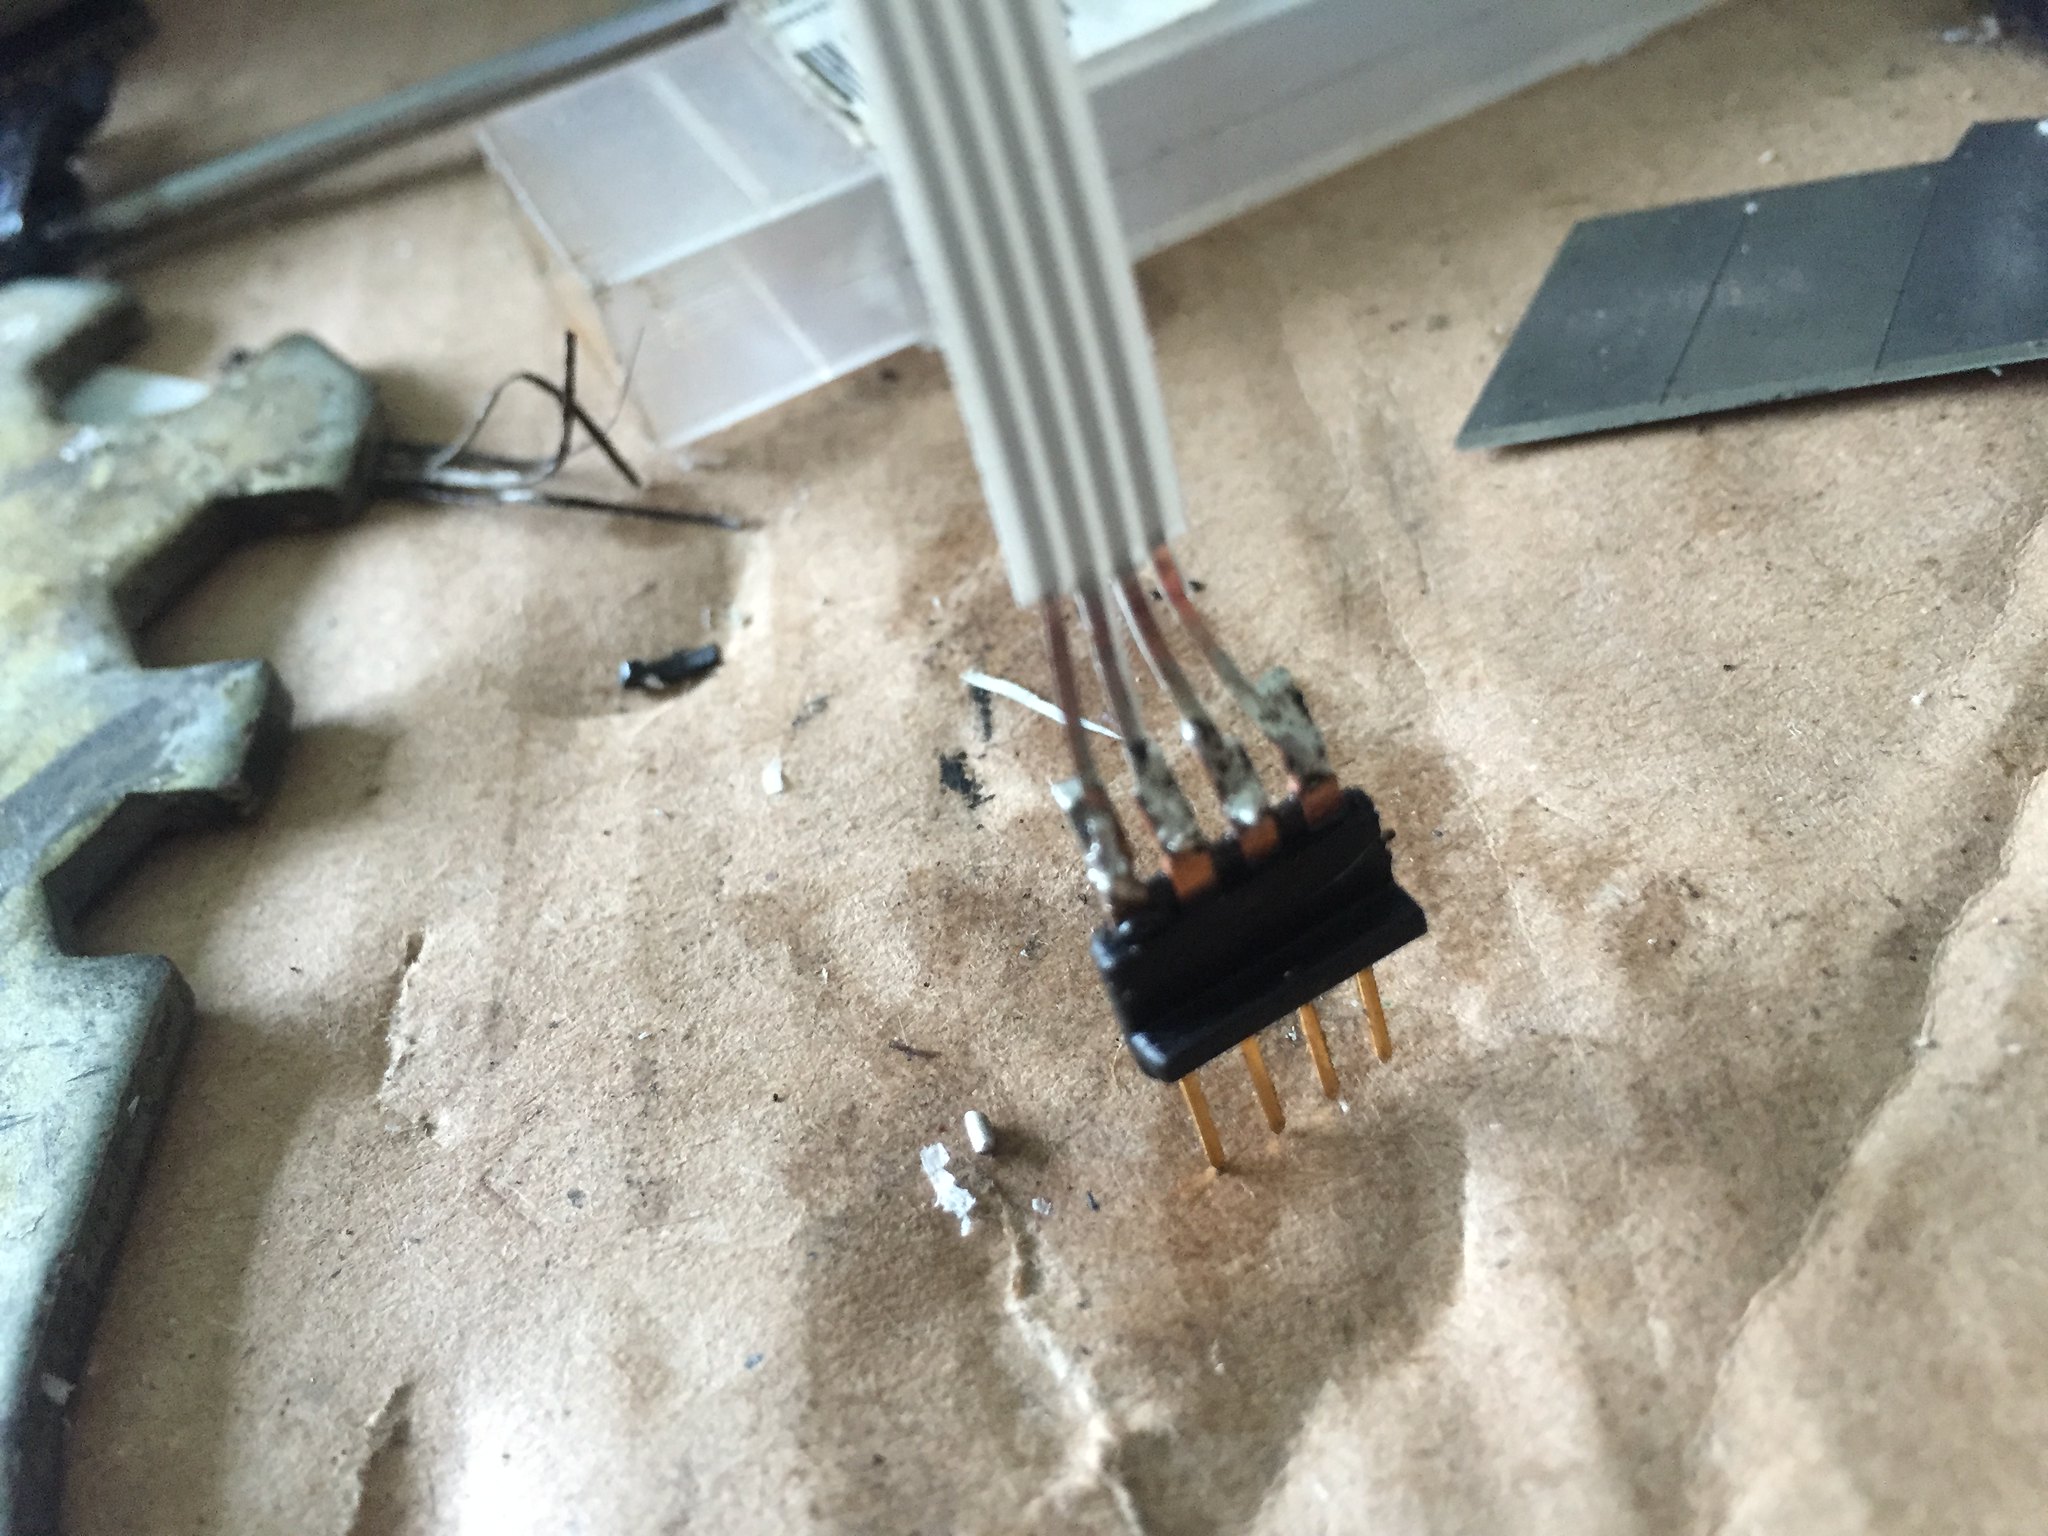
To fix my problem, I had to repair the internal coil wires within the torque sensor. There's about a metre of ribbon cable that wraps in a coil around the steering column to allow for lock-to-lock movement. In fact, there's probably enough wire to allow for 9 full wheel revolutions before it will break. Mine had broken right at the outside end, so I was able to un coil the wire from inside to give myself the room to fix it.
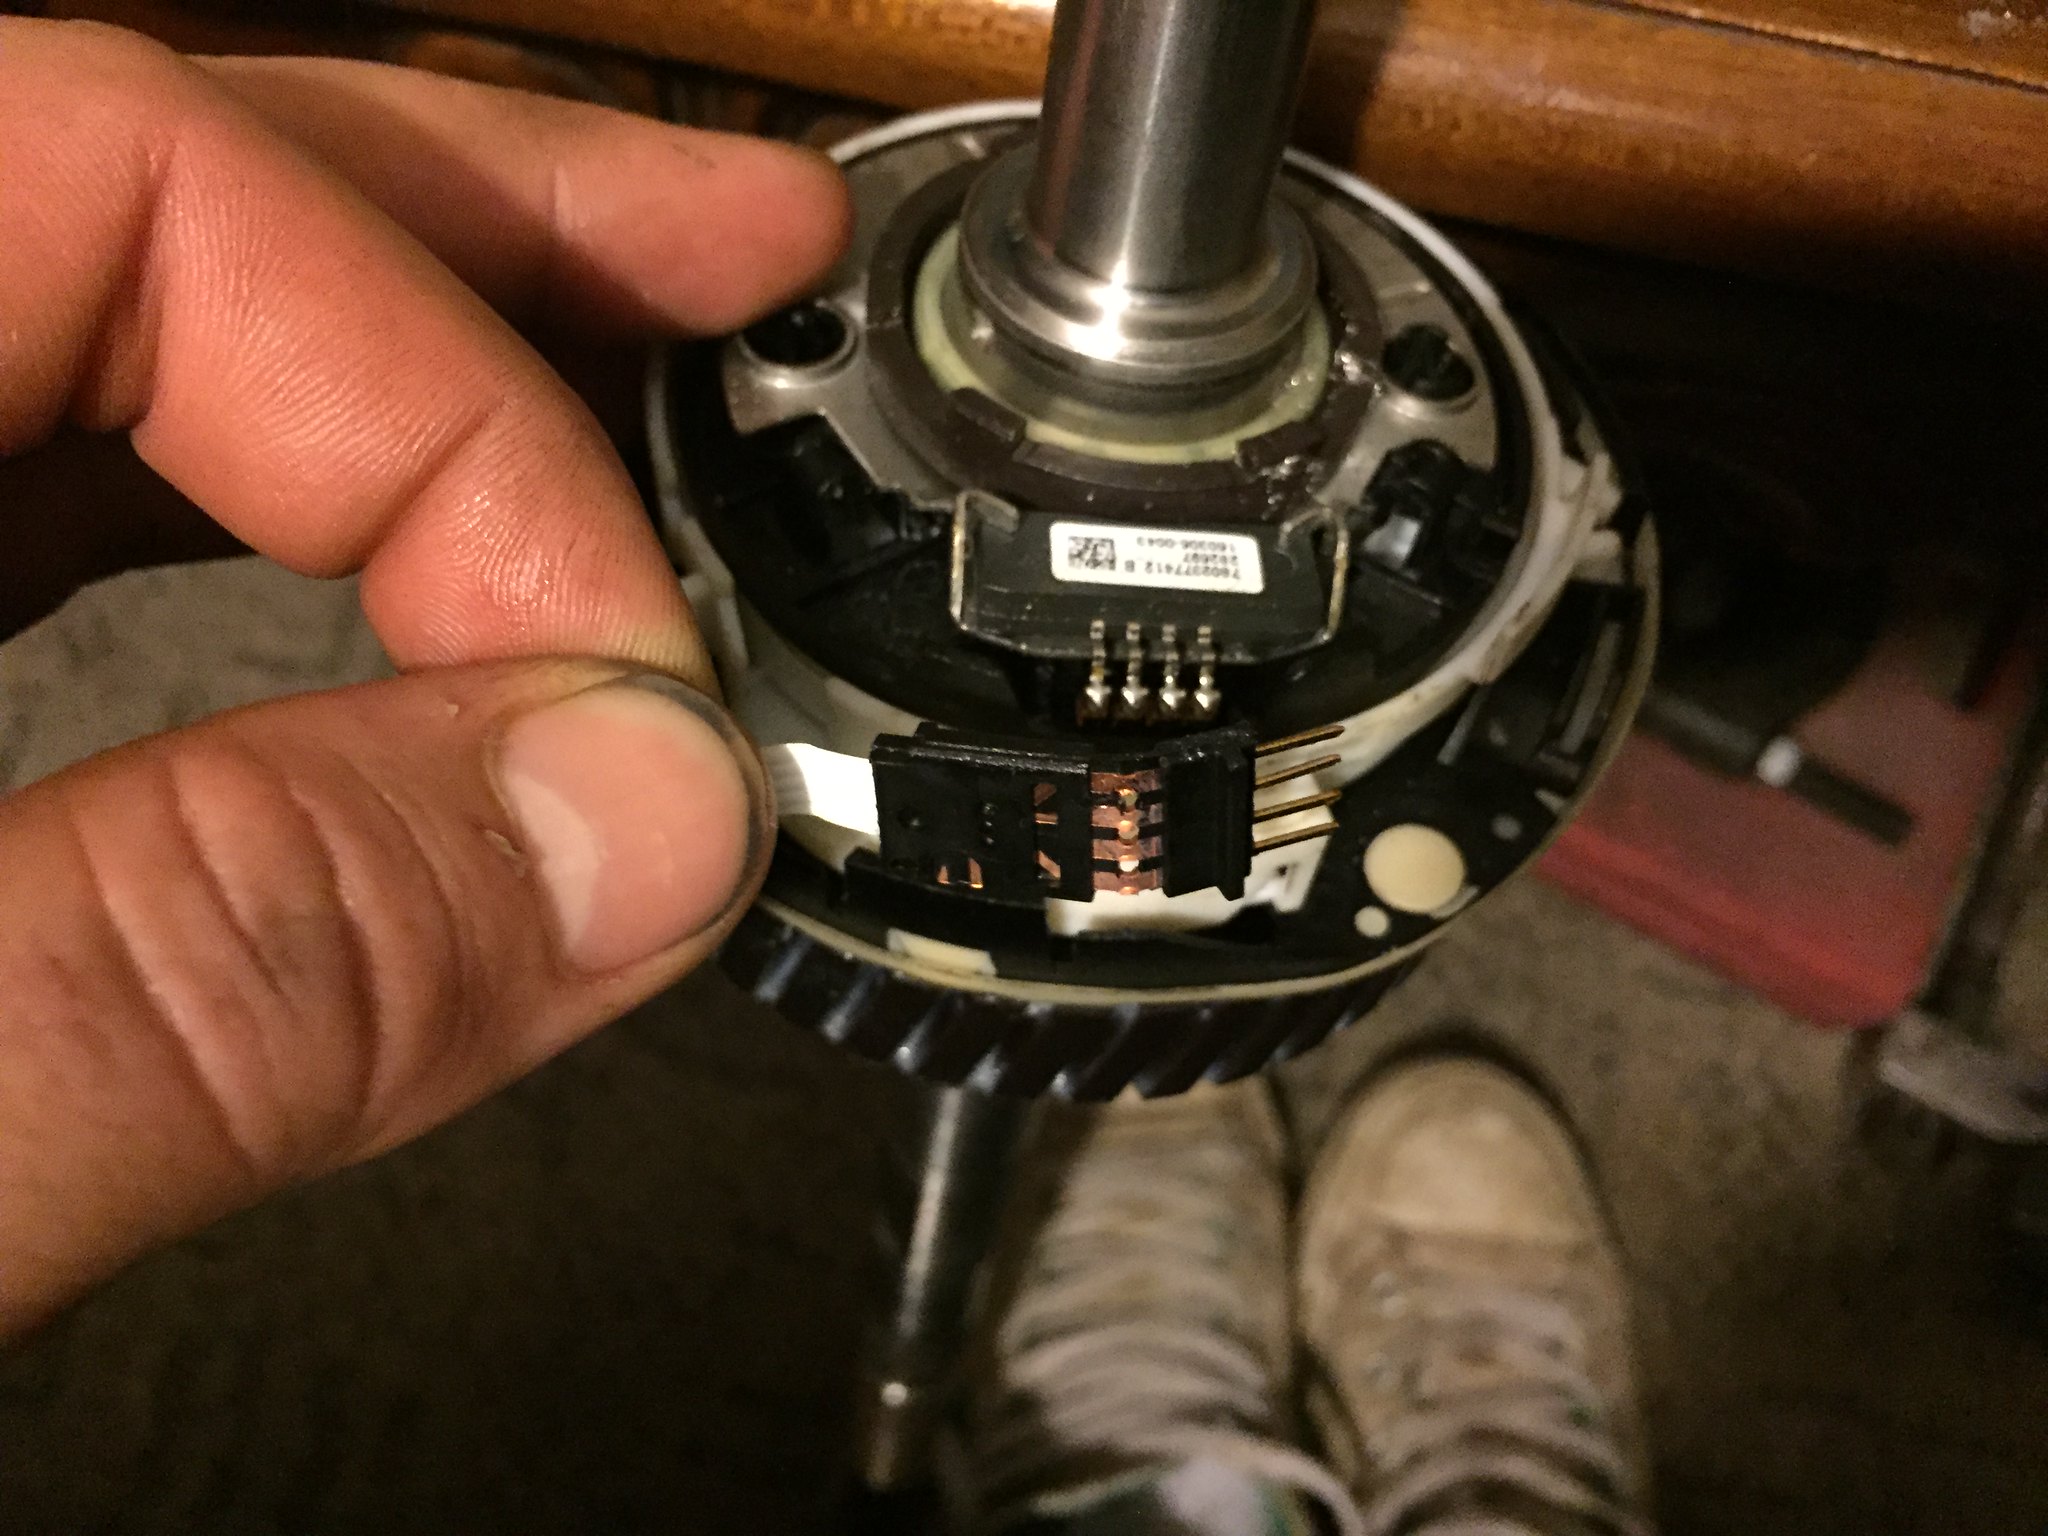
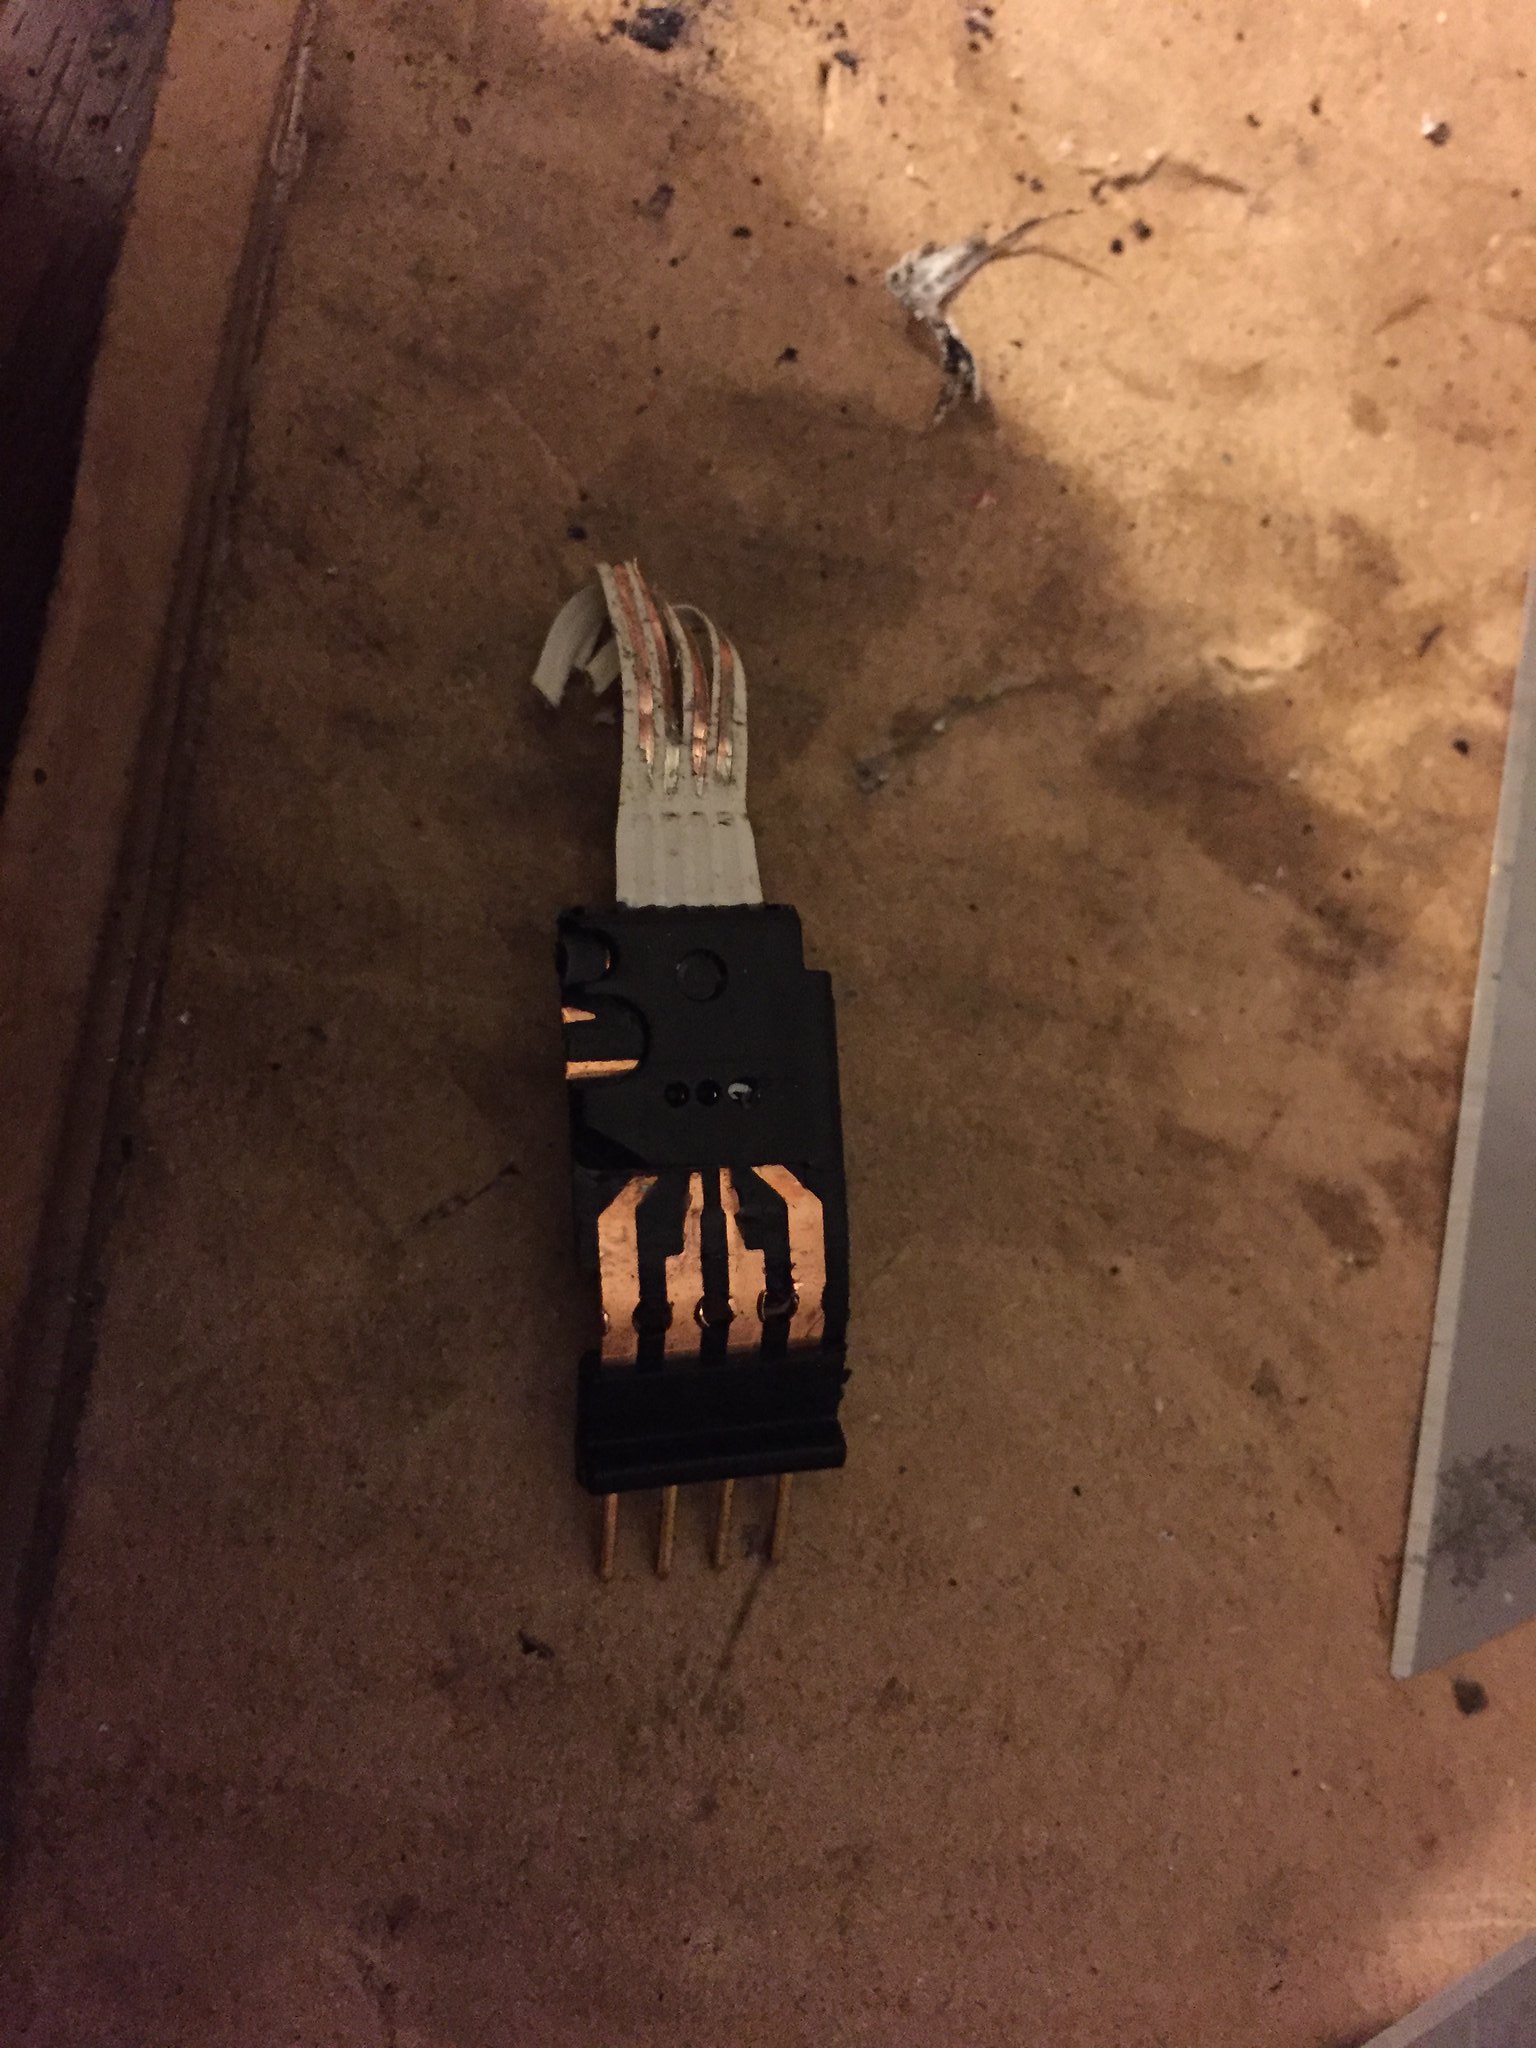
20) Cut the coil wire back to a nice clean bit, and strip it ready to solder back on to the terminal. (there's a surprisingly large amount of wire to work with, not just 3 turns worth) i had to cut the plastic terminal housing back quite a lot with a scalpel in order to give myself 4 neat contacts to solder.
21) Begin reassembly of the wiring back inside the torque sensor. I used some quick-setting two-part epoxy to secure the new connection in place, since none of the original plastic housing was being used in this fix.
22) Reassembly is the opposite of disassembly!