Good then, investigating how to mount restyled xenon headlights in my car, since I have a prestyled, I decided to work out how I could do it.
thanks to
The brico is valid for the entire range of headlightsmac27040 wrote:
Halogen headlight with orange indicator and halogen headlight with transparent indicator are the same headlight.
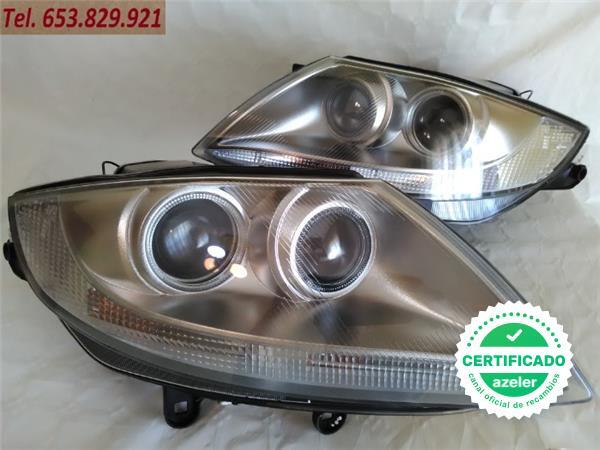
Prestyled or restyled halogen xenon headlights, ignore the silver background:
Pre halogen / xenon
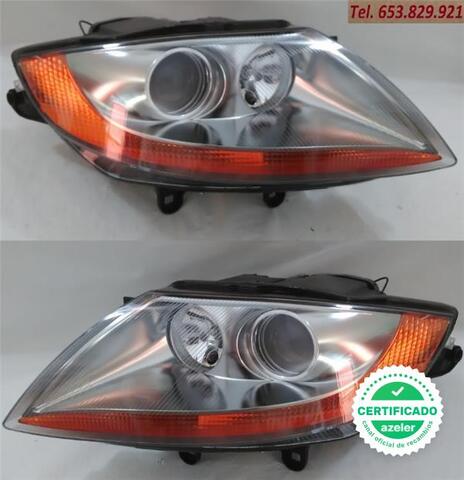
Restyled halogen:

Bixneon restyled lighthouse, the one we are going to mount:
I put you in situation
PreRestyled headlight, with orange or transparent halogen restyled flashing stripe.
Pinning the car connector on pre Halogen headlights
1. Mass or negative
2. Low beam
3. High beam
4. Position light
5. Indicators1
6. Indicators2
7. Mass or negative
8. Empty in Halogen / or pin Bixenon in pre xenon headlights
Pineado restyled bixenon lighthouse
1. Mass or negative
2. Low beam
3. Position light
4. EMPTY
5. Indicators1
6. Indicators2
7. Mass or negative
8. BIXENON pin or shutter
To do the brico, you take the connector of the lighthouse and remove a blue tab that it has. You remove the pins by pulling out and leaving it as follows:
Move Pin4 to position pin3
Pin3 moves to pin 8 position.
Only if you have xenon prerestyled pin 8 will you move it to pin 4 that there will be nothing
With this, the xenon should already work by itself, but when starting it will start flashing with what we will have to encode.
We open NCS EXPERT and enter the xenon retrofit code $ 522 for xenon, and the ALSZ / LZM light module is encoded. What comes to be passing a blank man
Then we code the following parameters so that the lights do not give errors:
My recommendation is that you look for all those that start with WARMUEBERWACHUNG and KALTUEBERWACHUNG and put them in nicht_aktiv, otherwise you do the following
CC_STANDLICHT_RECHTS nicht_aktiv Check Control (CC) - parking lights - right
CC_STANDLICHT_LINKS nicht_aktiv Check Control (CC) - parking lights - left
WARMUEBERWACHUNG_SL_LI nicht_aktiv Hot monitoring - parking lights - left
WARMUEBERWACHUNG_SL_RE nicht_aktiv Hot monitoring - parking lights - right
KALTUEBERWACHUNG_SL_LI nicht_aktiv Cold monitoring - parking lights - left
KALTUEBERWACHUNG_SL_RE nicht_aktiv Cold monitoring - parking lights - right
KALTUEBERWACHUNG_FL nicht_aktiv Cold monitoring - high beams
WARMUEBERWACHUNG_FL nicht_aktiv Hot monitoring - high beams
ONLY for people who have previously retrofitted LED TAILLIGHTS
PWM_ANSTEUERUNG_SL_RE_HI = Change to 01 (Default 02)
PWM_ANSTEUERUNG_SL_LI_HI = Change to 01 (Default 02)
BREMSLICHT_ALS_STANDLICHT = Change to Not Active (Default Active)
To prevent the levellers from making an error if you have not changed the light control and have not retrofitted the levellers.
LEUCHTWEITENREG_AUTOM - nicht_aktiv
LEUCHTWEITENREG_DYNAM - nicht_aktiv
I recommend buying a light control without height adjustment wheel, put the one you already have in position 0 and put the housing of that one. ASi you save yourself coding and virginizing the light control to mount it, and drive the self-leveling devices.
For the headlight washers, I have assembled them, and it is a very simple task because everything is at hand. If you do not want to walk then stick the covers of the headlight washer and you save the cost of it. I have been passing MOT like this since 2014.
As a final note, those of you who want to convert your halogen headlight into PRESTYLED OEM xenon, no matter the orange or transparent strip, it can be done for approximately € 150, and I will explain it in another moment.