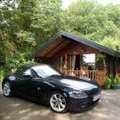


My choice, a pair of Bilstein rear uprated B6 shockers - early impressions are why did I leave it so long, as the composure of the rear is vastly improved, doesn't sag anywhere near as much as before so again makes for a more planted feel as the dreaded flex in the suspension's kept more under control.
This by far was the most information I found on the topic http://www.bimmerfest.com/forums/showth ... p?t=247840
though in practise it tells you the steps, though not how to execute it & also found some things mentioned weren't necessary (like remove the knobs off the shelf & dampers which for the life of me found impossible)
So, here we go...
1. Read the link above. It's got a good diagram and it's possible with a bit of imagination to get the job done
2. If it's your first time, plan for at least 3 hours - you need patience to remove all the plastic clips without damaging them so start in the morning on a sunny day
3. The roof needs to be up, find your tool set to get out a flat head screwdriver; pair of pliers, 10/11mm for hexagonal nuts; 17mm socket (wheel nuts); 18mm socket for lower shock mount & a set of open ended spanners from 6mm - 14mm, trolley jack, stop blocks for front tyres & a couple of pieces of wood to make taking tyre off/on much easier
4. Pull the boot bulb holder away from the trim & disconnect it at the cable
5. With the shelf in the lowered (roof opening position) Start by levering off the plastic edge of the fabric trim that connects to the metal shelf all he way along the shelf. By placing the flat screwdriver underneath the plastic edge, you can lever it off at on end & gently feed the rest off
6. Raise the shelf by turning the knobs into the upper position & then remove the two hexagonal bolts (note I did nt have to remove the knobs or damper mech as per other instructions)
7. Where the shelf joins the knob lifting mechanism, there are 3 small plastic clips each side that need to be removed. You can either use the flat headed screwdriver & push them up from inside the boot, or, reach over the seats & try to pull them out (I found easier to push from underneath & risked loosing them)


8. With light inward pressure on the folding metal flanges that support the roof, the plastic clips should release the shelf which can then be removed by carefully lifting it upwards, inwards & to the right, while SLOWLY rotating the left side downwards. Ths should allow you to remove the shelf in its entirety... even allowing you to feel your drains on bth sides.
9. You'll find a small plastic pin & pressure clip. Simply use the pliers to pull the pin out & the plastic lug can be levered out with the flat head screwdriver


10. Deep breath... the plastic cowling attached to the metal flange lifting knobs should now be loose. By FIRMLY pulling backwards & slightly inwards, you will be able to remove them (note I did not have two plastic pins & lugs each side as suggested by the other instructions). Ths is a little tricky so take your time, as u don't want to damage anything but won't come out willingly.


11. Under some foam, the Holy Grail of... the top mounts are exposed. iwas supplied with a new bolt, but had to re-use my old rubber mounts, upper shock cage & bump stops.

12. Crack the torque of the wheel nuts, locking wheel nut always first, blocks under front tyres & then jack up & remove the wheel - tip, placing a piece of wood either side of the wheel will help both with removal & refitting... and often stops accidental smashing of the rim against your discs!!!

13. Place a block / axle stand underneath the main knuckle joint so the shock absorber has no suspension tension
14. Remove the top shock absorber nut by simply using one spanner to stop the shaft rotating, the other to undo the nut anticlockwise
15. Remove bottom shock bolt with 18mm socket

16. Re-use (as in my case) old bump stops & upper casing & refit lower shock bolt first, upper one second & torque up
17. Refitting is pretty similar to taking apart - sometimes the foam gets in the way on the top mount so you may have to partially remove it
18. I also found refitting the clips was a little tricky & best done with shelf in lowered position - the nearest shelf clip to rear fitted within the boot, the clip nearest the seat from inside the car.
19. Make sure the shelf sits nicely in the groove for trouble free roof operation

Hope this helps someone, even if it is just to clean the rear shelf & fondle the drains